Training and Applying a Model
This section describes how to create algorithm code in Jupyter, train a model using the fit operation, and apply it to new data using the apply operation.
Write the Algorithm Code in Jupyter
On the Deployed Images screen, open the menu for the tutorial-demo:local deployment, and select Go to Jupyter. JupyterLab connected to the selected deployment container opens.
The algorithm code is stored in notebook.ipynb and must define the init, fit, and apply functions. You can also define the save, load, and summary functions. Add the following linear regression example for y = a·x + b to a notebook code cell:
import pandas as pd
import numpy as np
import pickle
from pathlib import Path

MODEL_DIR = Path('/srv/app/model/data')
MODEL_DIR.mkdir(parents=True, exist_ok=True)

def _cfg(param):
    p = (param.get('options') or {}).get('params') or {}
    return p.get('feature', 'x'), p.get('target', 'y')

def init(df, param):
    return {'algorithm': 'demo_linreg'}

def fit(model, df, param):
    feature, target = _cfg(param)
    x = df[feature].astype(float).values
    y = df[target].astype(float).values
    a, b = np.polyfit(x, y, 1)               # train the model by fitting coefficients
    model.update({'a': float(a), 'b': float(b), 'feature': feature, 'target': target})
    return model

def apply(model, df, param):
    feature = model.get('feature', 'x')
    out = df.copy()
    out['prediction'] = model['a'] * out[feature].astype(float) + model['b']
    return out

def save(model, name):
    with open(MODEL_DIR / f'{name}.pkl', 'wb') as h:
        pickle.dump(model, h)
    return model

def load(name):
    with open(MODEL_DIR / f'{name}.pkl', 'rb') as h:
        return pickle.load(h)
Press Ctrl+S to save the code. It is automatically synchronized with the runtime container and used as the active algorithm.
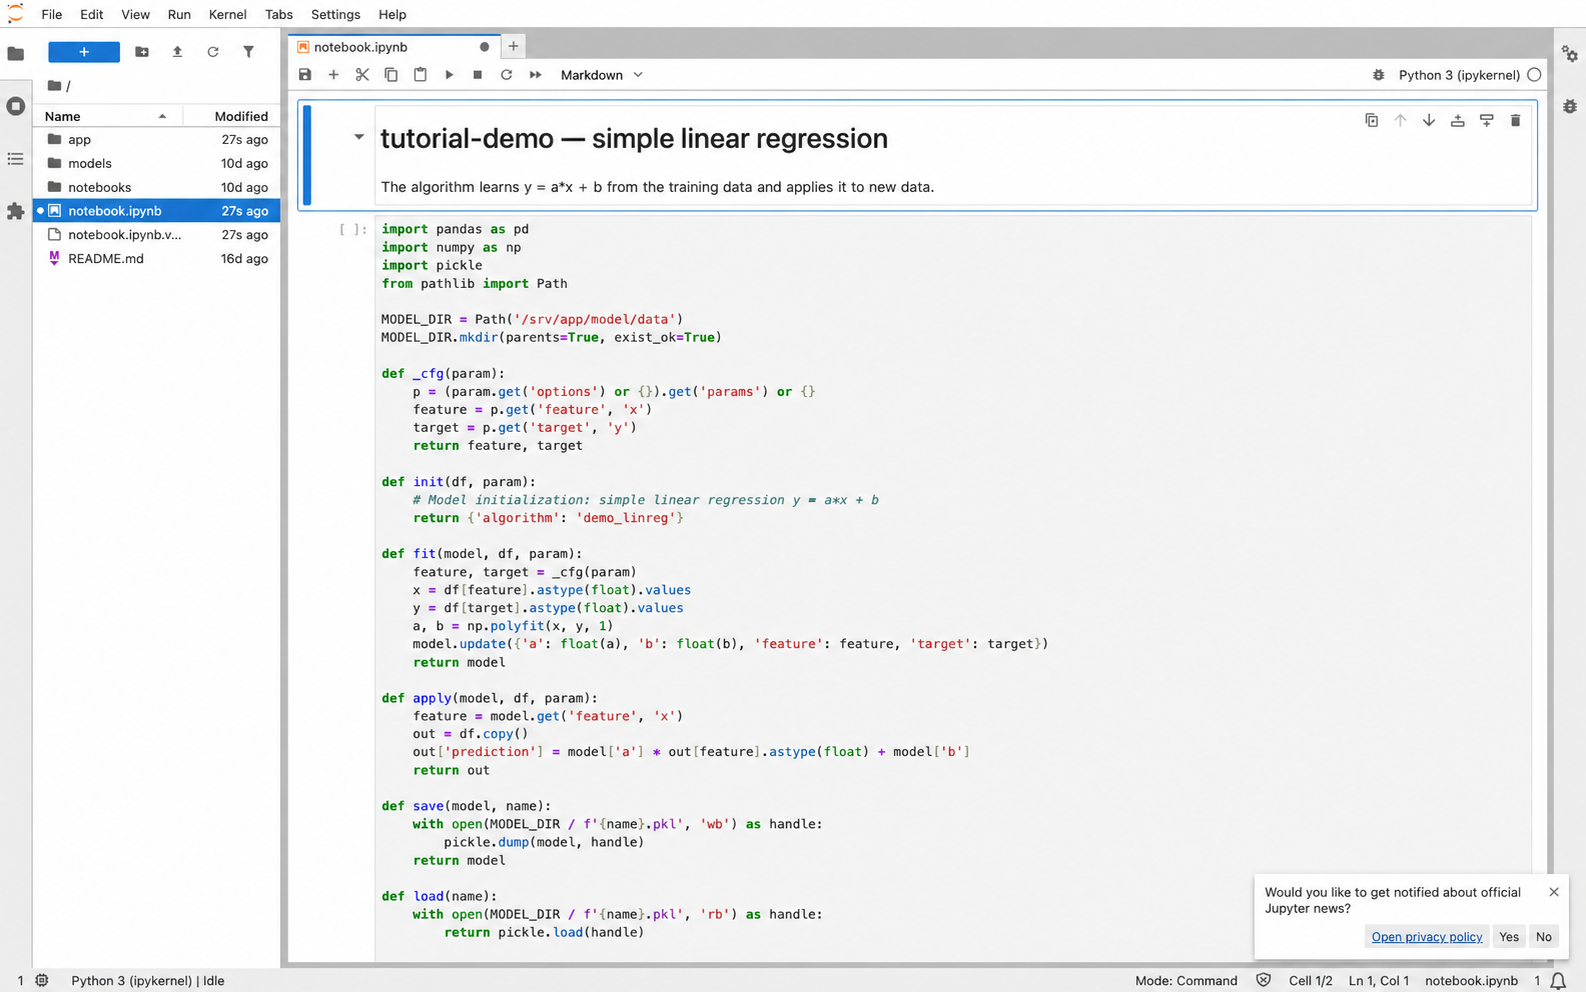
The init(df, param) function creates a model object, fit(model, df, param) trains and returns the model, and apply(model, df, param) returns a DataFrame containing predictions. Custom request parameters are passed in param['options']['params'].
Train a Model Through the API (fit)
The ML Studio API is available through the Search Anywhere Framework proxy at the /api/mltk/api/v1/ml/... base path. To train a model, send a POST /api/mltk/api/v1/ml/fit request:
curl -sk -b cookies.txt -H "osd-xsrf: true" -H "Content-Type: application/json" \
  -d '{
    "mode": "sync",
    "model_name": "tutorial-demo-model",
    "algorithm": "tutorial-demo",
    "environment": "local",
    "input": {"kind": "inline", "format": "json", "data": [
      {"x": 1, "y": 2.1}, {"x": 2, "y": 3.9}, {"x": 3, "y": 6.1},
      {"x": 4, "y": 8.0}, {"x": 5, "y": 10.2}
    ]},
    "params": {"feature": "x", "target": "y"}
  }' \
  "https://<host>:5601/api/mltk/api/v1/ml/fit"
The request uses the following fields:
mode- execution mode:syncorasyncmodel_name- name of the model to trainalgorithmandenvironment- the algorithm and environment that identify thealgorithm:environmentdeploymentinput- training dataset. In this example, the data is passed in thedatafield with theinlinetypeparams- algorithm parameters
In synchronous mode (sync), the following response is returned after training is complete:
{"ok": true, "body": {
  "job":   {"id": "job_...", "operation": "fit", "status": "succeeded"},
  "model": {"id": "tutorial-demo-model-000316", "name": "tutorial-demo-model", "status": "ready"},
  "result": {"rows": [{"model_name": "tutorial-demo-model", "trained_rows": "5"}]}
}}
The trained model is displayed on the Models screen with the Ready status and a link to the artifact, which is the model file saved by the save function:

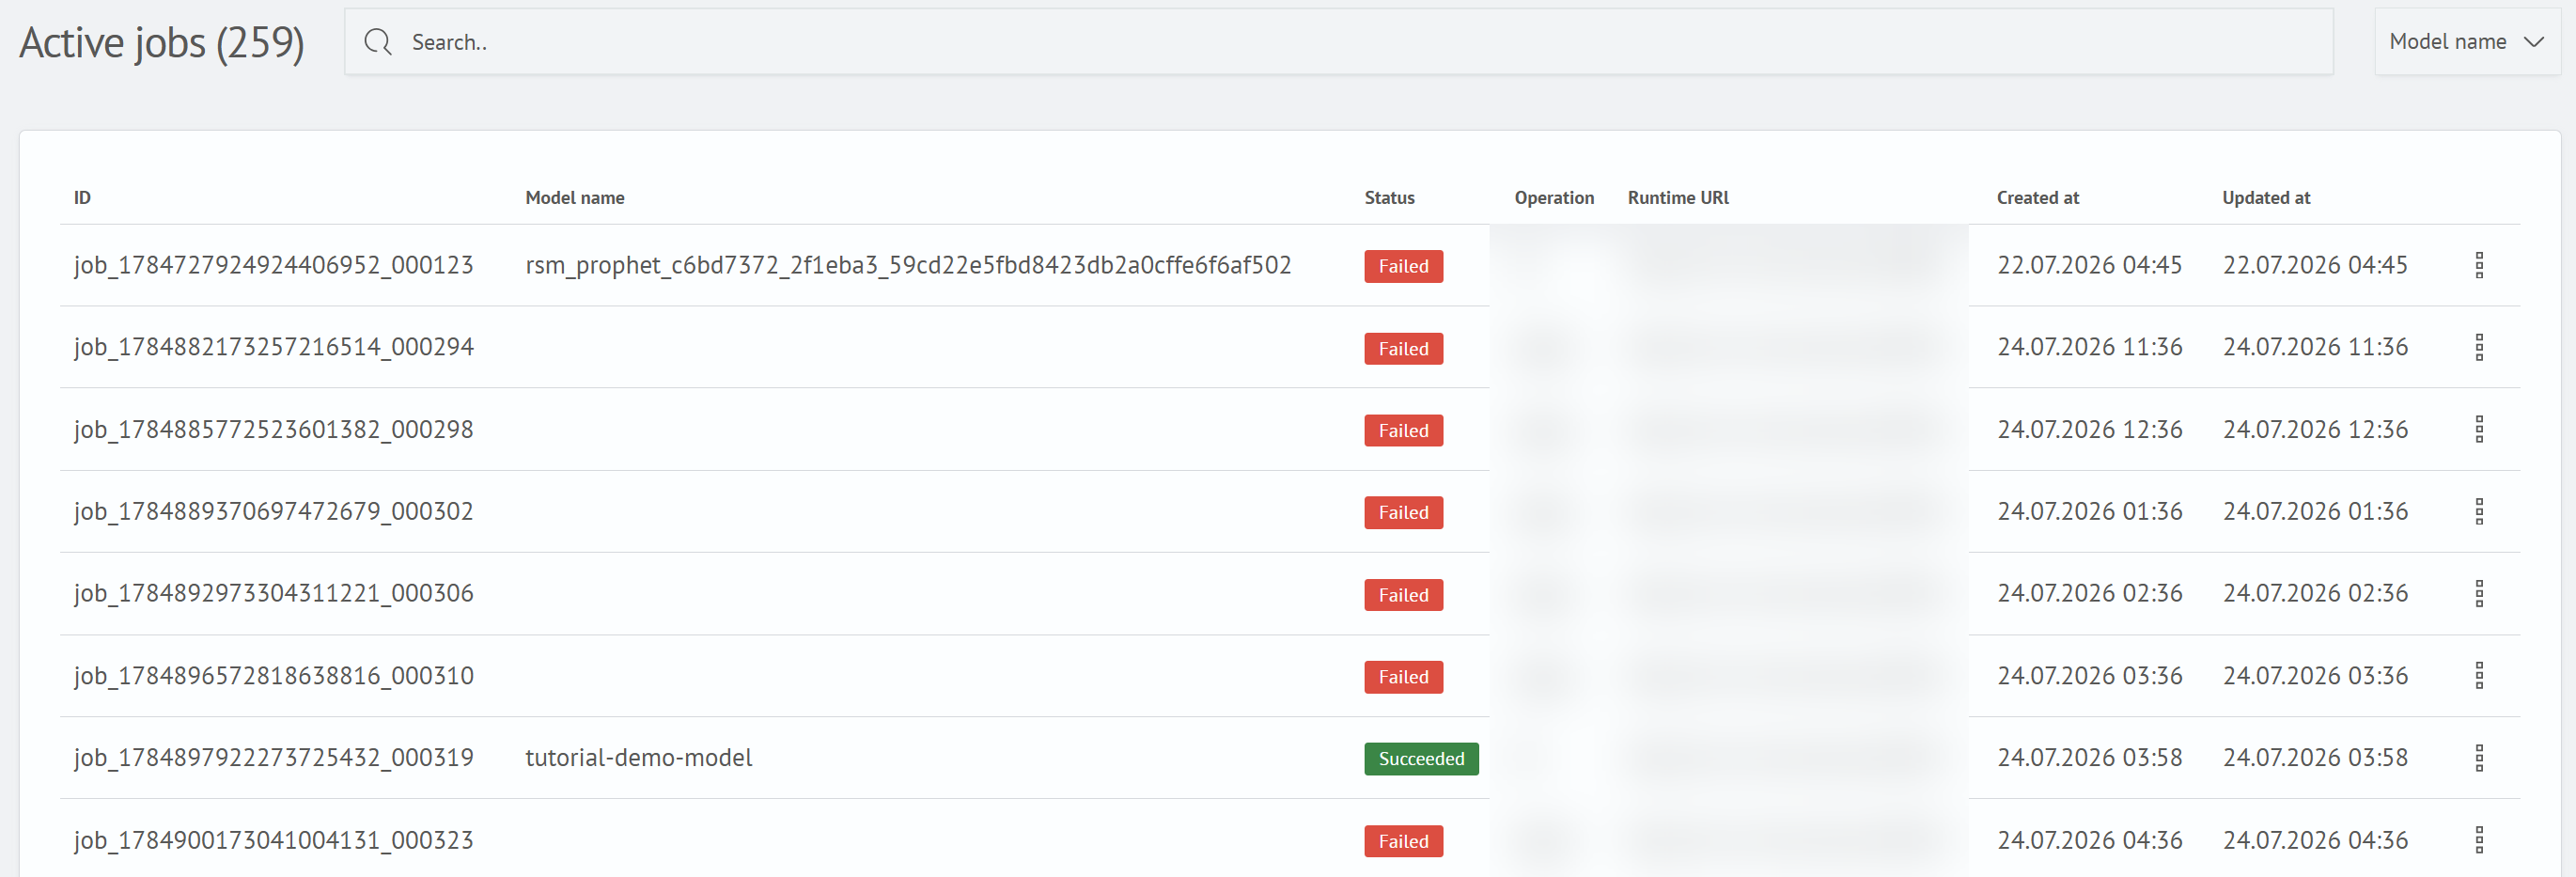
In asynchronous mode (mode: "async"), the response contains a job_id with the queued status. After execution, the job is displayed on the Running Jobs screen with the Succeeded status. Synchronous jobs (sync) run immediately and are not saved to the job list.
Apply the Model (apply)
To apply the trained model to new data, send a POST /api/mltk/api/v1/ml/apply request. Specify the model name in the model_name field:
curl -sk -b cookies.txt -H "osd-xsrf: true" -H "Content-Type: application/json" \
  -d '{
    "mode": "sync",
    "model_name": "tutorial-demo-model",
    "input": {"kind": "inline", "format": "json", "data": [
      {"x": 6}, {"x": 10}, {"x": 100}
    ]},
    "params": {"feature": "x", "target": "y"}
  }' \
  "https://<host>:5601/api/mltk/api/v1/ml/apply"
The response contains predictions in result.rows. In this example, the model identified the y ≈ 2·x relationship:
{"ok": true, "body": {
  "job":   {"id": "job_...", "operation": "apply", "status": "succeeded"},
  "model": {"id": "tutorial-demo-model-000316", "name": "tutorial-demo-model", "status": "ready"},
  "result": {"rows": [
    {"x": "6",   "prediction": "12.15"},
    {"x": "10",  "prediction": "20.27"},
    {"x": "100", "prediction": "202.97"}
  ]}
}}
This completes the entire model workflow: algorithm created - image deployed - model trained using fit - model applied using apply.
The cookies.txt file contains the Smart Monitor session cookies. Requests through the proxy must include the osd-xsrf: true header. When accessing sm-ml-service directly, use /api/v1/ml/fit and /api/v1/ml/apply without the /api/mltk prefix. For details, see SM-ML Settings.
Next step: Training and Applying a Model Through SML.