ML Studio Interface
This section describes the screens and forms of the ML Studio module, the available actions, and the purpose of each field. Backend configuration is described in SM-ML Settings.
Definitions of the terms algorithm, model, job, runtime environment, and deployment are provided in the module overview.
Location and Structure
To open the module, go to Main Menu - ML Studio. The following screens are available:
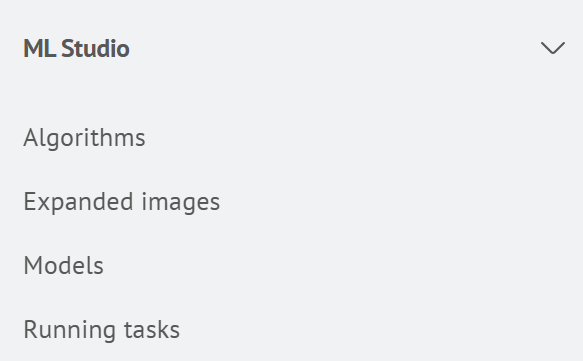
| Menu Item | Description |
|---|---|
Algorithms | Algorithm registry |
Deployed Images | Algorithm deployments in runtime environments |
Models | Trained models |
Running Jobs | History and statuses of training and application operations |
Algorithms Screen
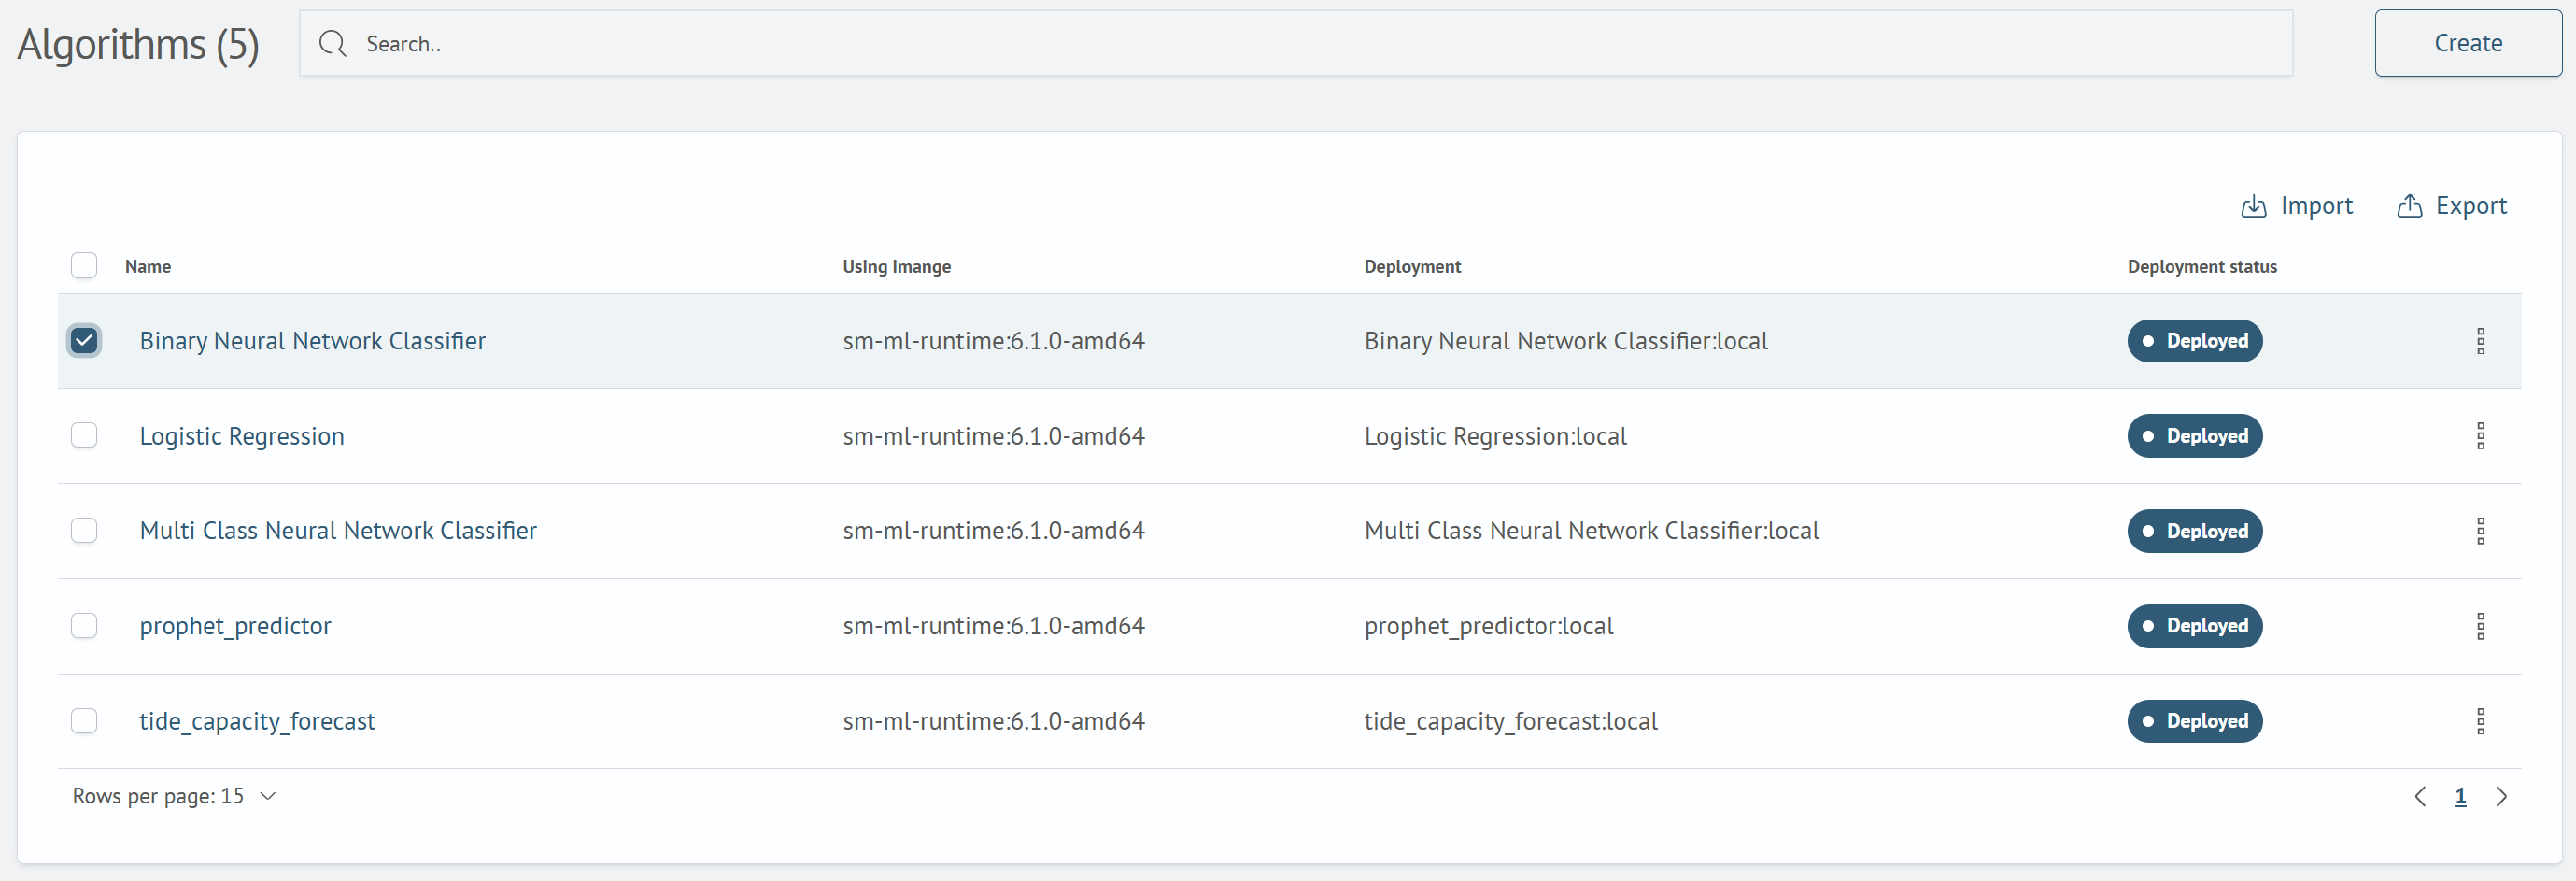
This screen displays a list of registered algorithms. The heading includes the number of records, for example, Algorithms (5).
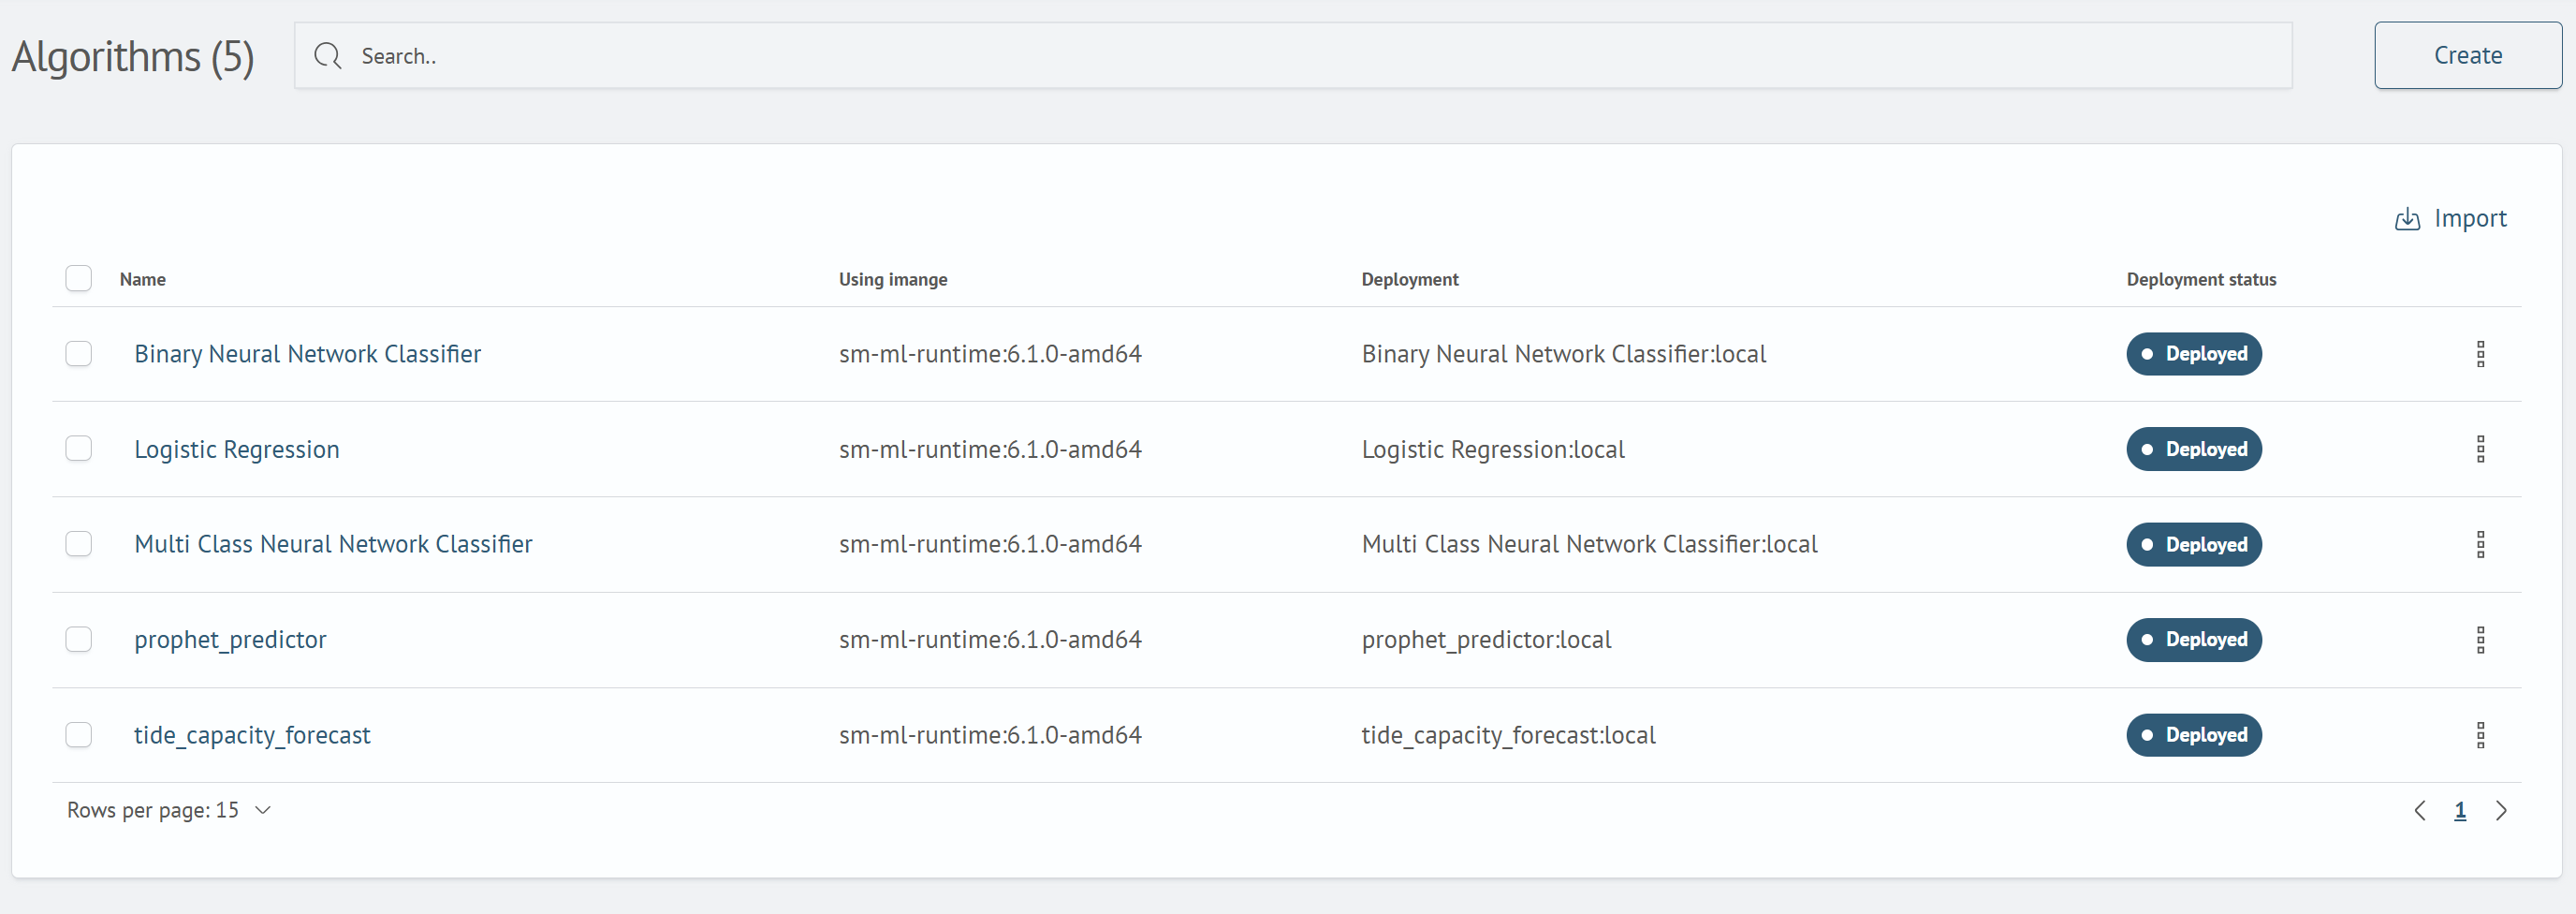
Toolbar above the table:
Search- filters the list by nameCreate- opens the algorithm creation formImport- uploads algorithms from a JSON fileExport- saves the selected algorithms to a JSON file. For details, see Import and Export. The button appears after you select rows using the checkboxes
Table columns:
| Column | Description |
|---|---|
| Name | Algorithm name and a link to its details page |
| Image Used | Base container image, for example, sm-ml-runtime:6.1.0-amd64 |
| Deployed Image | Name of the associated deployment, for example, Logistic Regression:local |
| Deployed Image Status | Deployment state, for example, Deployed |
Row actions (⋮ menu on the right):
Edit- edits the algorithmDelete- deletes the algorithm
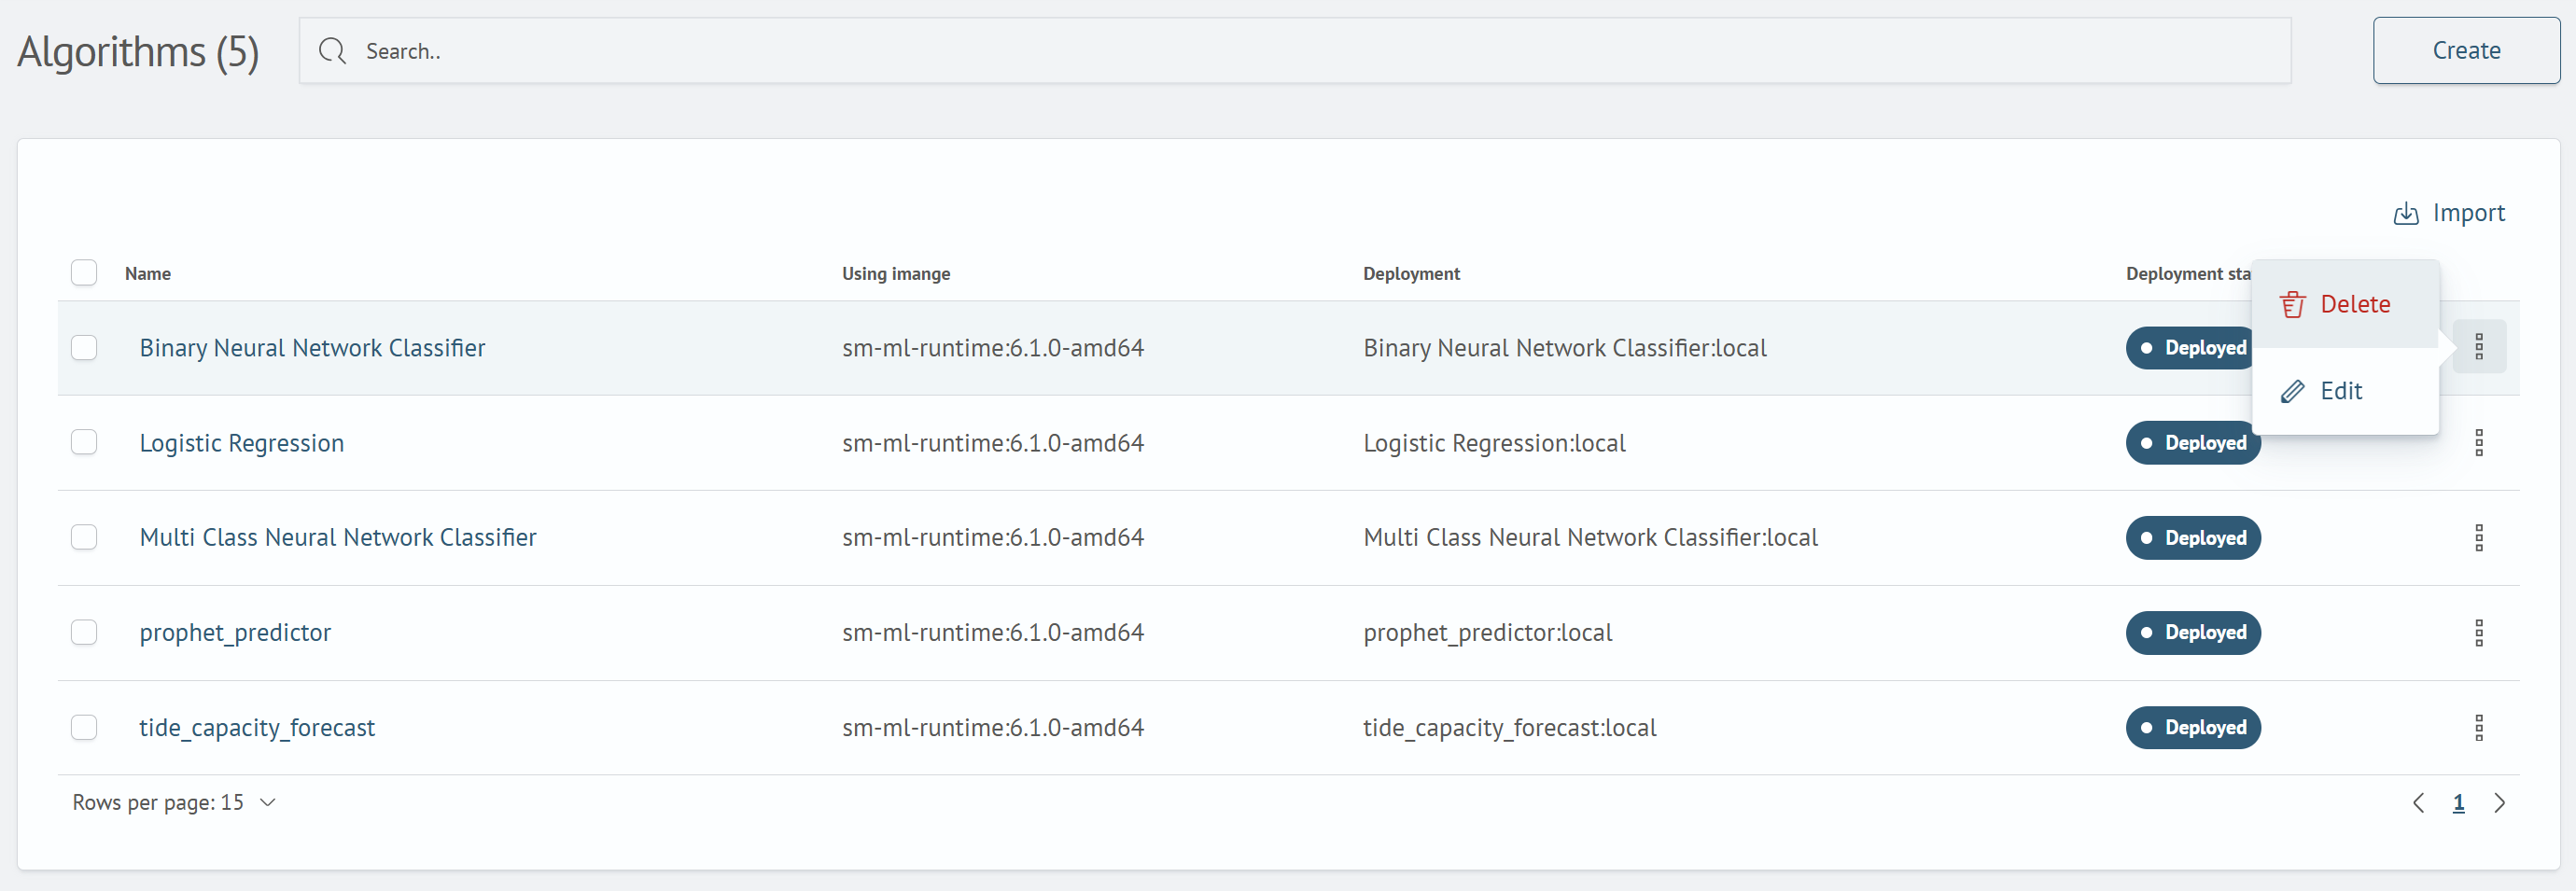
To select records, select the checkboxes to the left of the corresponding rows. To select all records, select the checkbox in the table header. After you select at least one record, the Export button appears next to Import. For details, see Import and Export.
Create New Algorithm Form
Click Create to open the dialog.
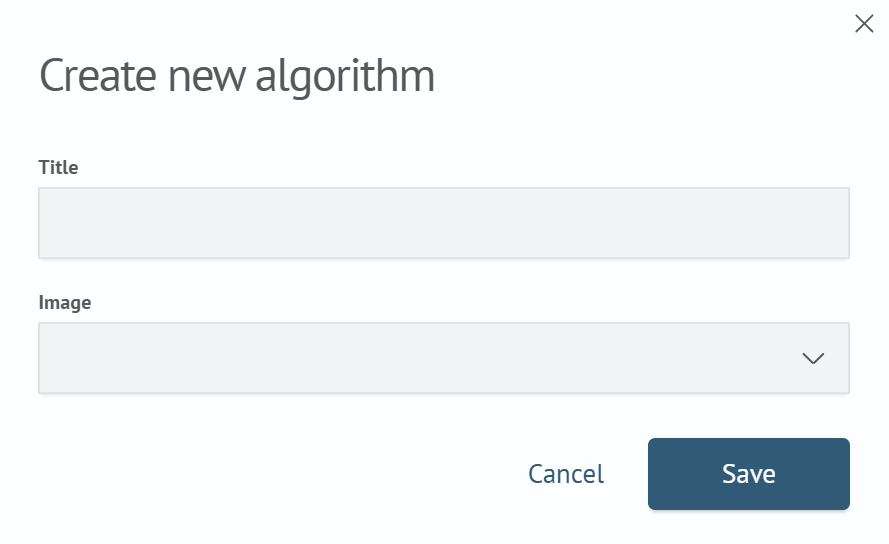
| Field | Type | Description |
|---|---|---|
Name | Text | Human-readable algorithm name |
Image | Drop-down list | Container image in which the algorithm will run. The list contains images available in the runtime environment, for example, sm-ml-runtime:* |
Buttons: Cancel, Save.
Import and Export
Use JSON export and import to transfer algorithms between Search Anywhere Framework instances.
Export. Select the required algorithms using the checkboxes, and click Export. The selected algorithms are saved to a JSON file.
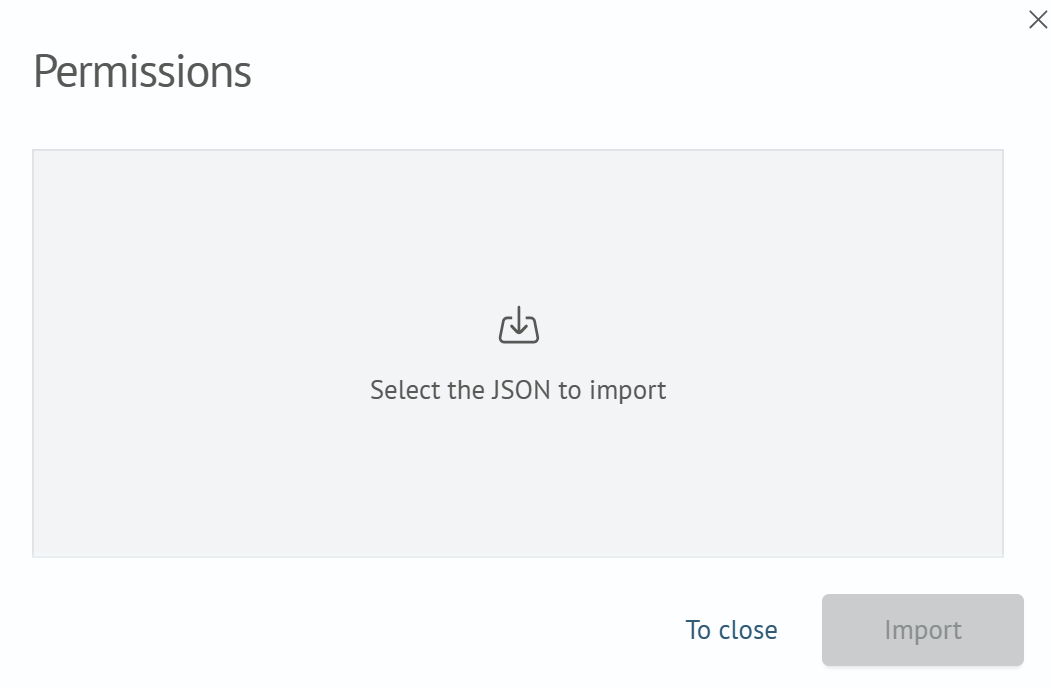
Import. Click Import and upload a previously exported file in the Select JSON to Import area. After you select a file, the Import button becomes available. To close the dialog without importing, click Close.
Algorithm Details Page
Click an algorithm name to open its details page. Click ← Back to return to the list.
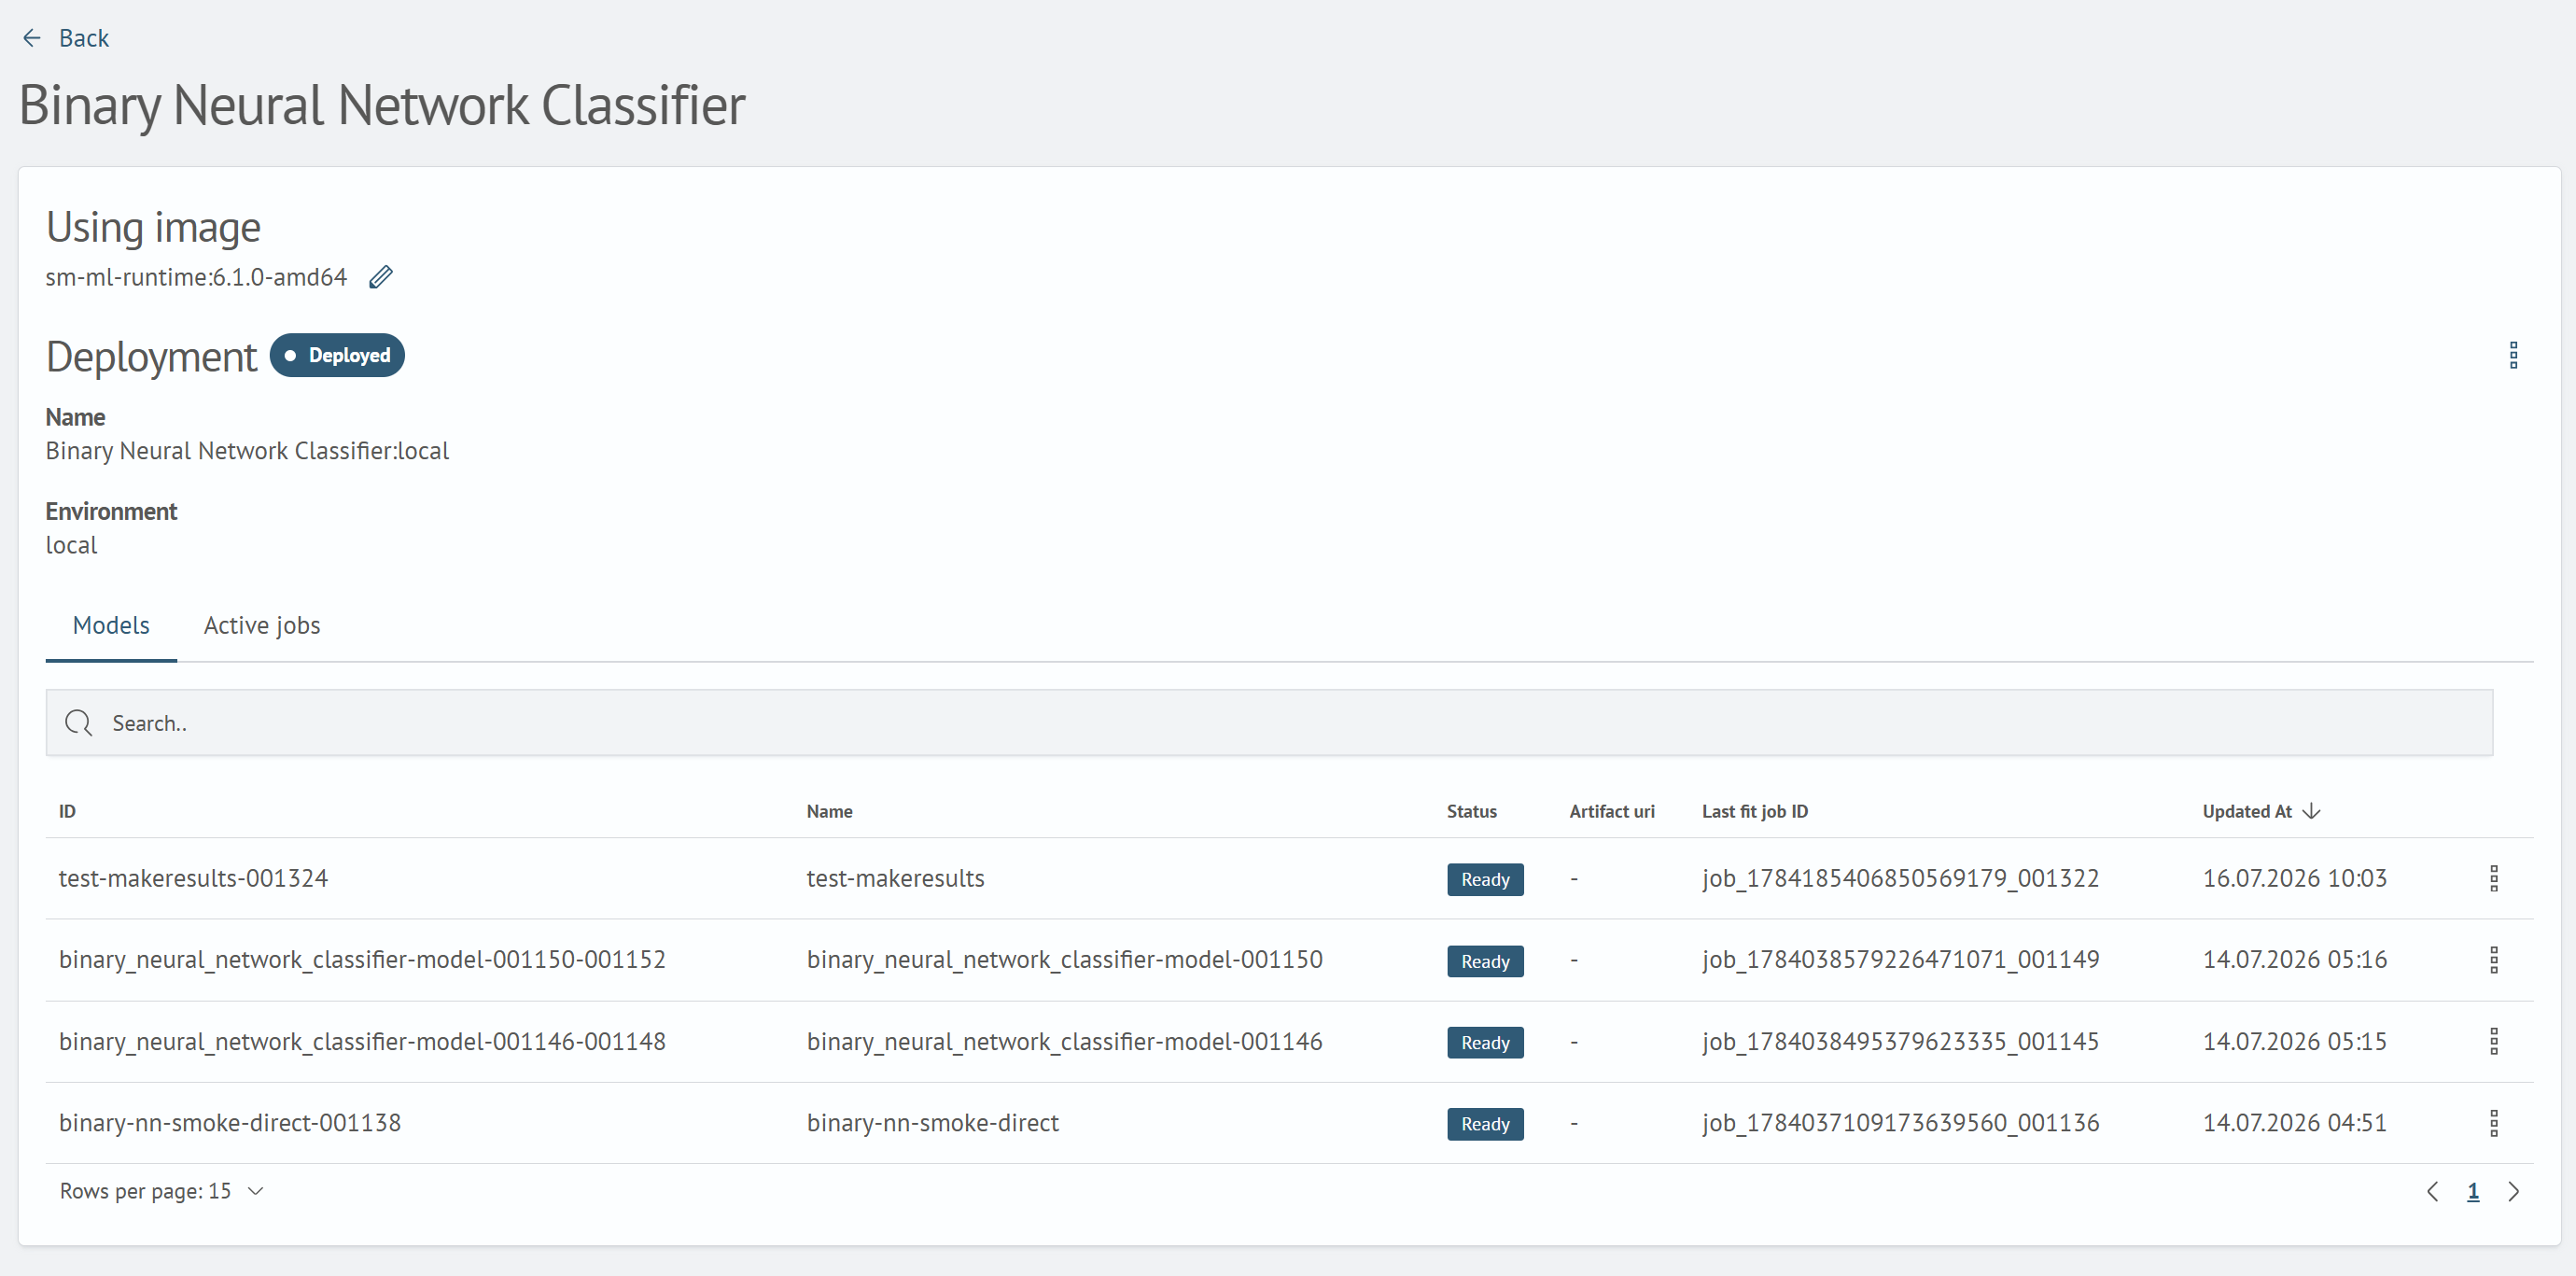
The page contains the following elements:
Image Used- the current base image with an edit icon (✎)Deployed Image- a panel with the status (Deployed) and the⋮actions menu:- deployment
Name, for example,Binary Neural Network Classifier:local Environment, for example,local
- deployment
- Tabs:
Models- models trained using this algorithm. The columns are described in theModelssectionRunning Jobs- training and application jobs for this algorithm
The ⋮ menu contains the same actions as the row menu on the Deployed Images screen: open Jupyter, MLflow, or TensorBoard; synchronize the algorithm; update the status; or delete the deployment.
Deployed Images Screen
This screen displays a list of deployments, which are algorithm instances running in runtime environments. The heading includes the number of records, for example, Deployed Images (7).
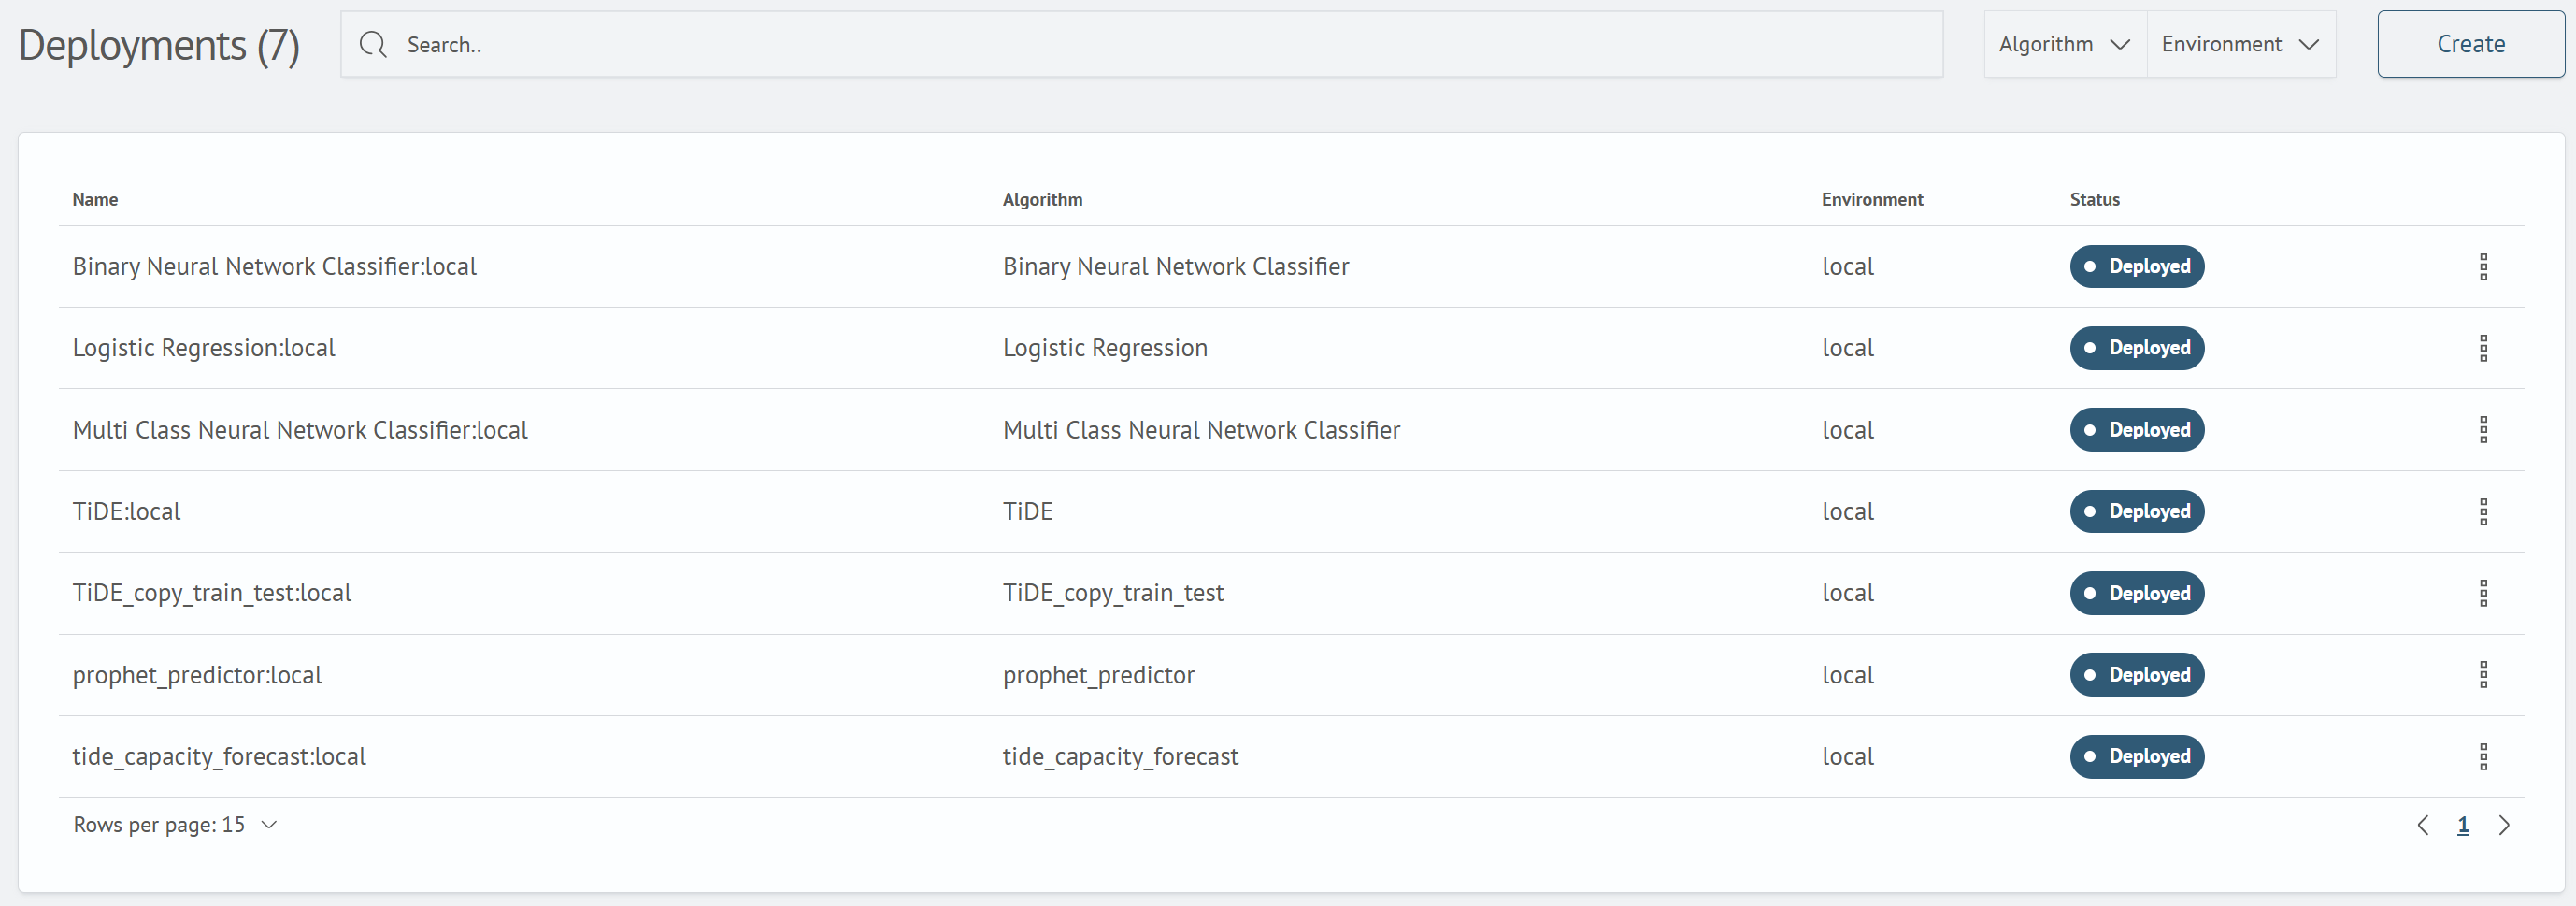
Toolbar:
Search- filters by nameAlgorithm- filters by algorithmEnvironment- filters by runtime environmentCreate- opens the deployment creation form
Table columns:
| Column | Description |
|---|---|
| Name | Deployment name, for example, TiDE:local. Click the name to open the update form |
| Algorithm | Algorithm associated with the deployment |
| Environment | Runtime environment, for example, local |
| Status | State, for example, Deployed |
Row actions (⋮ menu):
Go to Jupyter- opens the deployment's Jupyter environmentGo to MLflow- opens MLflowGo to TensorBoard- opens TensorBoardSynchronize Algorithm- synchronizes the algorithmUpdate Status- retrieves the current deployment stateDelete- deletes the deployment
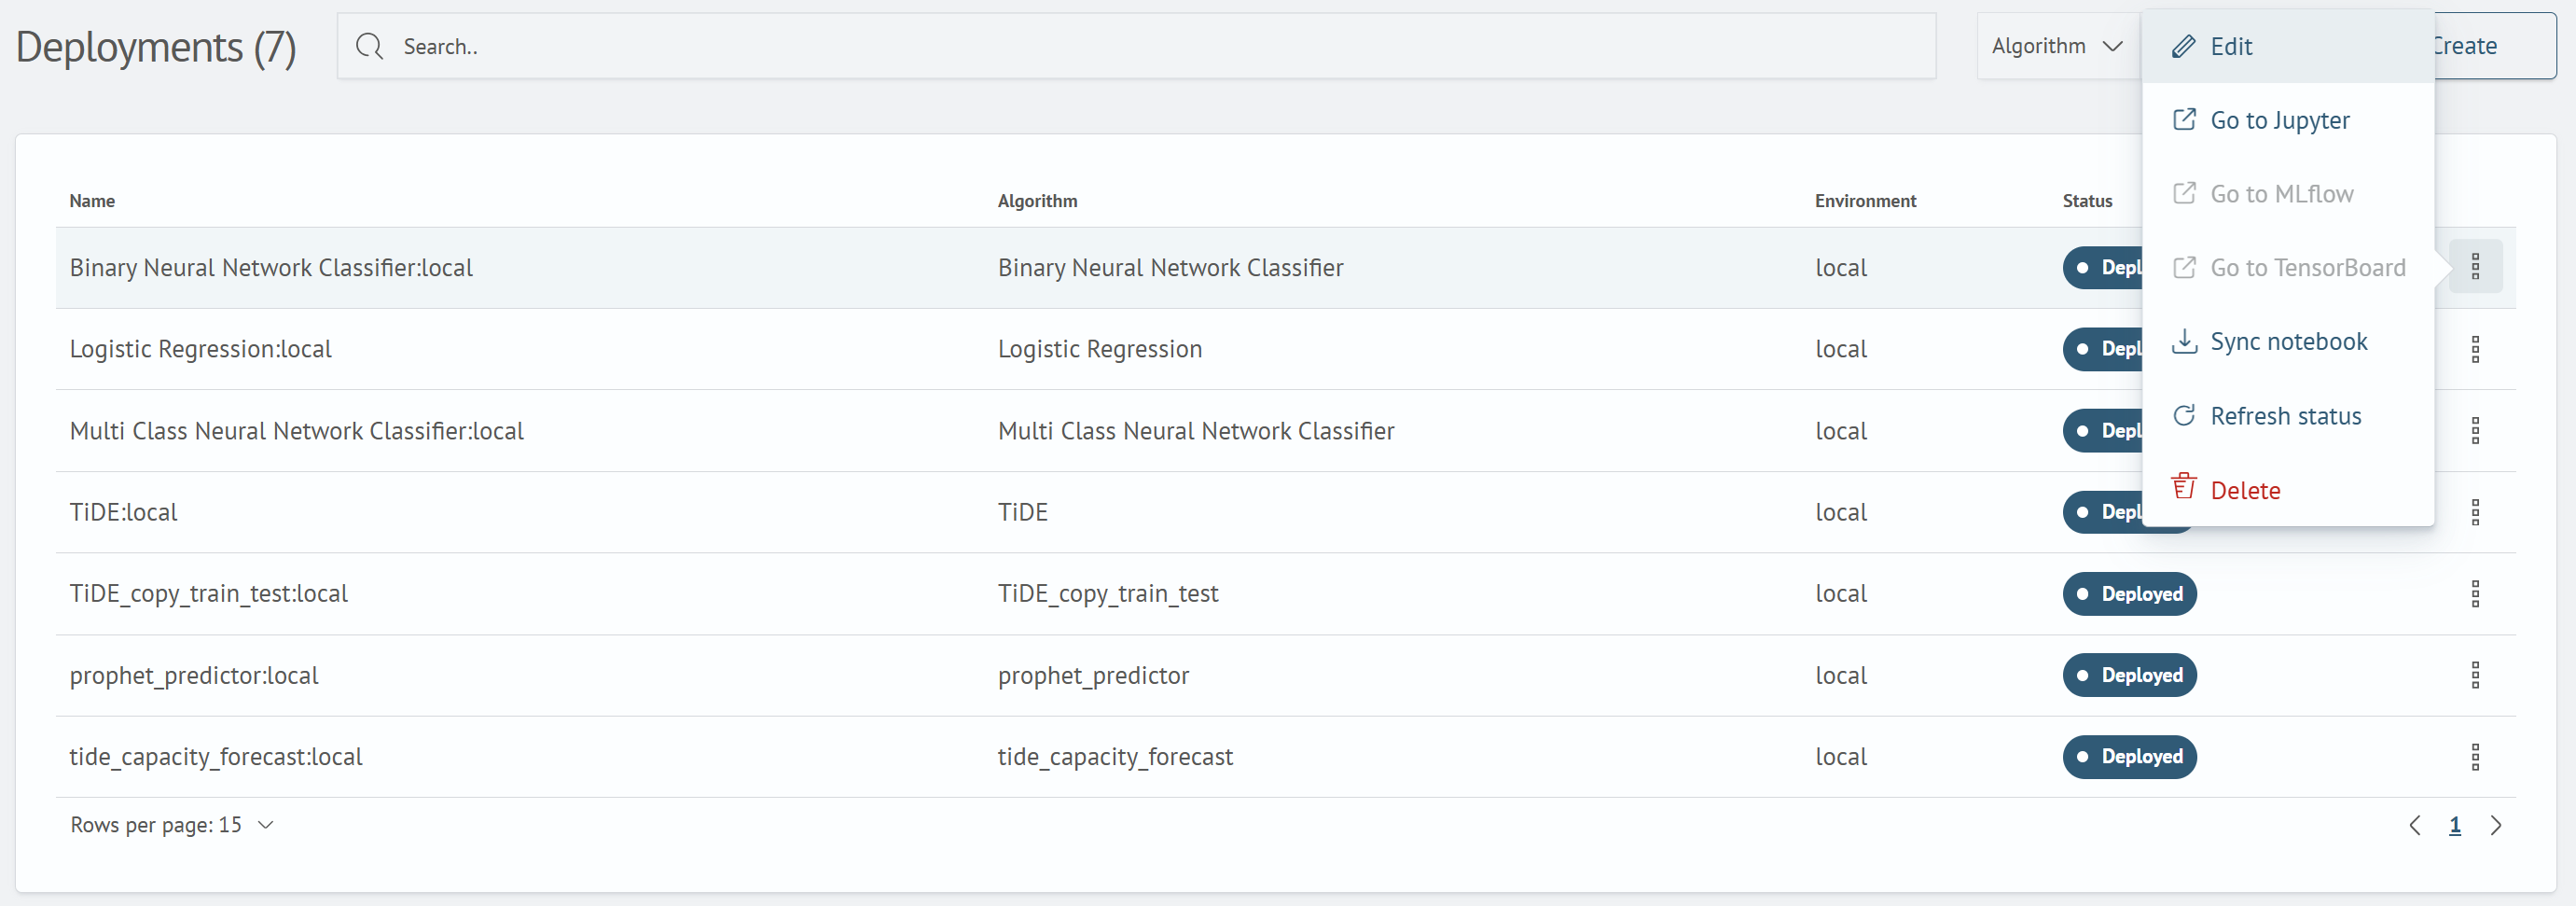
An action is disabled if the corresponding service is unavailable for the deployment. In the screenshot, MLflow and TensorBoard are unavailable.
Create Deployment Form
Click Create to open the dialog.
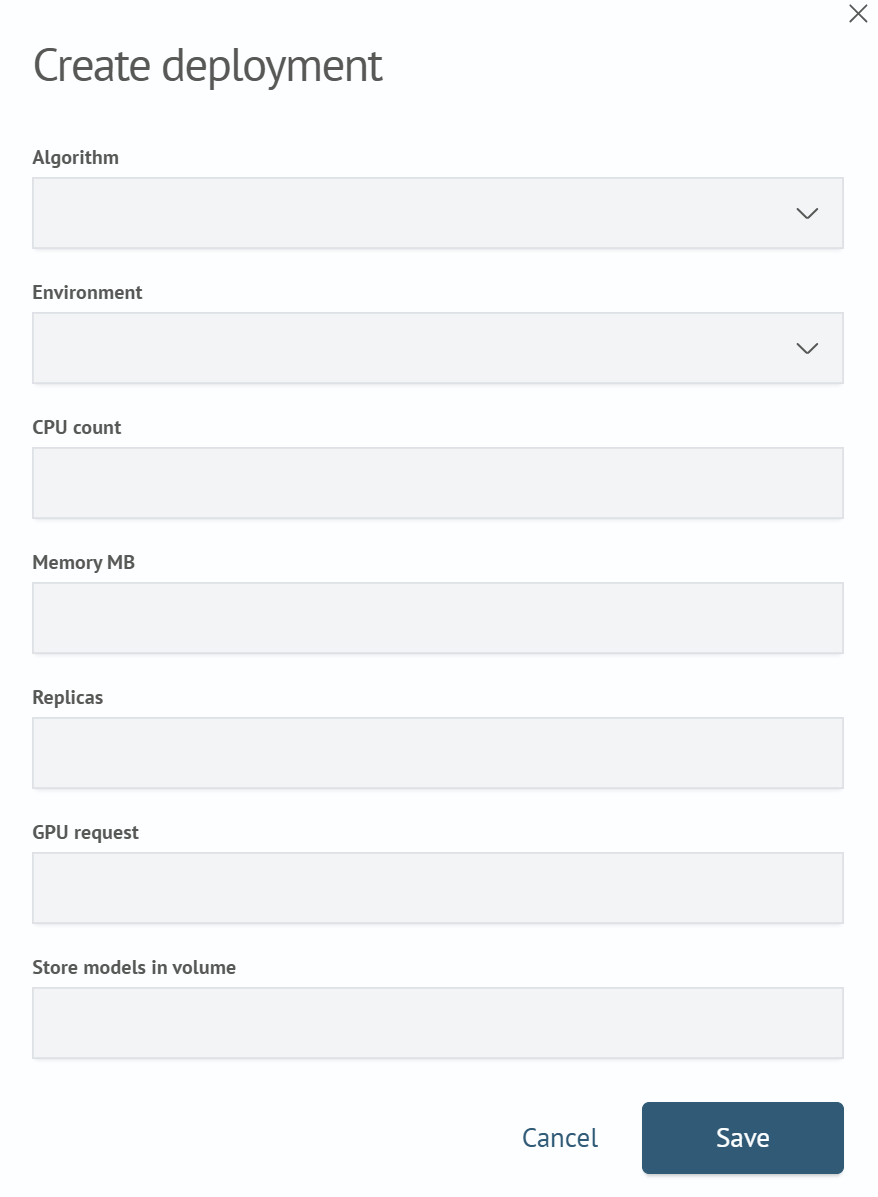
| Field | Type | Description |
|---|---|---|
Algorithm | Drop-down list | Algorithm to deploy |
Environment | Drop-down list | Runtime environment to which the image is deployed |
CPU Count | Number | Number of allocated CPU cores, for example, 2 |
Memory, MB | Number | Memory limit in megabytes, for example, 4096 |
GPU Request | Value | Number of requested GPUs or all for all available GPUs |
Buttons: Cancel, Save.
Update Deployment Form
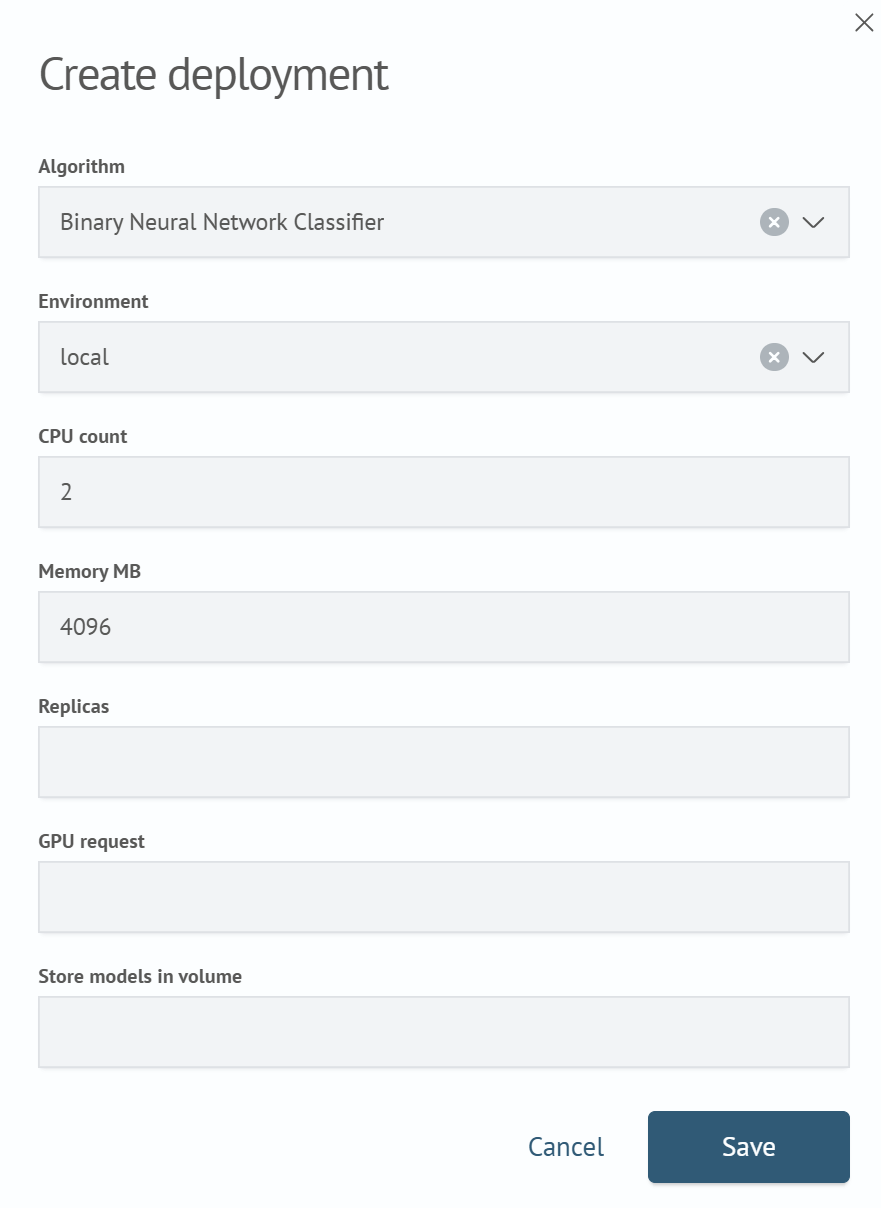
Click a deployment name to open the form. It contains the same fields as the creation form. The Algorithm and Environment fields cannot be changed. You can change the CPU count, memory size, GPU parameters, and model storage.
Models Screen
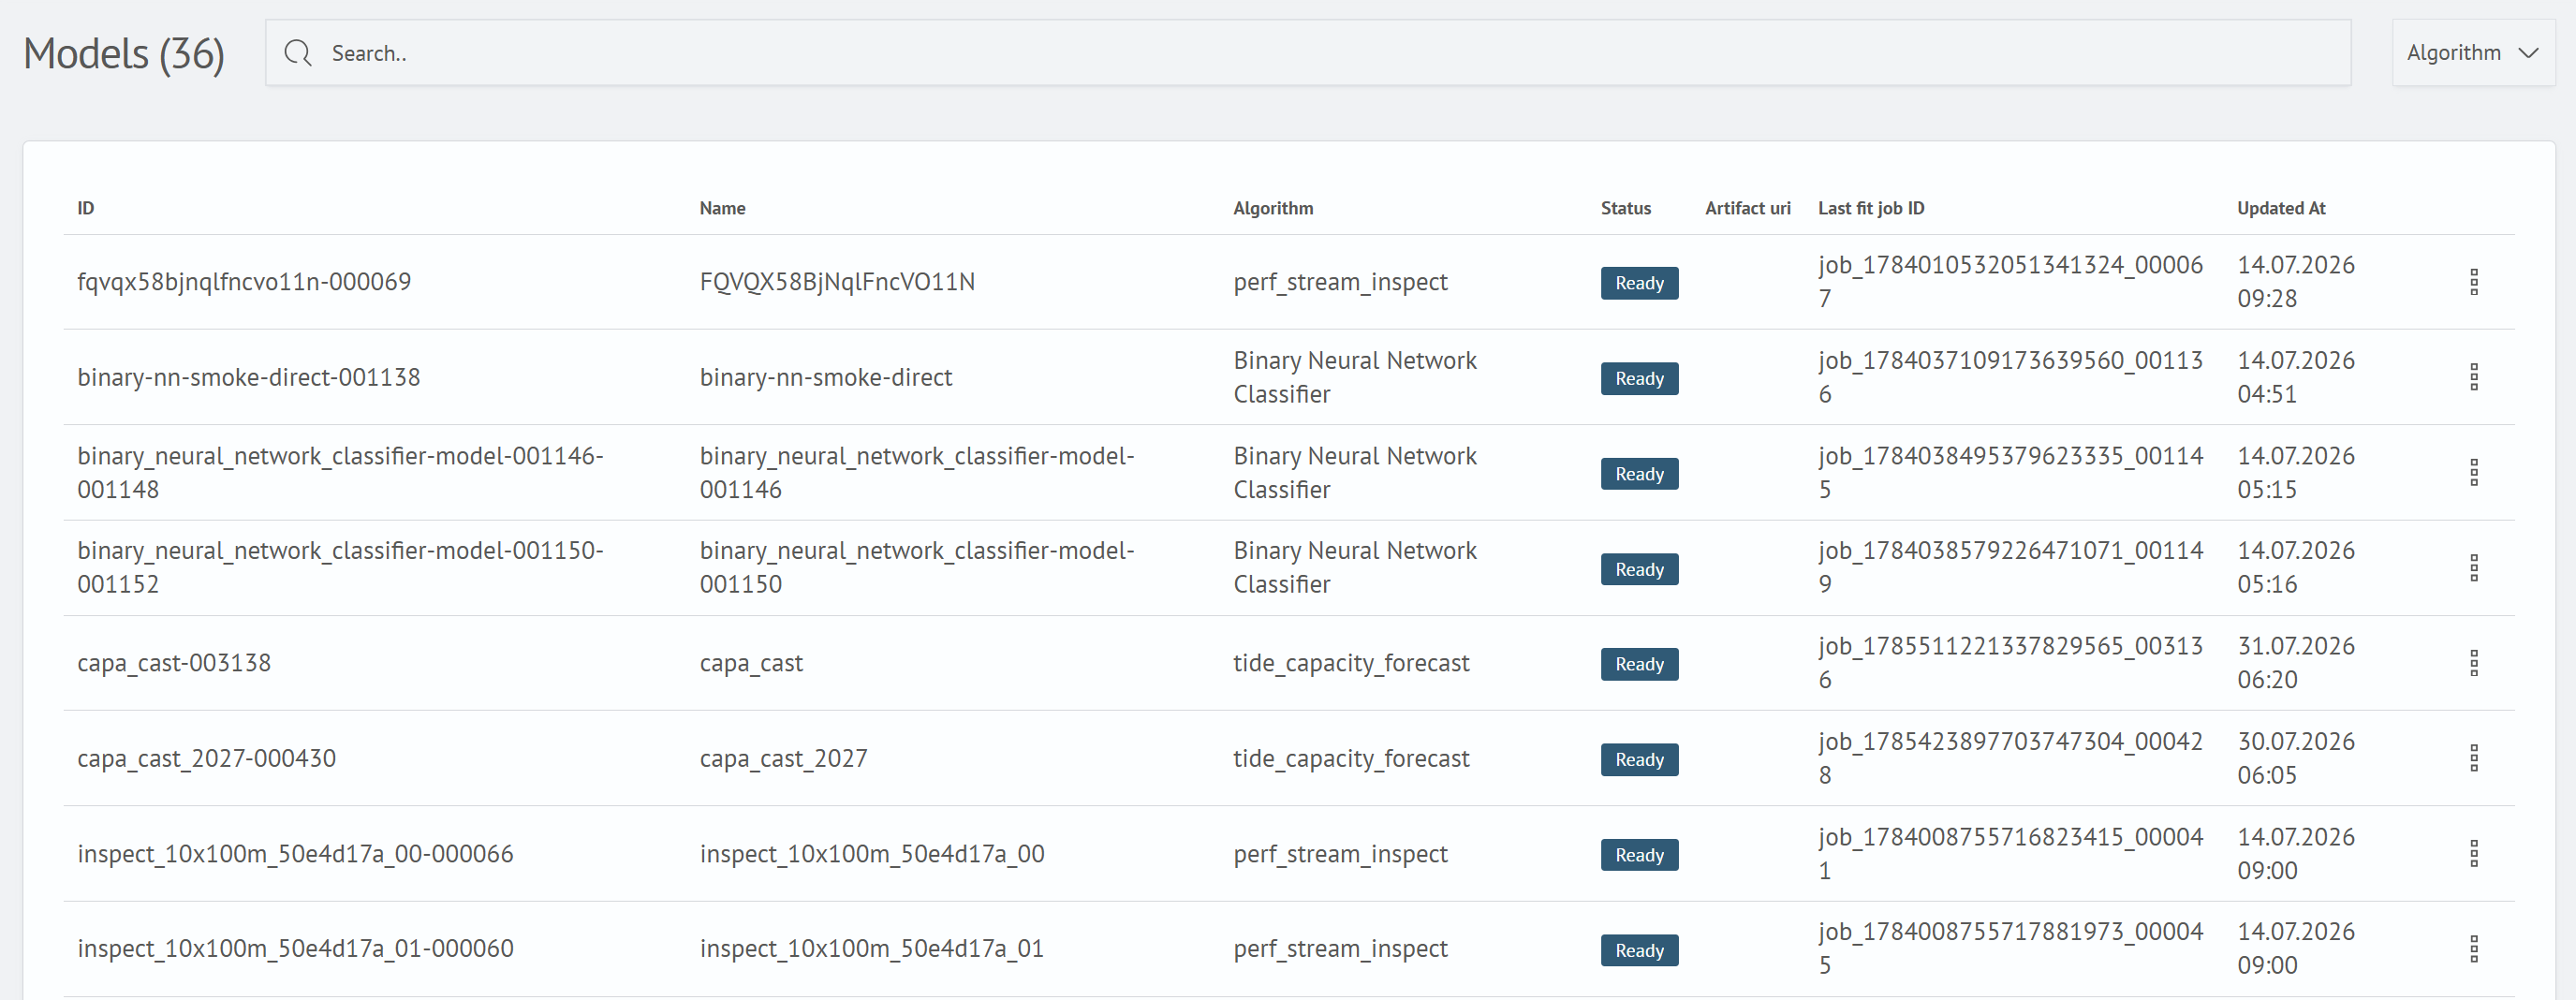
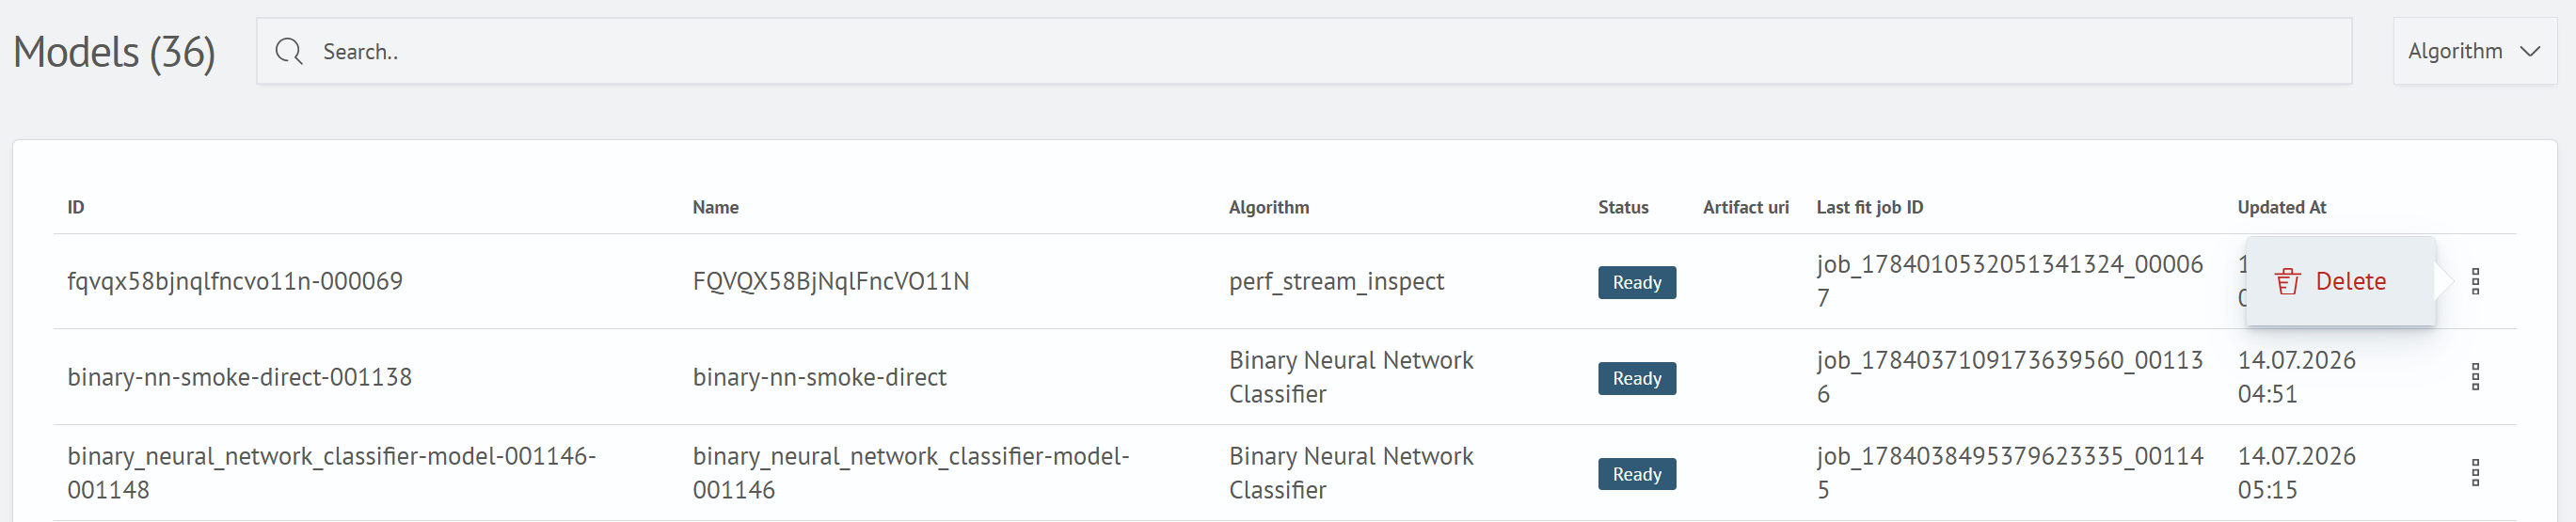
This screen displays the latest ready versions of trained models. The heading includes the number of records, for example, Models (19).
Toolbar:
Search- filters by name or IDAlgorithm- filters by algorithm
Table columns:
| Column | Description |
|---|---|
| ID | Unique model version identifier, for example, binary-nn-smoke-direct-001138 |
| Name | Model name |
| Algorithm | Algorithm used to train the model |
| Status | State, for example, Ready |
| Artifact URL | Link to the model artifact, if available |
| Last Running Job ID | Job that created or updated the model (job_…) |
| Last Updated | Date and time when the model information was last updated |
Row actions (⋮ menu):
Delete- deletes the model
Running Jobs Screen
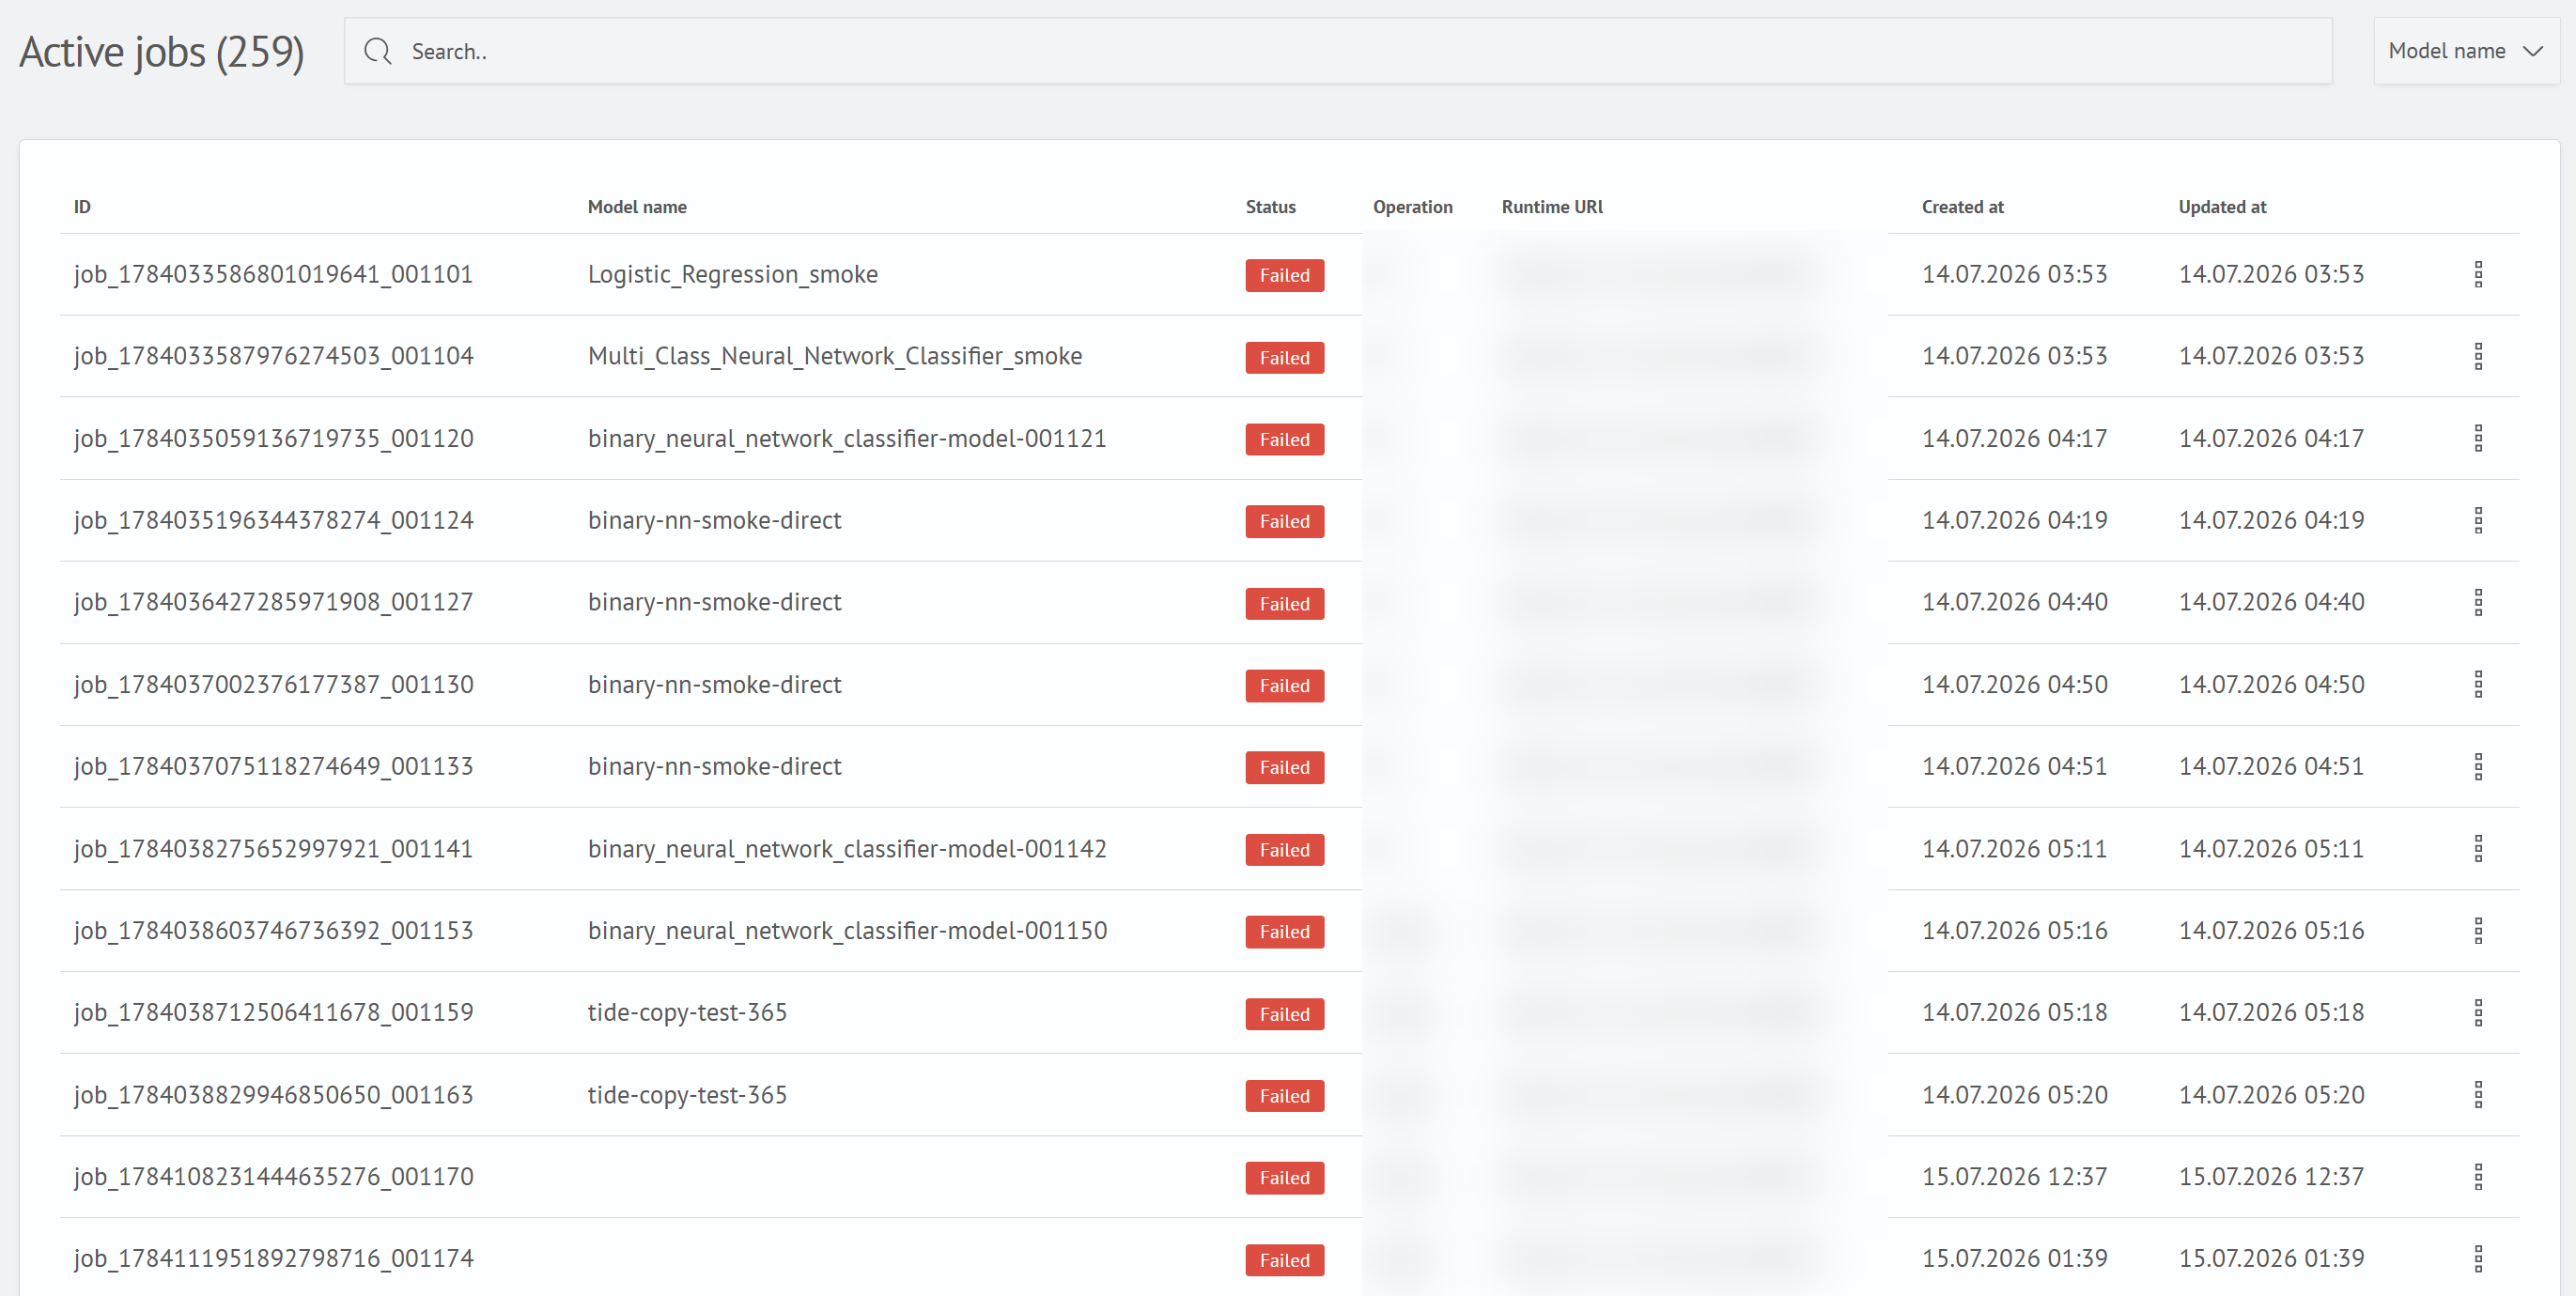
This screen displays the history of training and application jobs. The heading includes the number of records, for example, Running Jobs (48).
Toolbar:
Search- filters by ID or nameModel Name- filters by model
Table columns:
| Column | Description |
|---|---|
| ID | Job identifier (job_…) |
| Model Name | Model on which the job ran |
| Status | Job state, for example, Error or Ready |
| Operation | Operation type: fit (training) or apply (application) |
| Runtime URL | Address of the environment where the job ran, for example, http://…:30011 |
| Created At | Date and time when the job was created |
| Last Updated | Date and time when the status was last changed |
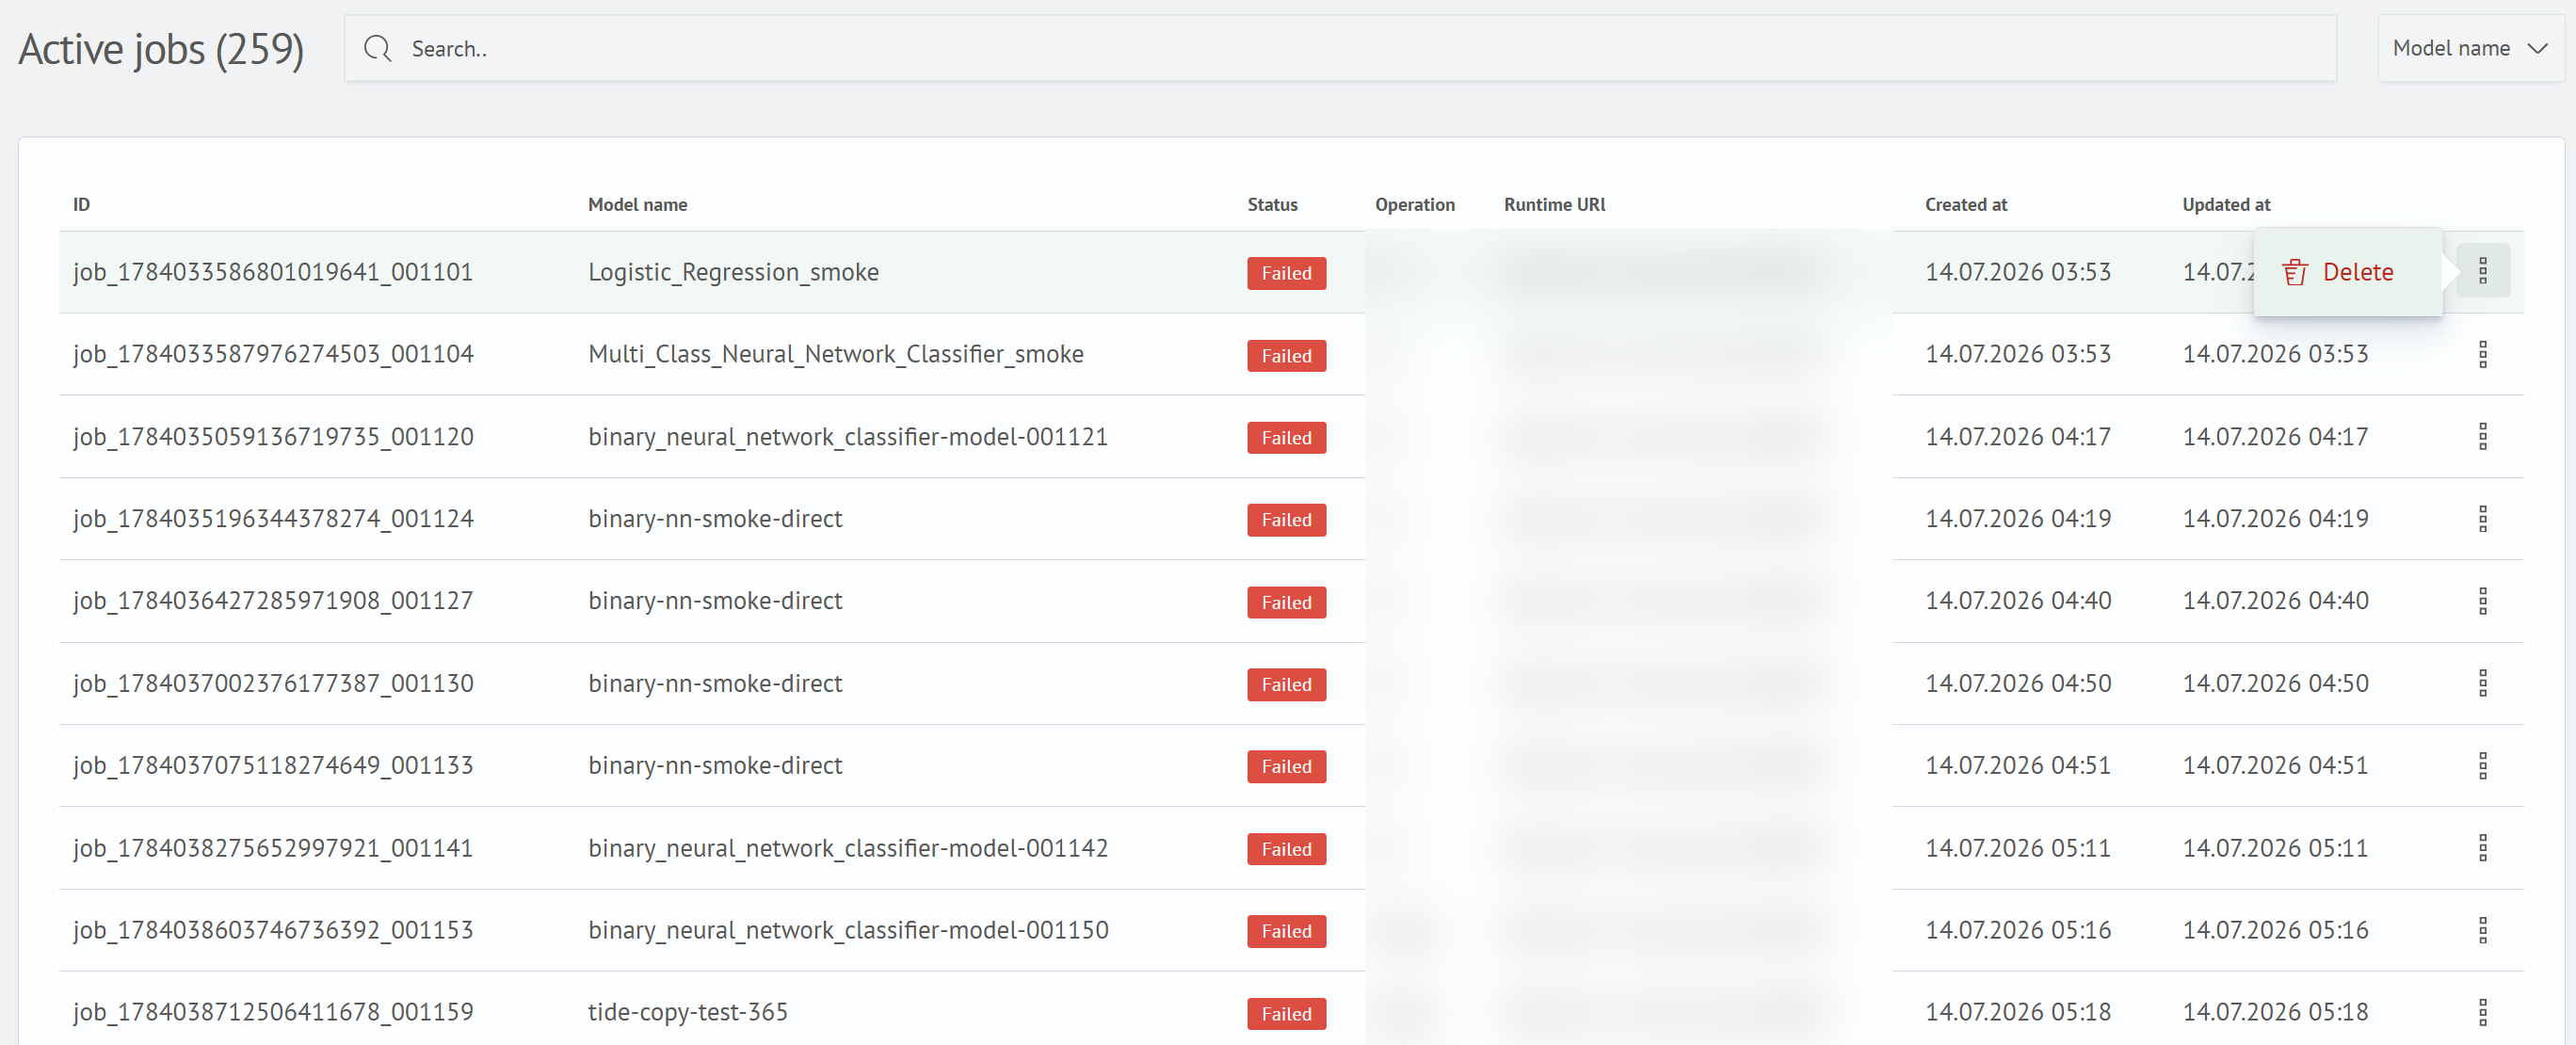
Row actions (⋮ menu):
Delete- deletes the job record
Page navigation is available at the bottom of the table.
Common Interface Elements
Searchand filters are available in all lists. Results are immediately displayed in the table- Pagination - the bottom of each table contains a
Rows per Pagefield (default:15) and page navigation controls - Row menu
⋮- contextual actions for a specific record - Statuses are displayed as colored labels: green indicates a successful or ready state, and red indicates an error
- The heading of each list includes the number of records in parentheses
Related Resources
For a step-by-step workflow using these screens, see the ML Studio Step-by-Step Guide.