Mailing Group Settings for Job Scheduler
Configuring mailing groups allows you to combine recipients into groups. These groups can be used in the Job Scheduler when setting up active actions of the type Send E-mail.
Interface
To access the mailing group configuration interface, open the SAF side menu and select the Management section. On the page that opens, you will find the Job Scheduler section in the left-hand menu, and within it, the Mailing List Settings option.
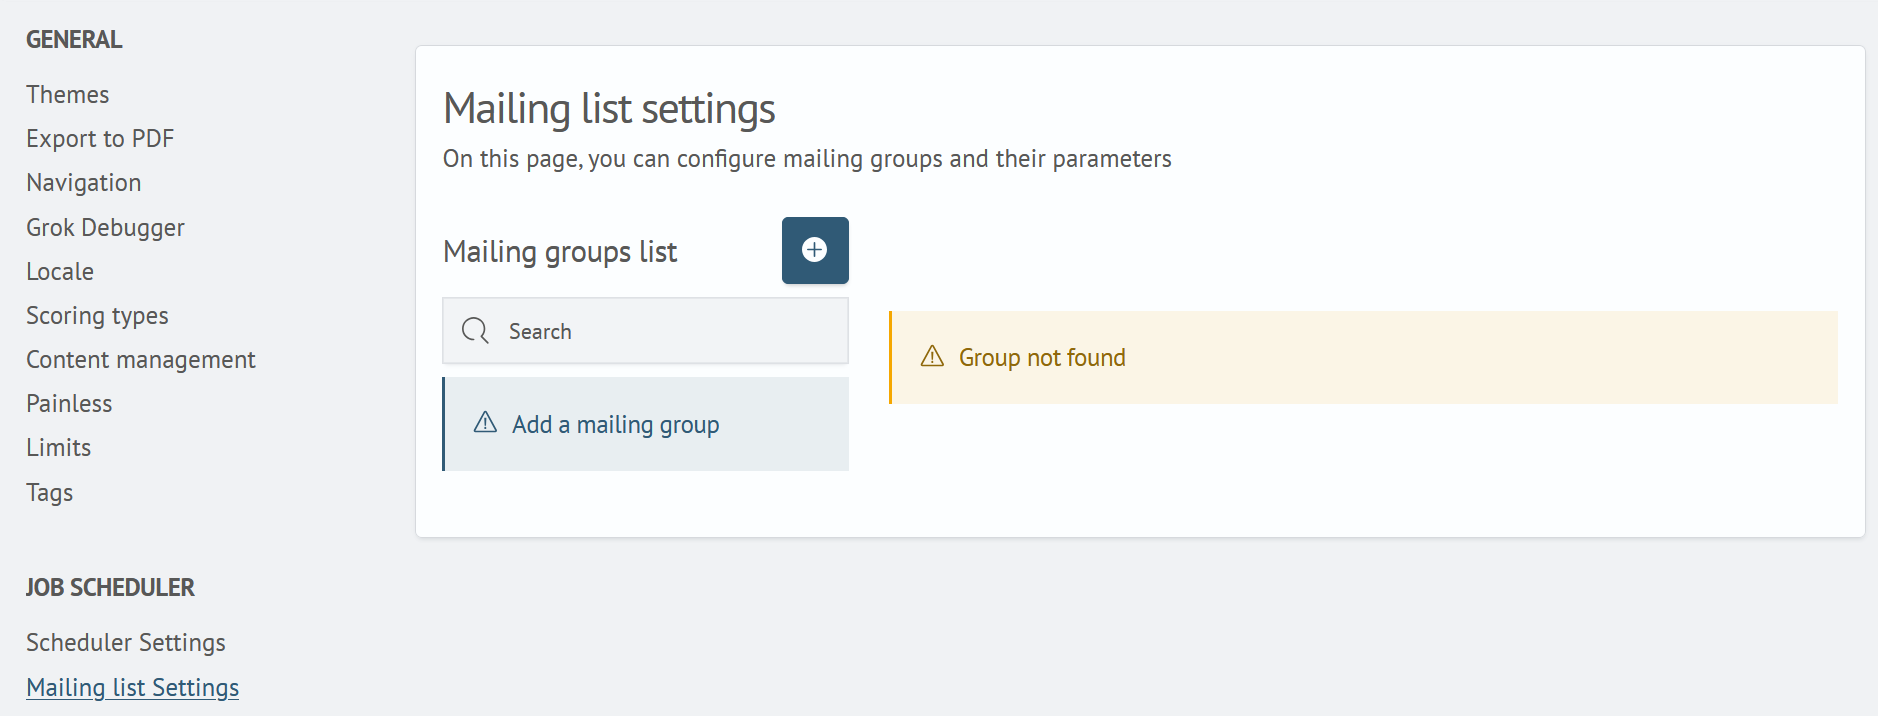
Mailing Group Settings is an interface that allows you to create mailing groups, assign them names, add descriptions, and specify email addresses for distribution within each group.
Adding a New Group
To add a new group, click the plus sign button. After clicking, a creation form will open:
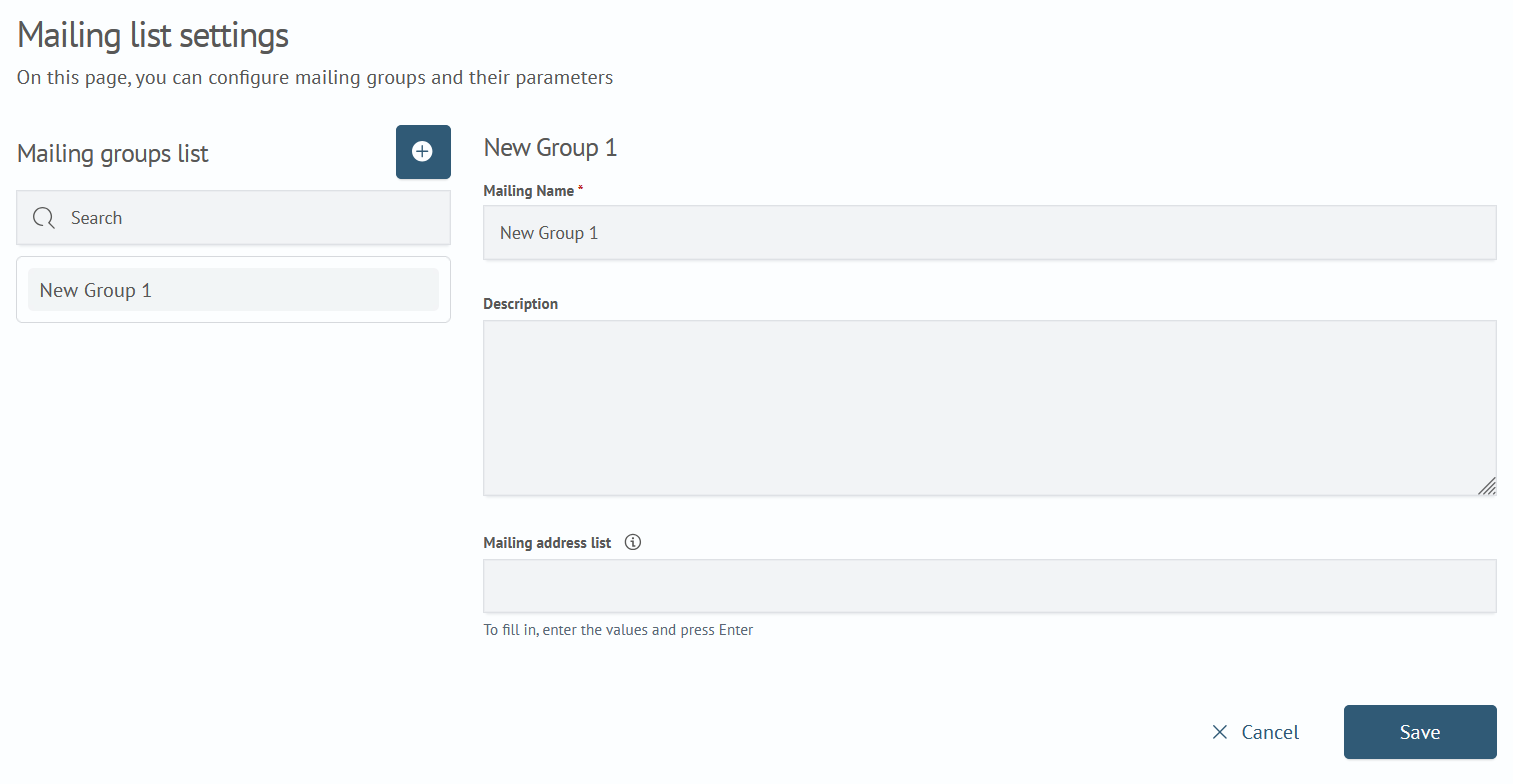
The form has three fields:
- Name - A mandatory field, pre-filled with the value "New Group". You can save the group with this value or replace it with another. The field cannot be empty
- Description - An optional field. Used to enter a description of the group to clarify its purpose
- List of Email Addresses - This field is for adding email addresses to be included in the group. To add an address, enter it and press the
Enterkey
You can also paste a list of email addresses from the clipboard. Acceptable formats for pasting are: test@email.org,test2@email.org or test@email.org;test2@email.org.
All addresses will automatically be separated into individual elements.
Editing a Group
You can open the group editing form by clicking on the desired group in the list. The editing form will then appear:
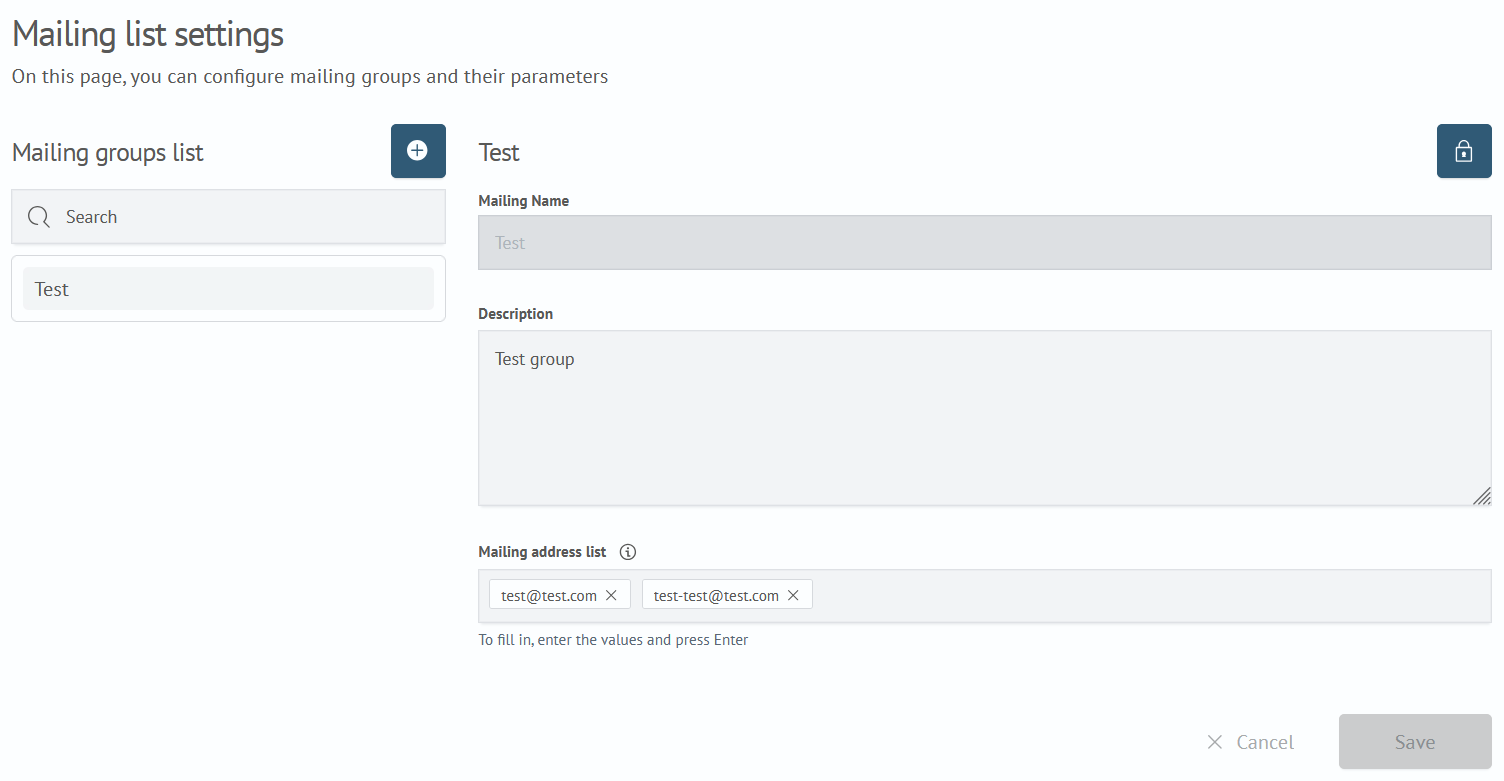
In the header of the editing form, next to the selected group's name, there is a button with a lock icon. This button is used to configure access to the group for different roles.
Applying Mailing Groups
In the Job Scheduler, when creating Active Actions, you can select the action type Send E-mail. After this, the email sending configuration interface will open.
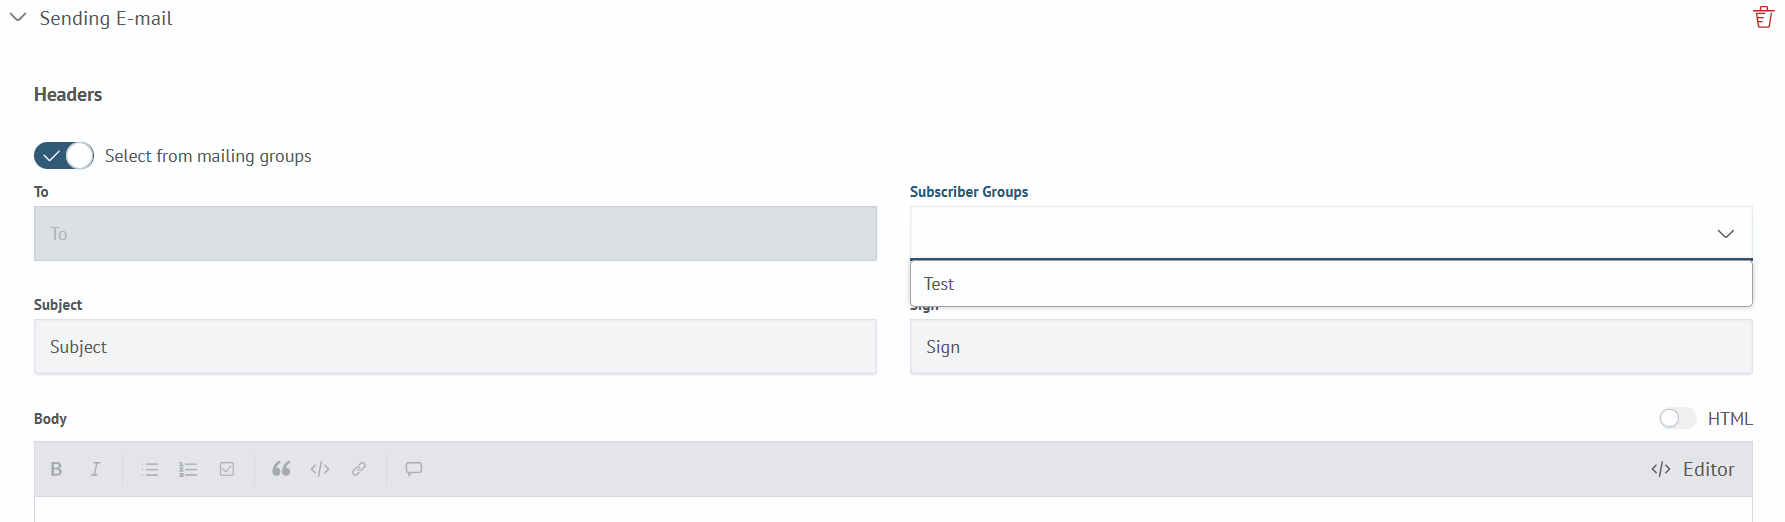
In the Basic section, above the To field, there is a toggle switch. If you activate it, an additional field Recipient Groups will appear to the right of the To field. In this field, you can select one of the existing groups. The email addresses included in the selected group will automatically populate the To field, and the field itself will become uneditable at this point.
This simplifies the process and eliminates the need to manually enter recurring email addresses.

After this, you can fill in the remaining fields and save the current active action to complete the setup.