Working with the Asset Database
Asset List
To navigate to the asset list page, select Assets in the Main Menu under the Inventory section. Then, select the desired configuration in the table and click on its name.
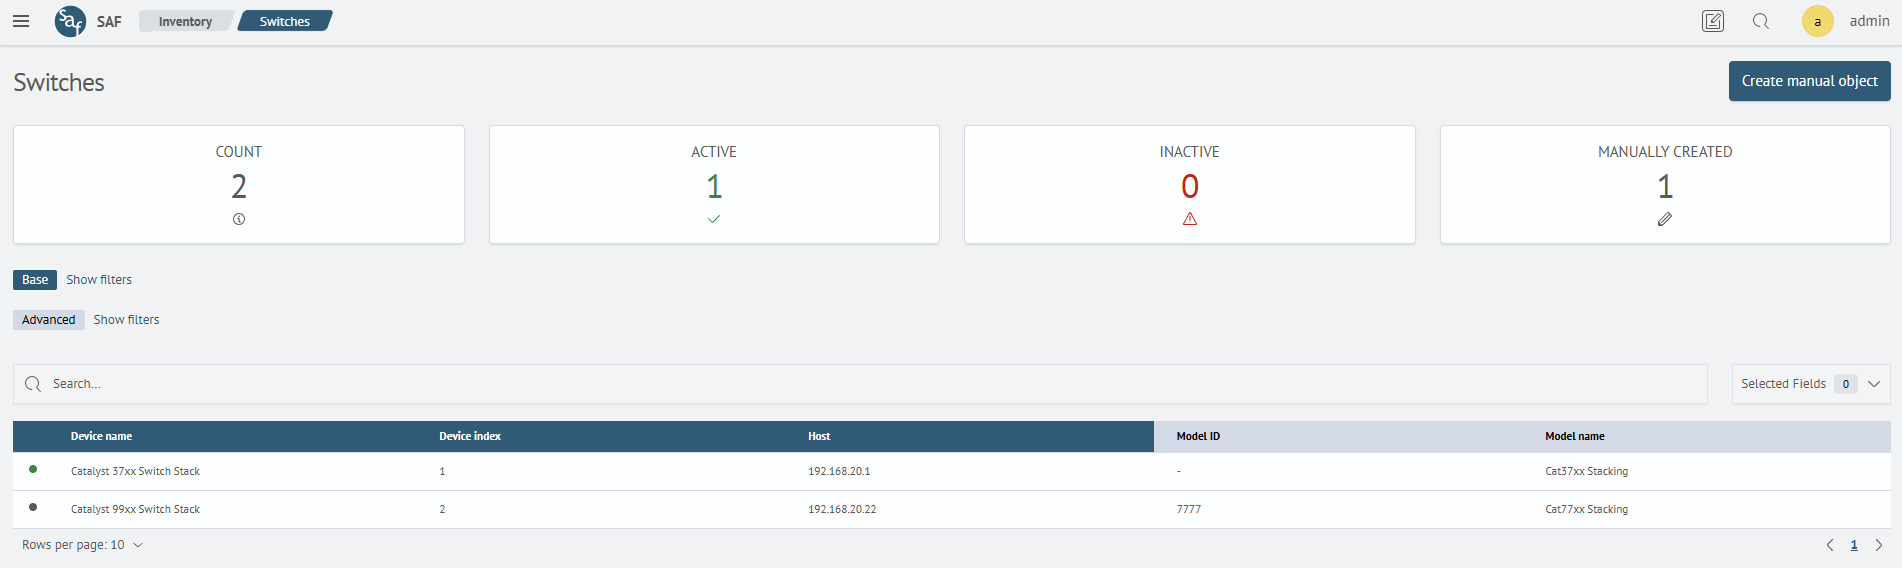
The asset list page is a table.
Under the asset name, the number of assets in different categories is displayed:
Count- overall count of assets created both automatically and manuallyActive- number of automatically created assets with data updated no later than one day agoInactive- number of automatically created assets with no data updates for more than one dayManually Created- count of assets created manually
The table can be sorted by columns and filtered using the Search input field. Filtering is also possible by basic and additional fields, as well as existing relationships.
You can create an object manually using the Create manual object button.
If necessary, it is possible to customize the displayed fields in the asset table using the Selected Fields drop-down list.
Asset Card
To open an asset card, select the desired row in the table and click on the asset name:
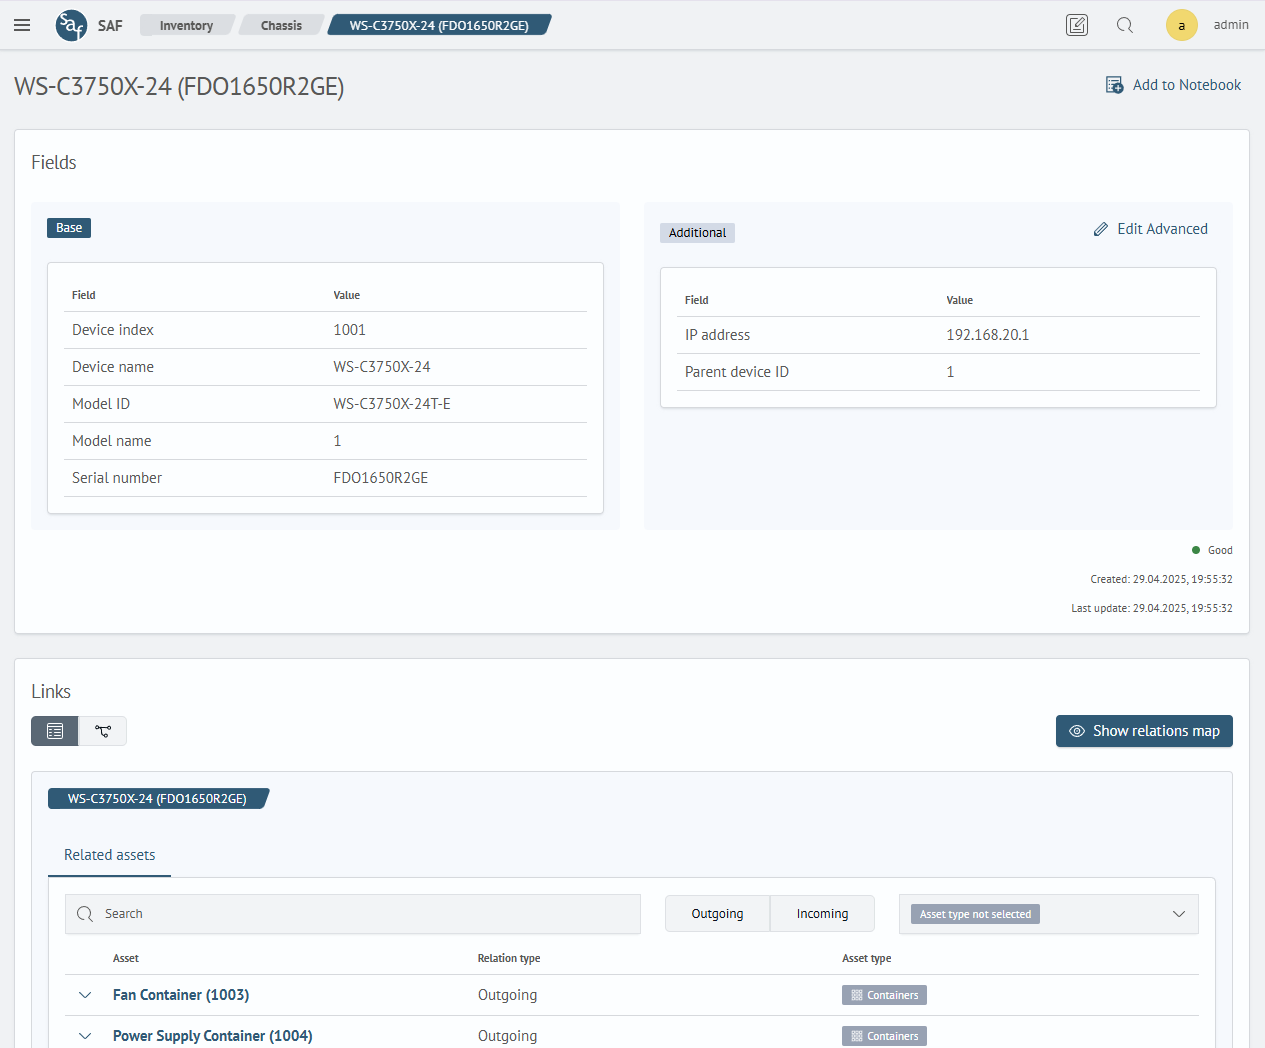
Fields
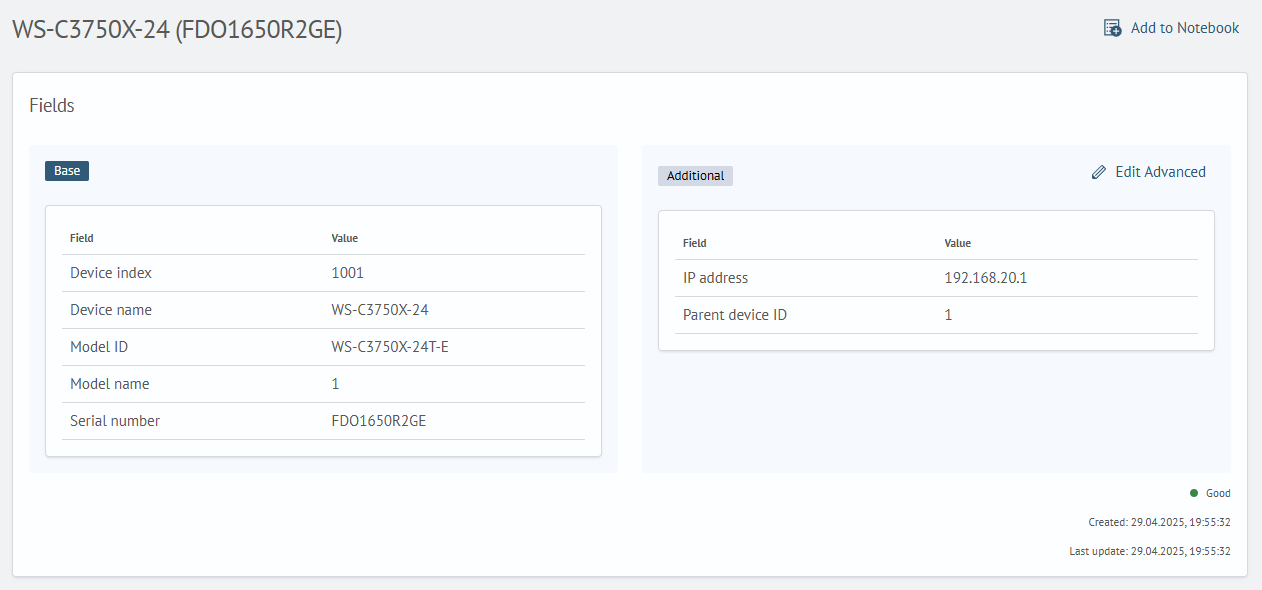
This section contains information generated based on the previously created configuration:
BaseAdditional
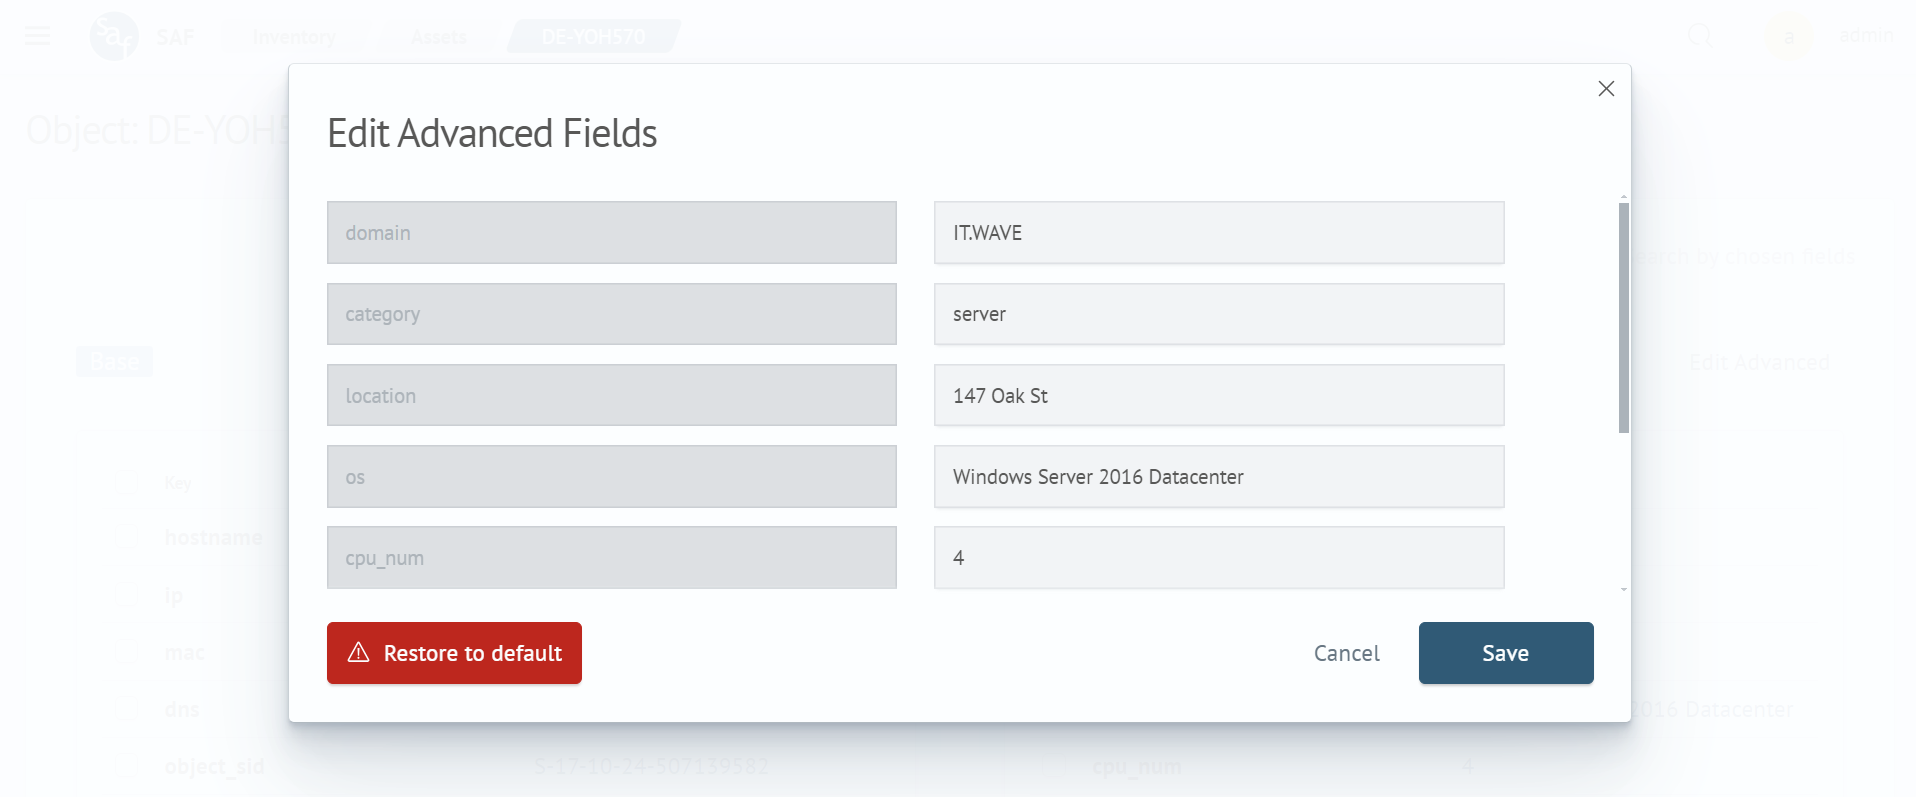
Users can edit an asset’s Additional Fields by clicking the corresponding link.
If the asset was manually created (indicated by the Custom Object icon), it can be fully customized, except for the creation of new additional fields.
Relations
This section shows information about the asset’s relations to other assets. The panel is displayed only if a relation has been configured in the Inventory module under the Relations tab.
The Relations section is only available for configurations that use the updated calculation algorithm.
See more in Migrating Asset Configuration.
By default, information about related assets at the first level is displayed. The data is presented as a list, which supports searching, filtering, and sorting.
Below is a visualization of asset relationships:
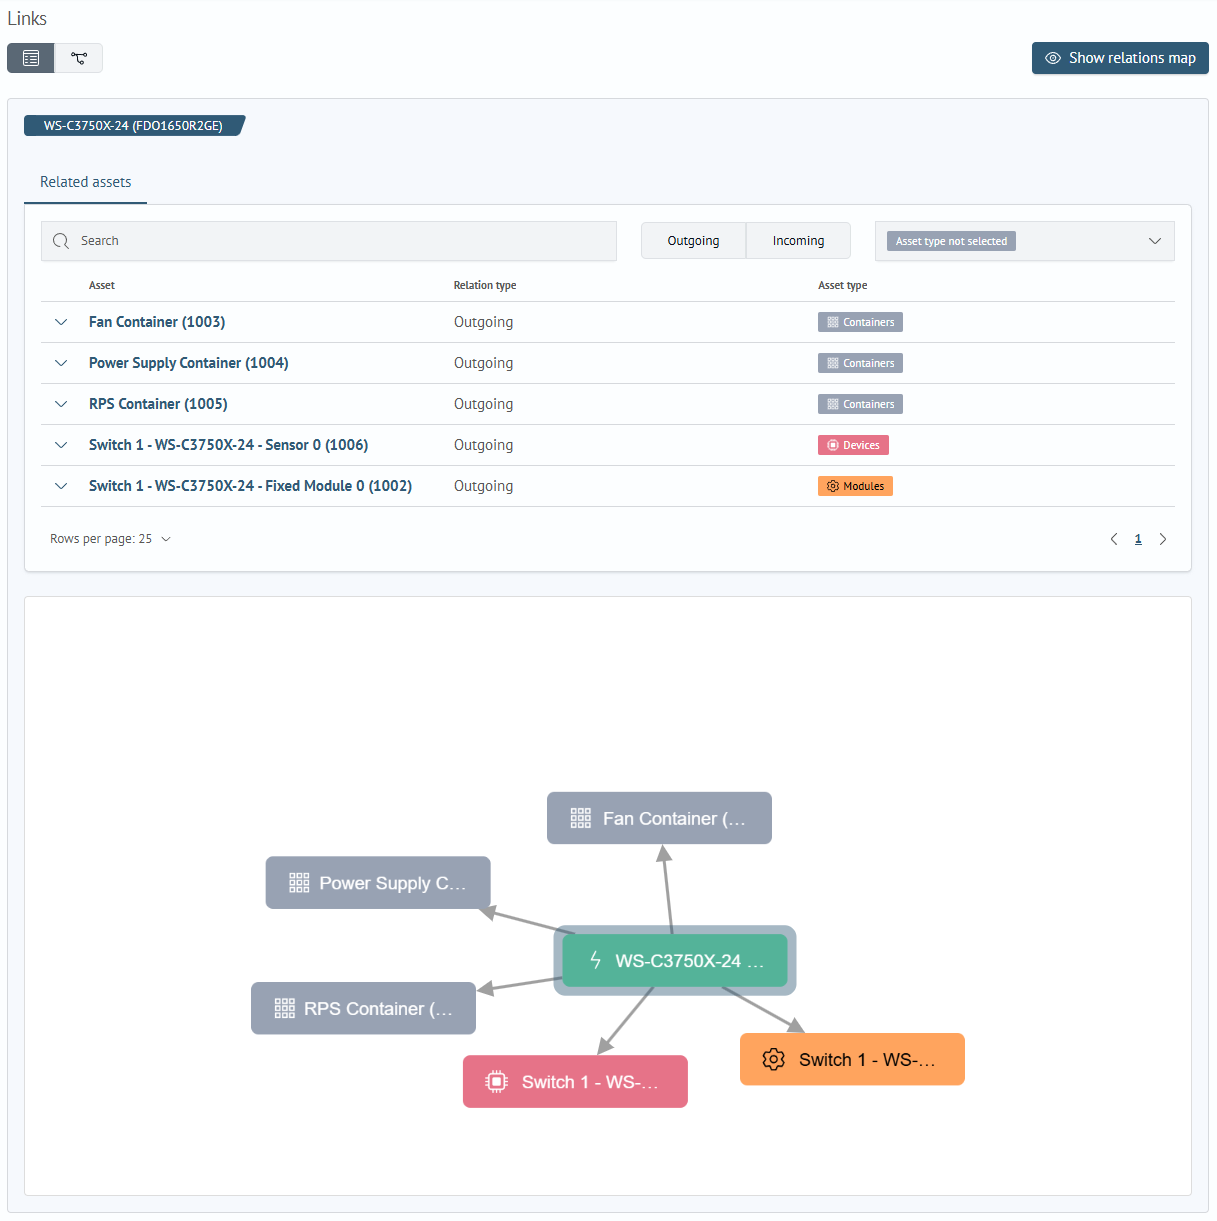
You can also view asset details by clicking the row expand icon:
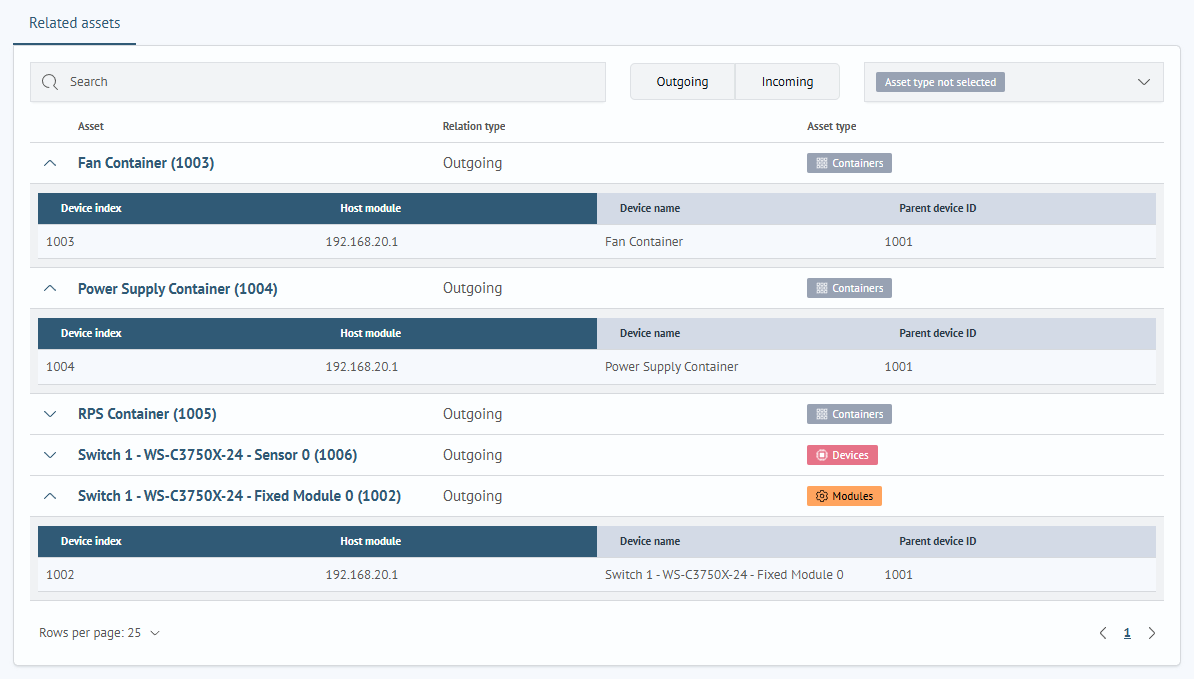
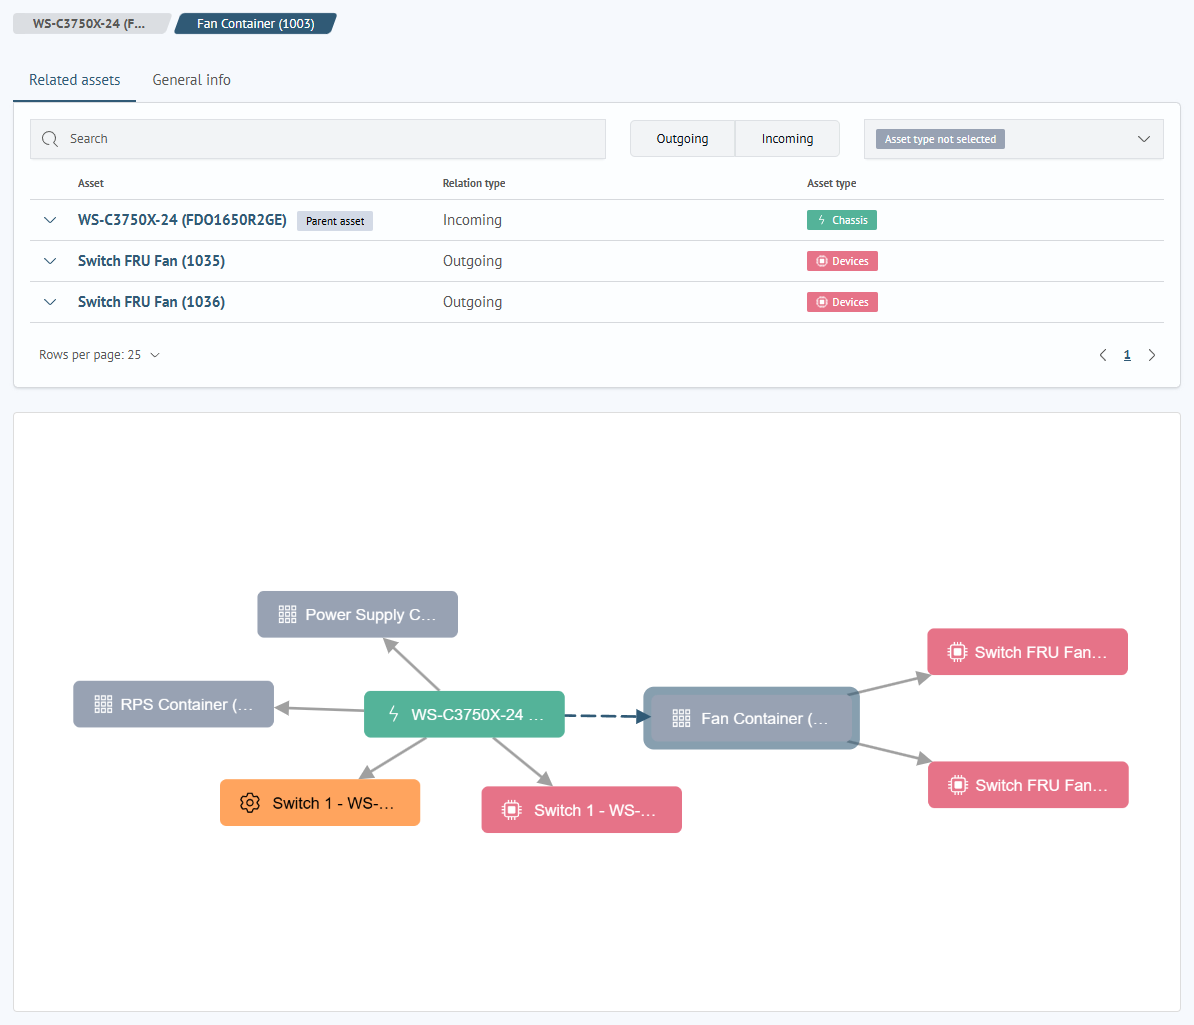
To view deeper relationship levels, click on an asset name in the relations table or directly on the asset in the visualization.
Both the table and visualization will update based on the selected asset.
If the selected asset is not the original one, the General info tab will become available to show field values:
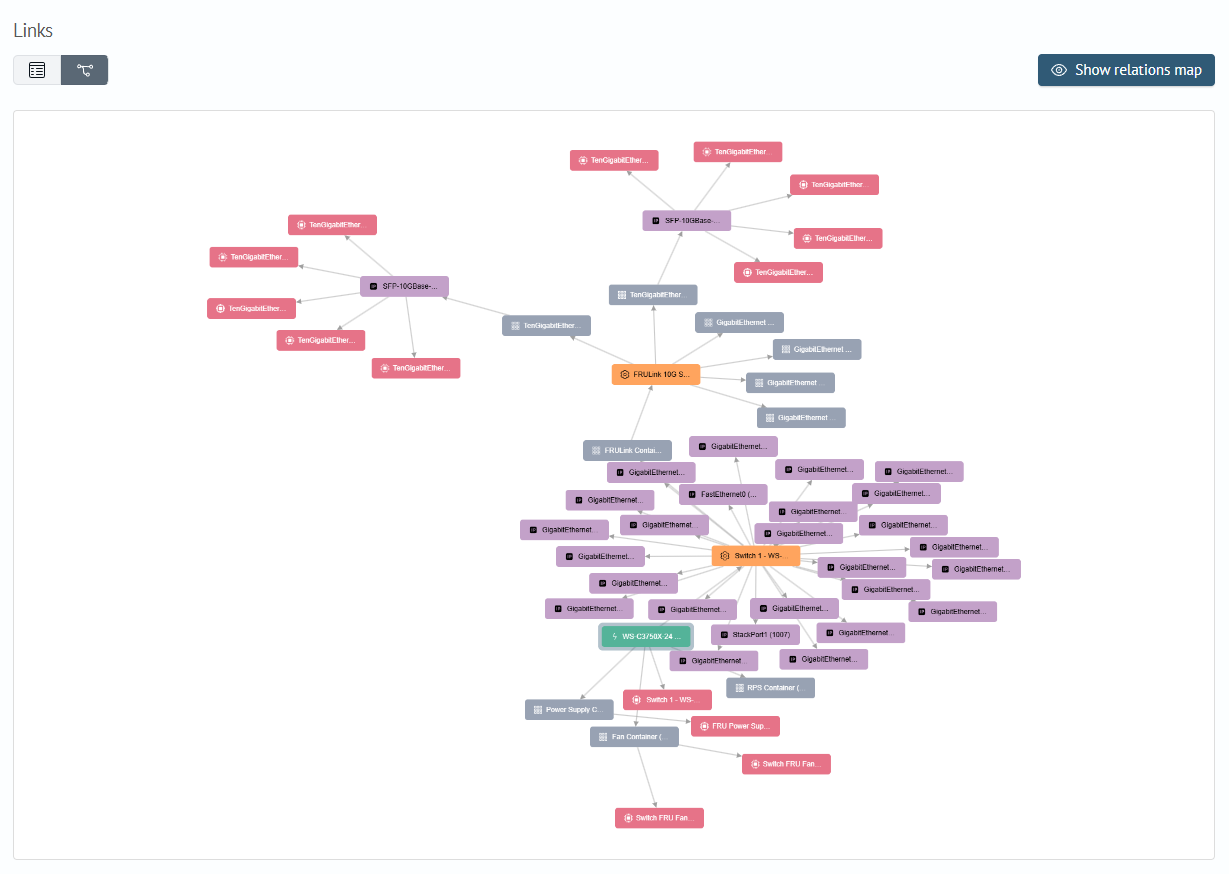
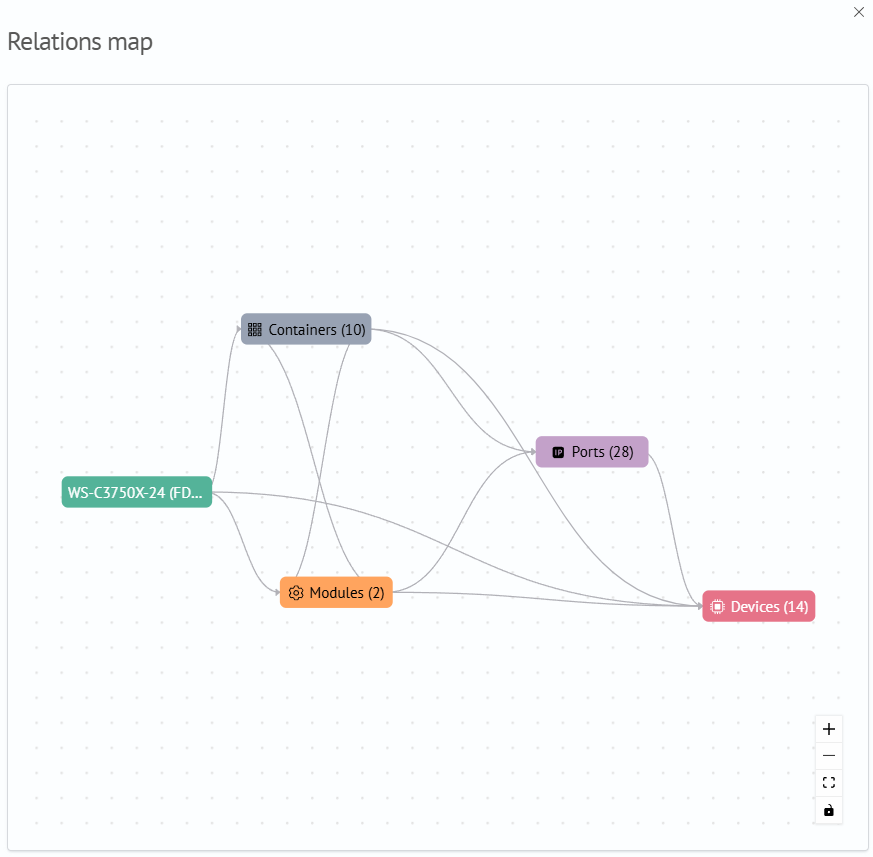
Full Asset Relation Map
In addition to first-level relations, you can view the full map of all descendant relations by clicking the branch icon:
Configuration Relation Map
By clicking Show relations map, you’ll see how the asset is connected to all its configurations, including the number of related assets:
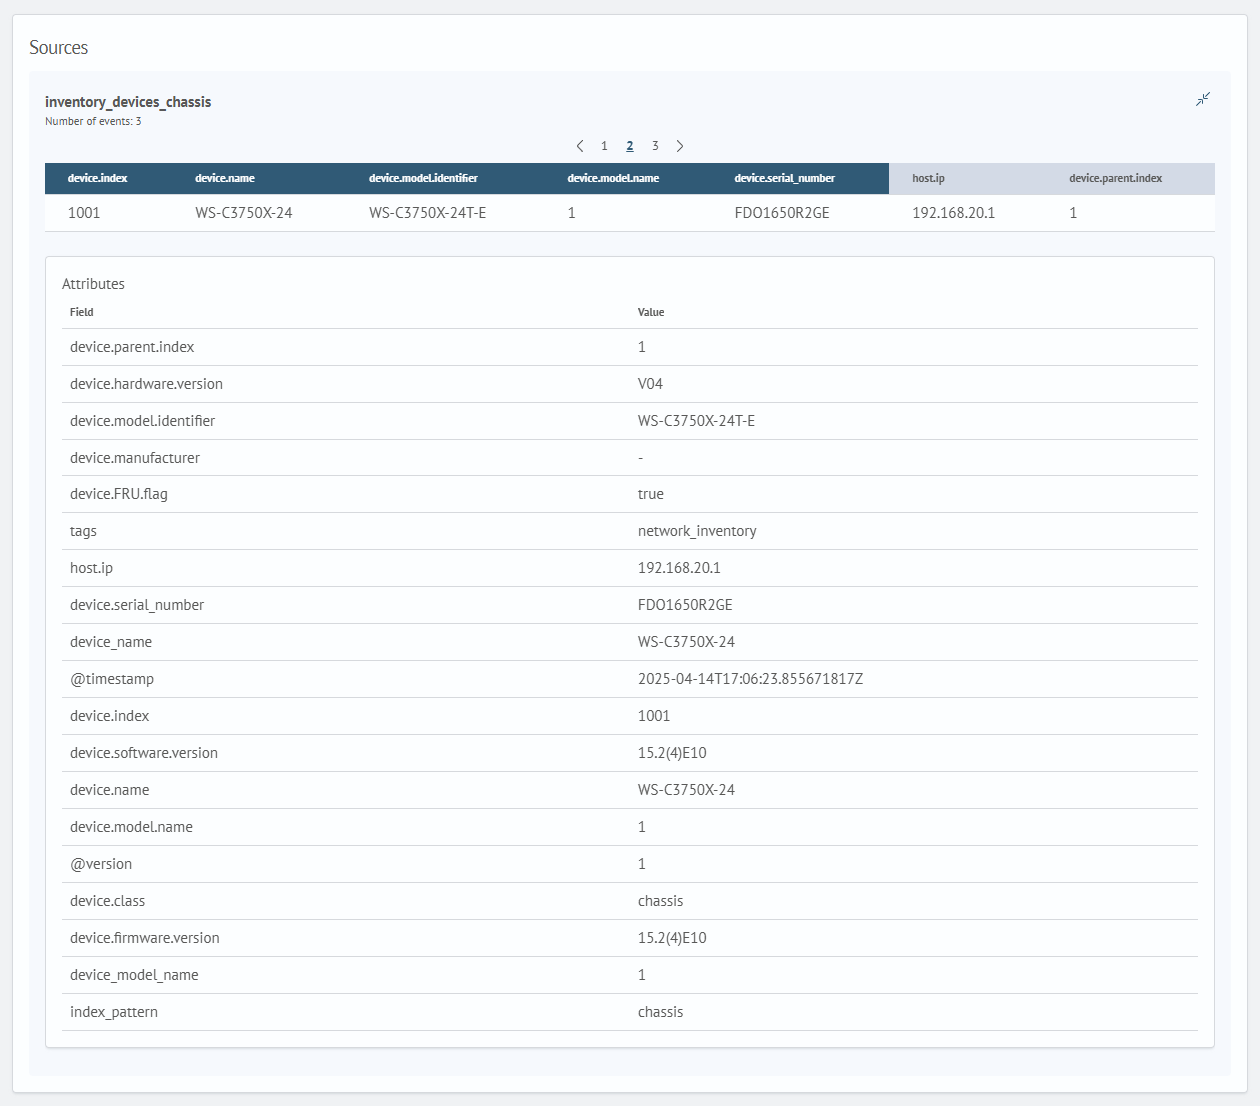
Sources
Sources contain information about the original events that contributed to the creation of the asset.
They are listed along with the source name and number of originating events:

Event details become visible when expanding the source:
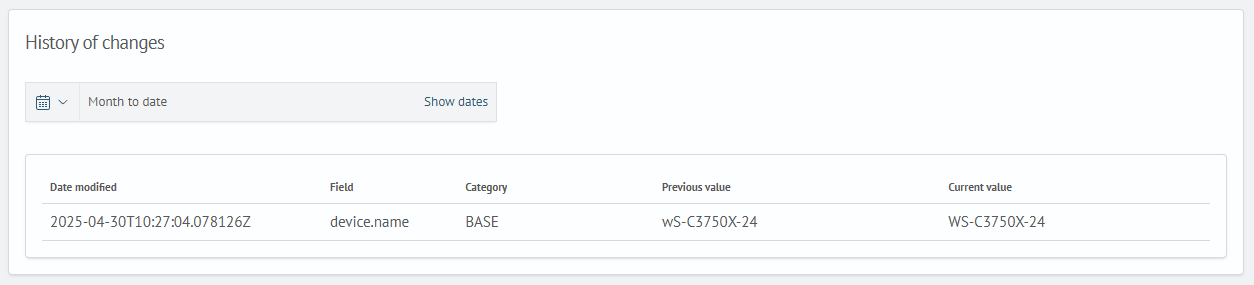
Change History
The asset's change history is displayed in a table listing all modifications, including:
Date modifiedFieldCategoryPrevious ValueCurrent Value
Manual Asset Creation
Primary Asset Fields
Manually creating assets allows users to enrich the existing asset database or build a new one from scratch.
Navigate to the appropriate database and click Manually Object creation. The manual asset creation form will appear:
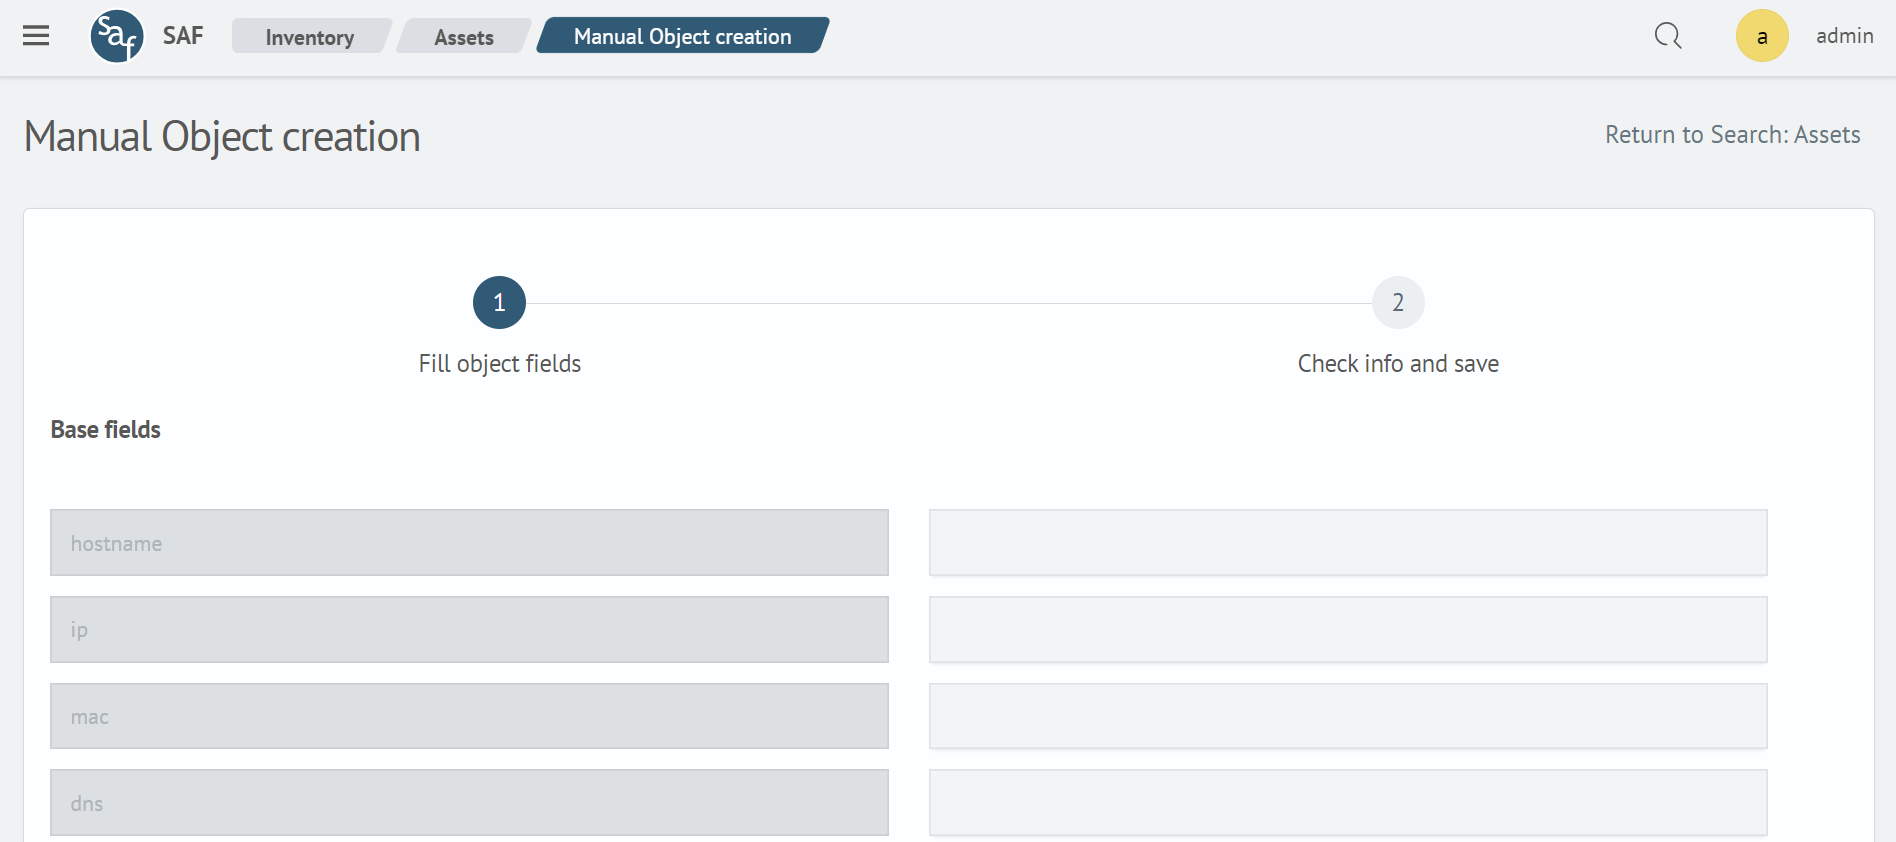
The form includes:
Base fields– Values defined by the asset configurationAdditional– Supplementary values, also defined by configuration
After completing the fields, click Next.
Confirmation and Save
The second form presents a summary before saving the manual asset. The content is similar to the first form.
After checking the filling, click the Save button.
If necessary, you can go back to the list by pressing the Back button.
Editing Additional Fields
Field editing works as follows:
- For manually created objects, both Base and Additional Fields can be edited
- For automatically created objects, only Additional Fields can be modified
You cannot add custom parameters to an asset. All fields must come from the predefined configuration.
To revert fields to their original state, click Restore to default. To revert a specific field only, use the green Reset This Field icon. To remove manual changes to a field and restore its original value, use the red Delete Manual Changes button.
If a custom object card is displayed and you want to delete it, click Delete Custom Object.
To save changes, click Save: