Creating Incidents
Incident creation refers to the process of logging and documenting significant events and correlation rule outputs. Depending on operational needs, incidents may be created either automatically (via the "Create Incident" function) or manually by authorized users.
Creating an Incident Using the "Create Incident" Active Action in the Job Scheduler
To create an incident using the Create Incident active action in the Job Scheduler, follow these steps:
-
Navigate to the
Job List(Main Menu-Job Scheduler-Job List) -
Click the
Createbutton to create a new task -
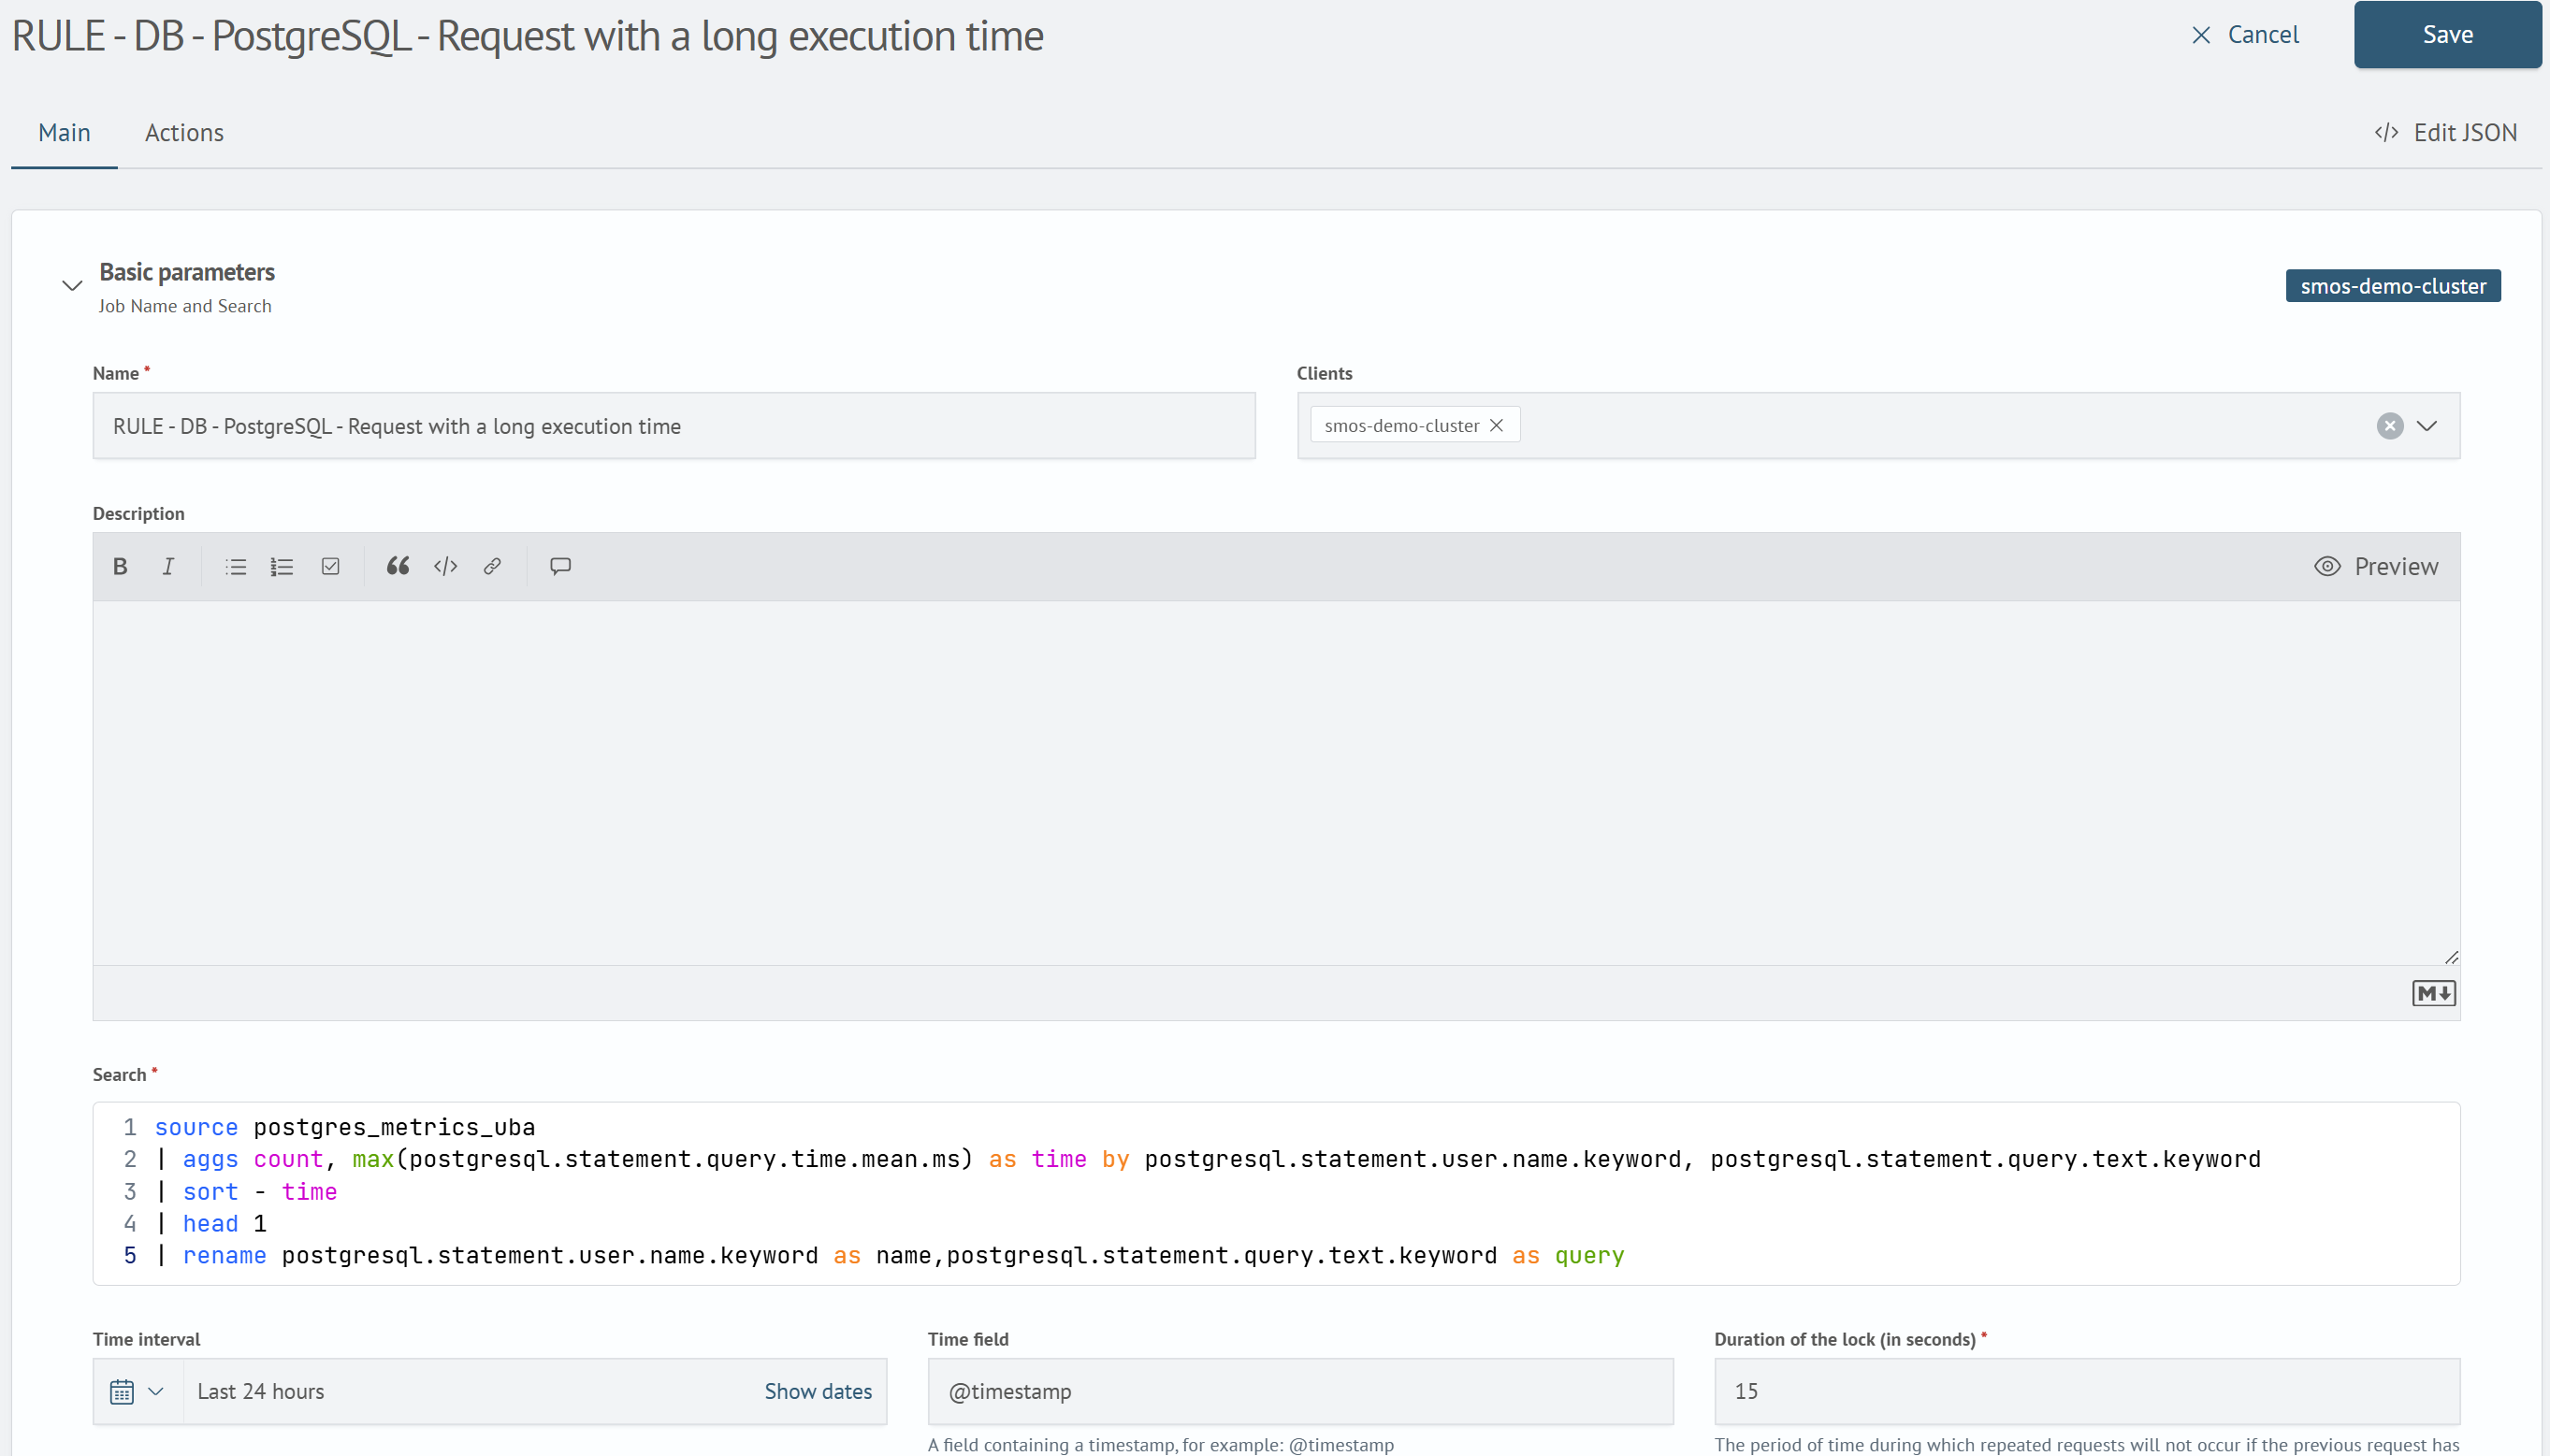
Fill in the main task fields, including
Name,Search, andDuration of the lock. An example of task settings is provided below:
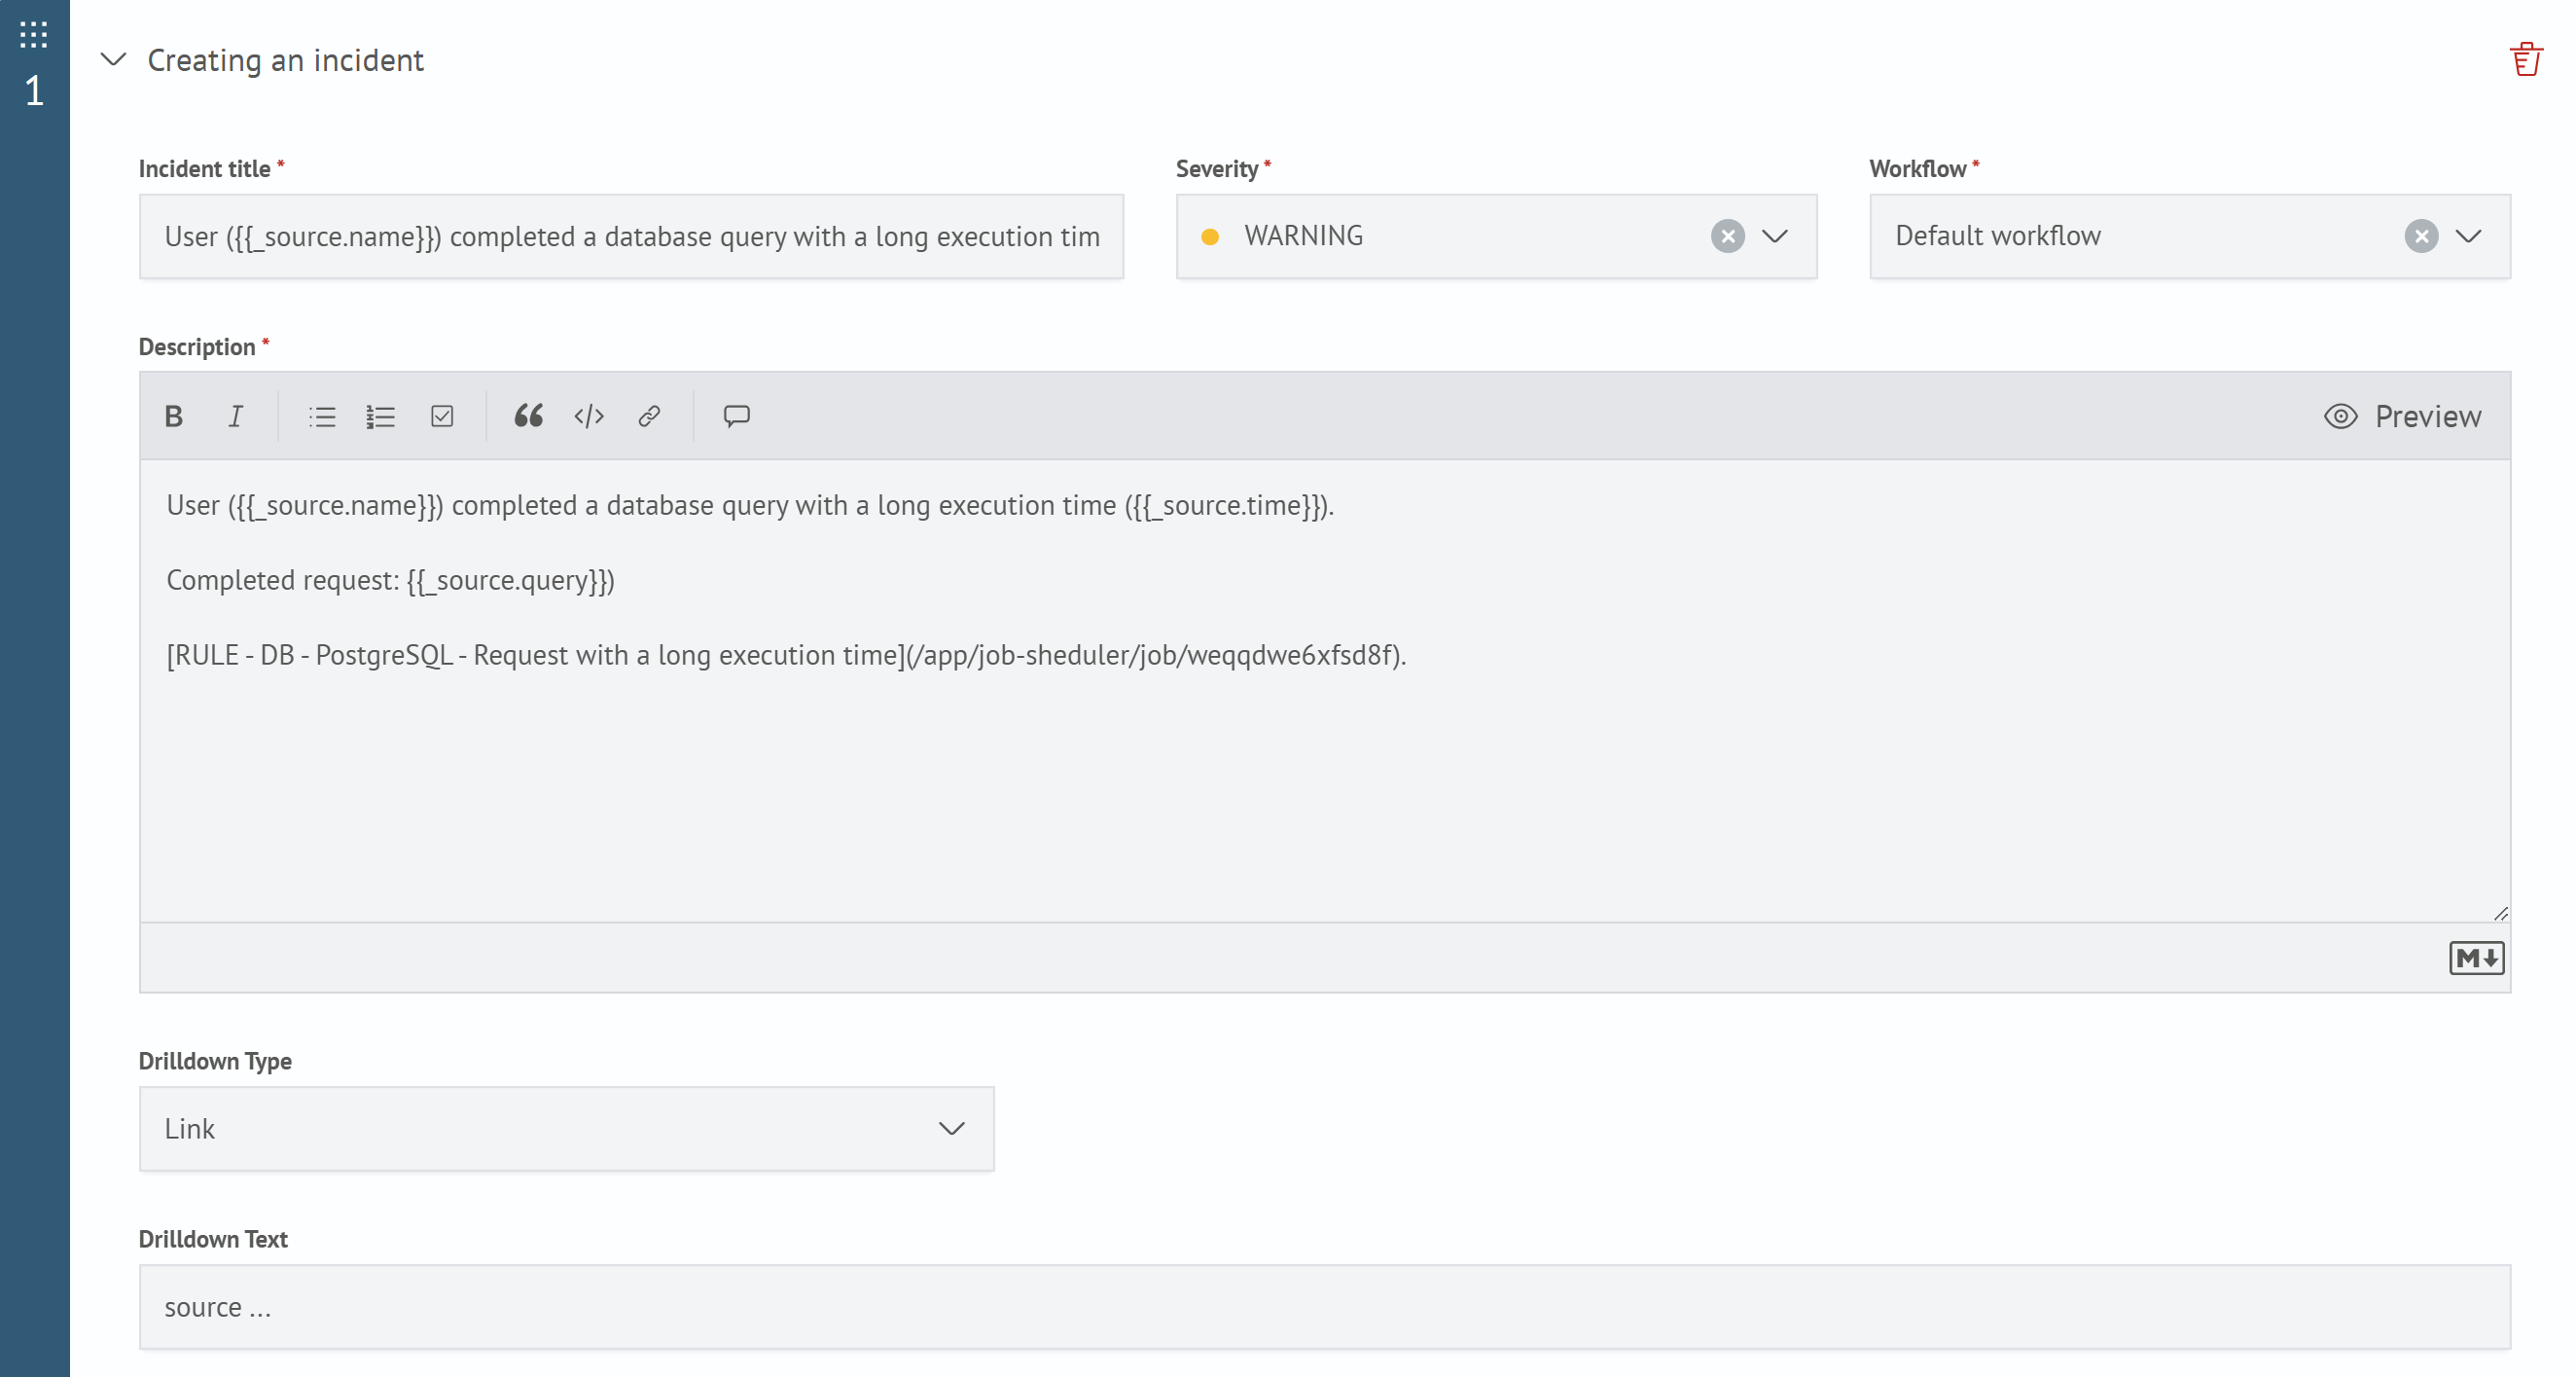
- Add the active action
Create Incidentto the task and fill it out. Information on filling out the main fields of the active action is available in the section Creating an Incident. An example configuration of the Create Incident active action is shown in the image below:
- Save the search task by clicking the
Savebutton at the bottom or top of the interface
The incident created as a result of the task execution will be displayed in the Incident Manager.
To learn more about how search tasks and active actions work, go to the Job Scheduler section.
Creating Manually
To create an incident manually:
- Go to the
Incident Manager - Click the
Create Incidentbutton. A modal window with incident parameters will appear:
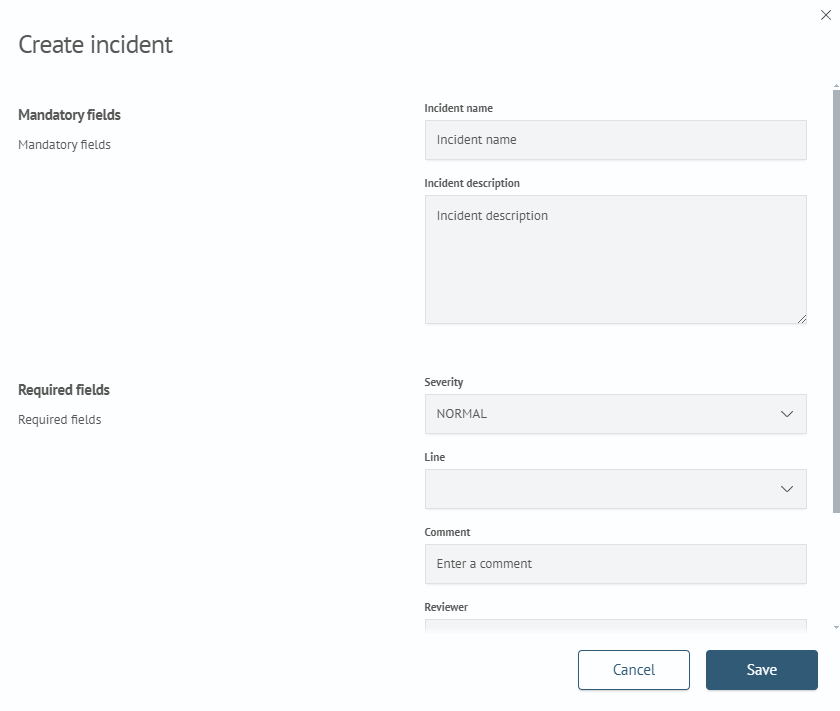
The set of fields is formed in the incident card. By default, each incident contains the following list of fields:
- Mandatory fields:
Incident name- the name of the incident displayed in the general list of incidentsIncident description- a description that is displayed in the general list when the incident details are expanded
- Required fields:
Severity- the importance level of the incidentComment- an explanatory comment for the incidentReviewer- the employee or group of employees responsible for resolving the incident and its consequences
- Additional Information - additional information about the incident
- Click the
Savebutton. After clicking the button, the created incident will be displayed in the general list