Incident Types Configuration
General Description
Types for incidents can be configured in the Smart Monitor module settings section. To do this, go to Navigation Menu - System Parameters - Module Settings - Incident Manager - Incident Types.
Using types, you can configure different incident displays and access to incidents, as well as methods of interacting with incidents for different roles. The incident type is specified when creating manually or through the task scheduler. If there is an incident in the system without a specified type, it will be available to all users with a full list of fields available in the system.

Creating a Type
To create a new incident type, you need to:
-
Click the + button
-
Fill in the
Basictab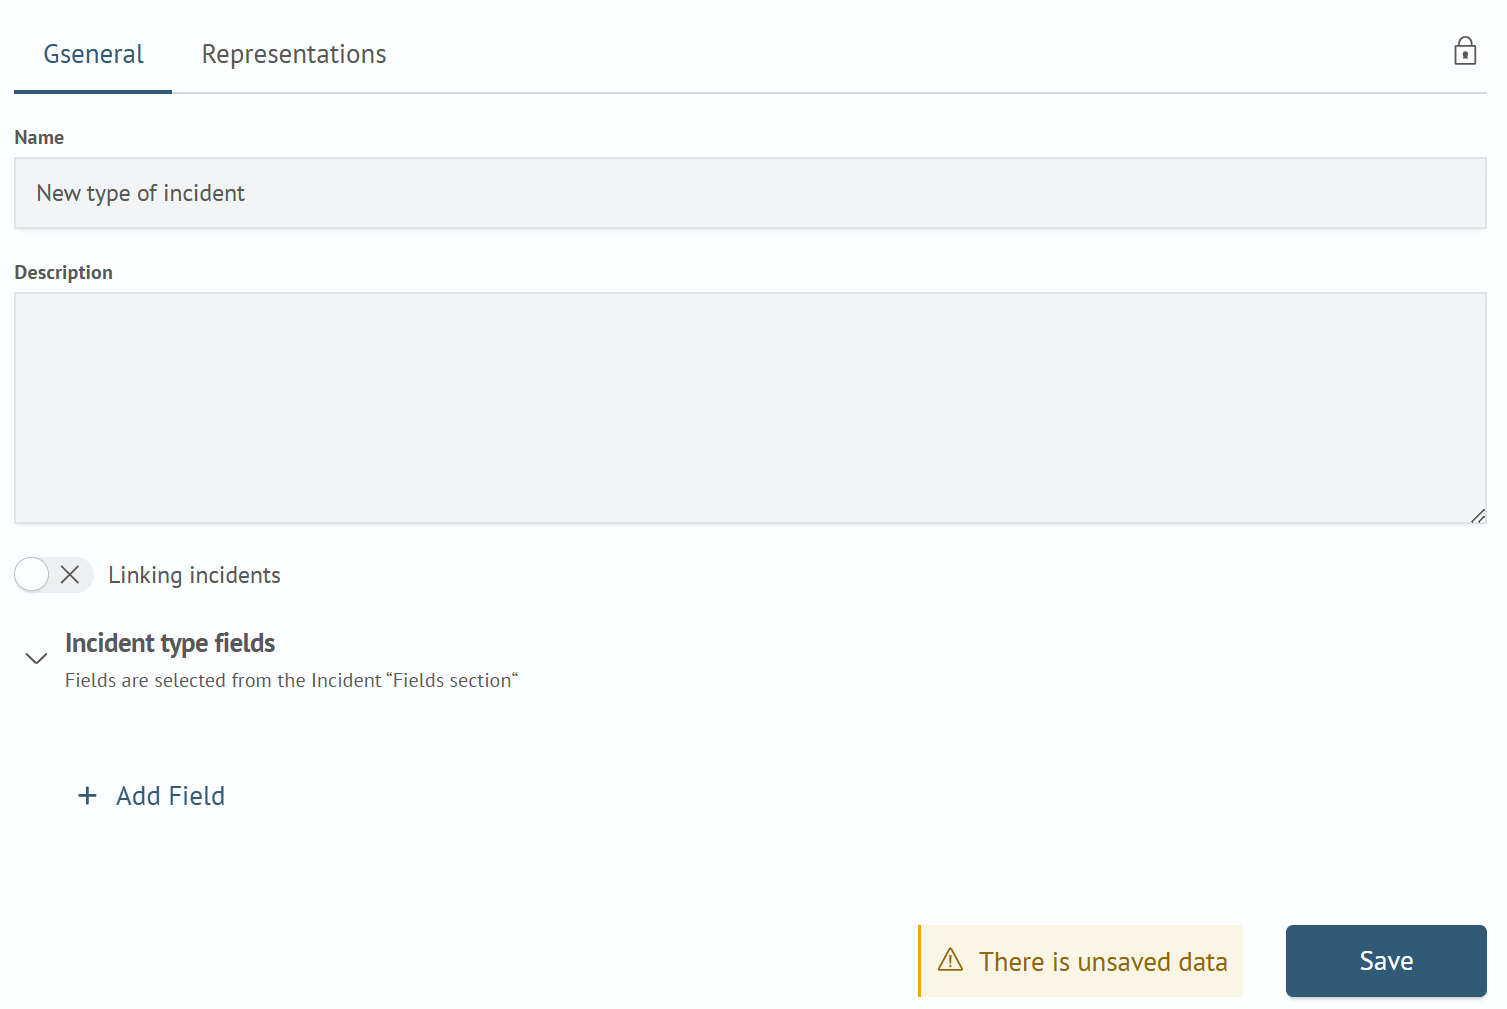
Name- name of the new incident typeDescription- description of the new incident typeLink Incidents- flag that enables the ability to configure related incidents in the new incident typeIncident Type Fields- in this section you can select the necessary fields and their default values
-
Fill in the
Viewstab On this tab, you can configure different display settings for the incident card. You can leave only certain fields visible or editable, which are necessary for investigation by users with a specific role. Active actions needed are also selected in the view, which will later be available on theIncident Managerpage.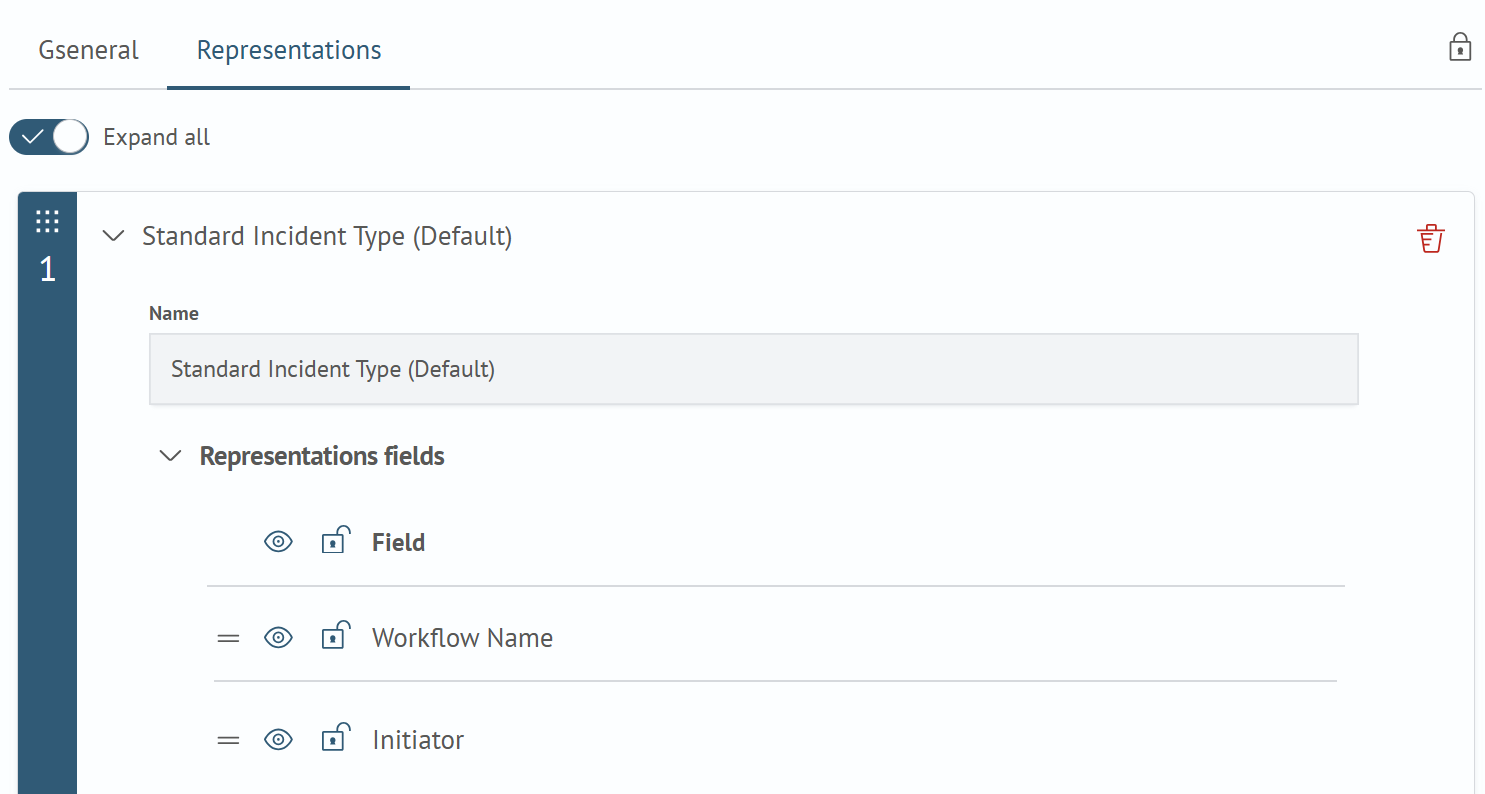
Name- name of the view for the current incident typeView Fields- here the field order, visibility (button ) and access to editing (button
  ) are configured
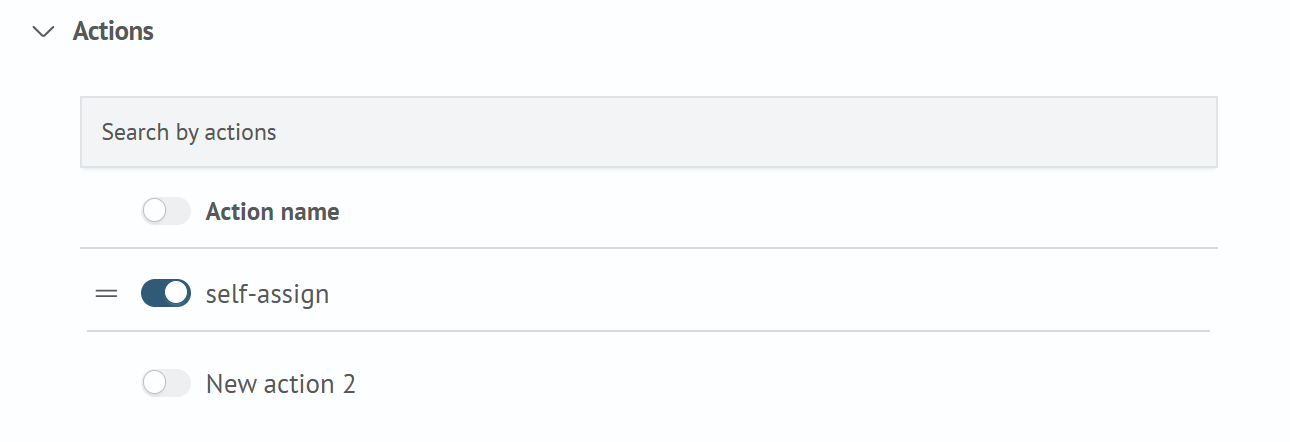
Active Actions- here you can select which active actions will be available to the user
-
Fill in
Access Settings(button in the upper right corner)
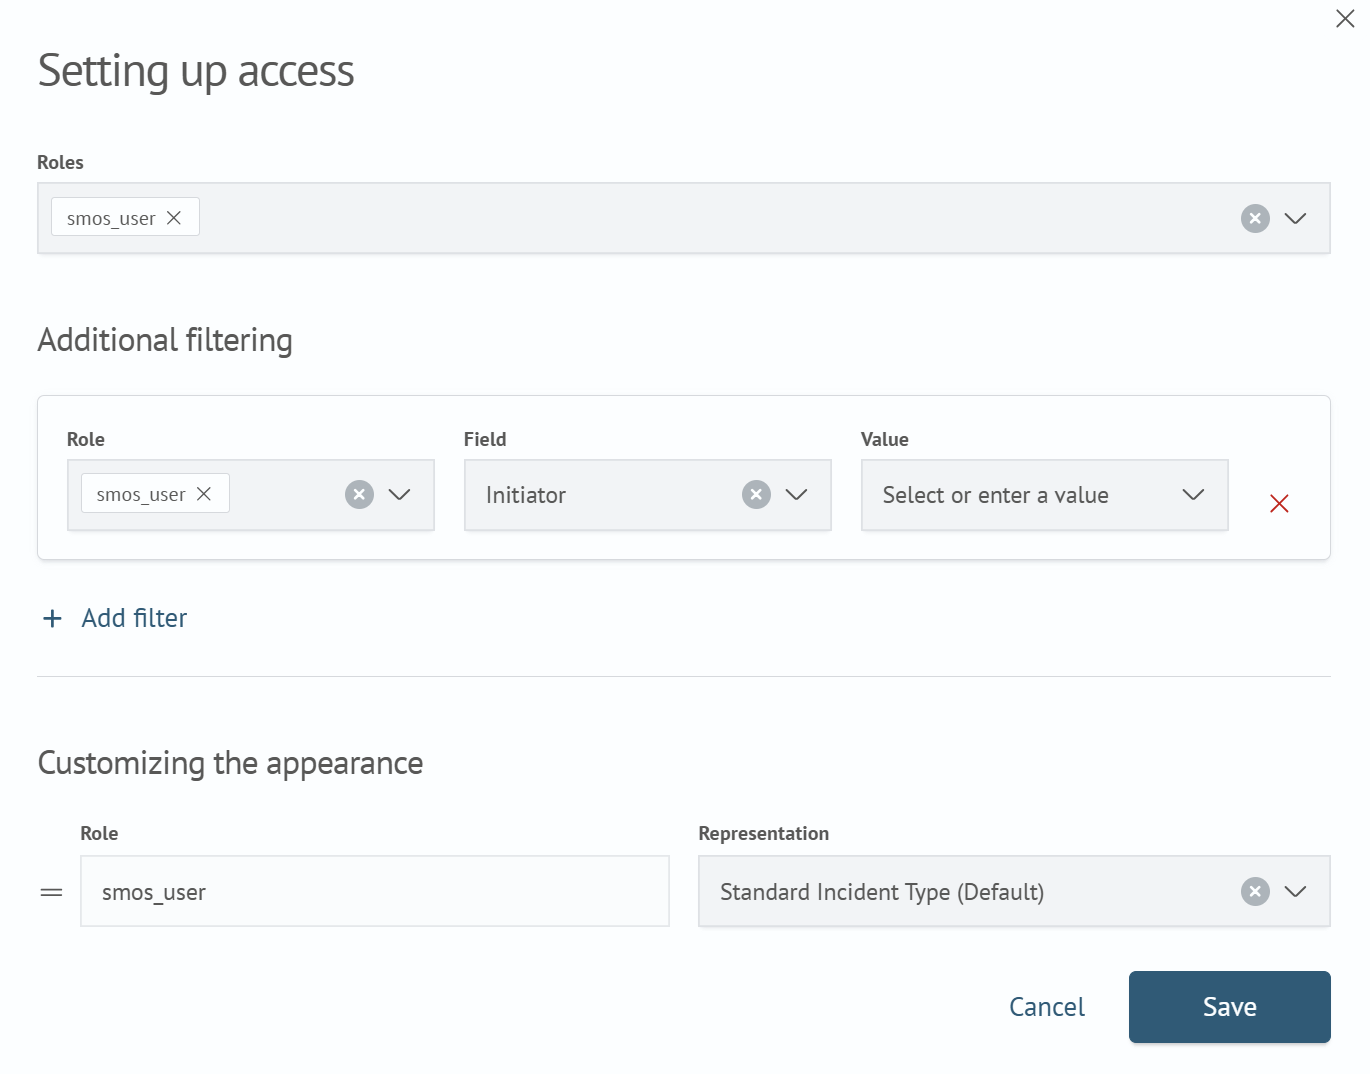
Roles- roles that have access to the incident on theIncident Managerpage and in the listAdditional Filtering- here you can specify additional conditions for filtering incidents.- For example, for the first_line role in this example, the incident will be available if the
Sourcefield equals the valueIT Appearance Settings- here you can map roles and views. For example, for a user with the first_line role, the incident card will be available as configured in theFirst Lineview. If a user has several roles specified in this mapping, the incident will be displayed to them as a combination of fields from all available views
Editing Existing Types
To edit an incident type, you need to:
- Select the incident type in the list and click on it
- The editor for the selected incident type parameters will appear on the right side, make changes
- Click the
Savebutton
Deleting Fields
To delete an incident type, click the × button next to the field name. In the dialog box that appears, confirm the action by clicking the Delete button or cancel the action by clicking the Cancel button.
If the selected incident type is used in the task scheduler, aggregation, or incidents with this type are stored in the system, it cannot be deleted.