Job Scheduler
General Description
The Job Scheduler component provides the ability to work with search tasks. A search task is an executed search query on a specified schedule, the results of which are processed by active actions. An active action is a processing option for the results of a search query (e.g., creating an incident, sending an email notification, etc.).
To access the main section of the component, select Job Scheduler - Jobs List in the Main Menu. Upon entering the section, a list of all tasks will be displayed:

Tasks can be created manually by the user or provided as part of a module as accompanying content.
Tasks provided as part of a module are of type System and cannot be deleted but can be modified. When modified, a copy is created with type User, replacing the default system task.
A colored indicator shows the task status. Red denotes disabled tasks, while green denotes active ones.
Task Management
Configuring Display Columns in the Table
The table allows you to configure the displayed information. For example, if you need to view a field that is not in the default table, you can add it by selecting the corresponding field from the Selected Fields dropdown. You can also disable the display of fields that are not required in the table. Fields marked with a checkmark will be displayed in the table. You can reset the display columns to default using the Reset button.
Managing Task Permissions
You can specify permissions for a task. This can be done in the permissions setup modal.
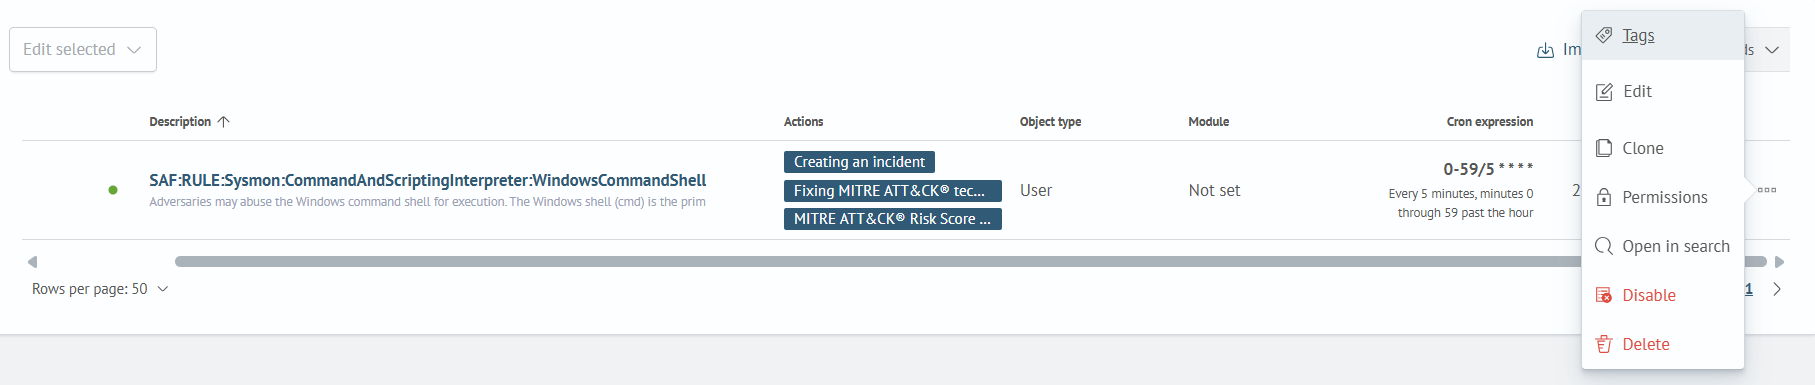
To set permissions for a task, expand the list of actions for the task by clicking the three-dot button on the right in the table. In the opened list, select Permissions.
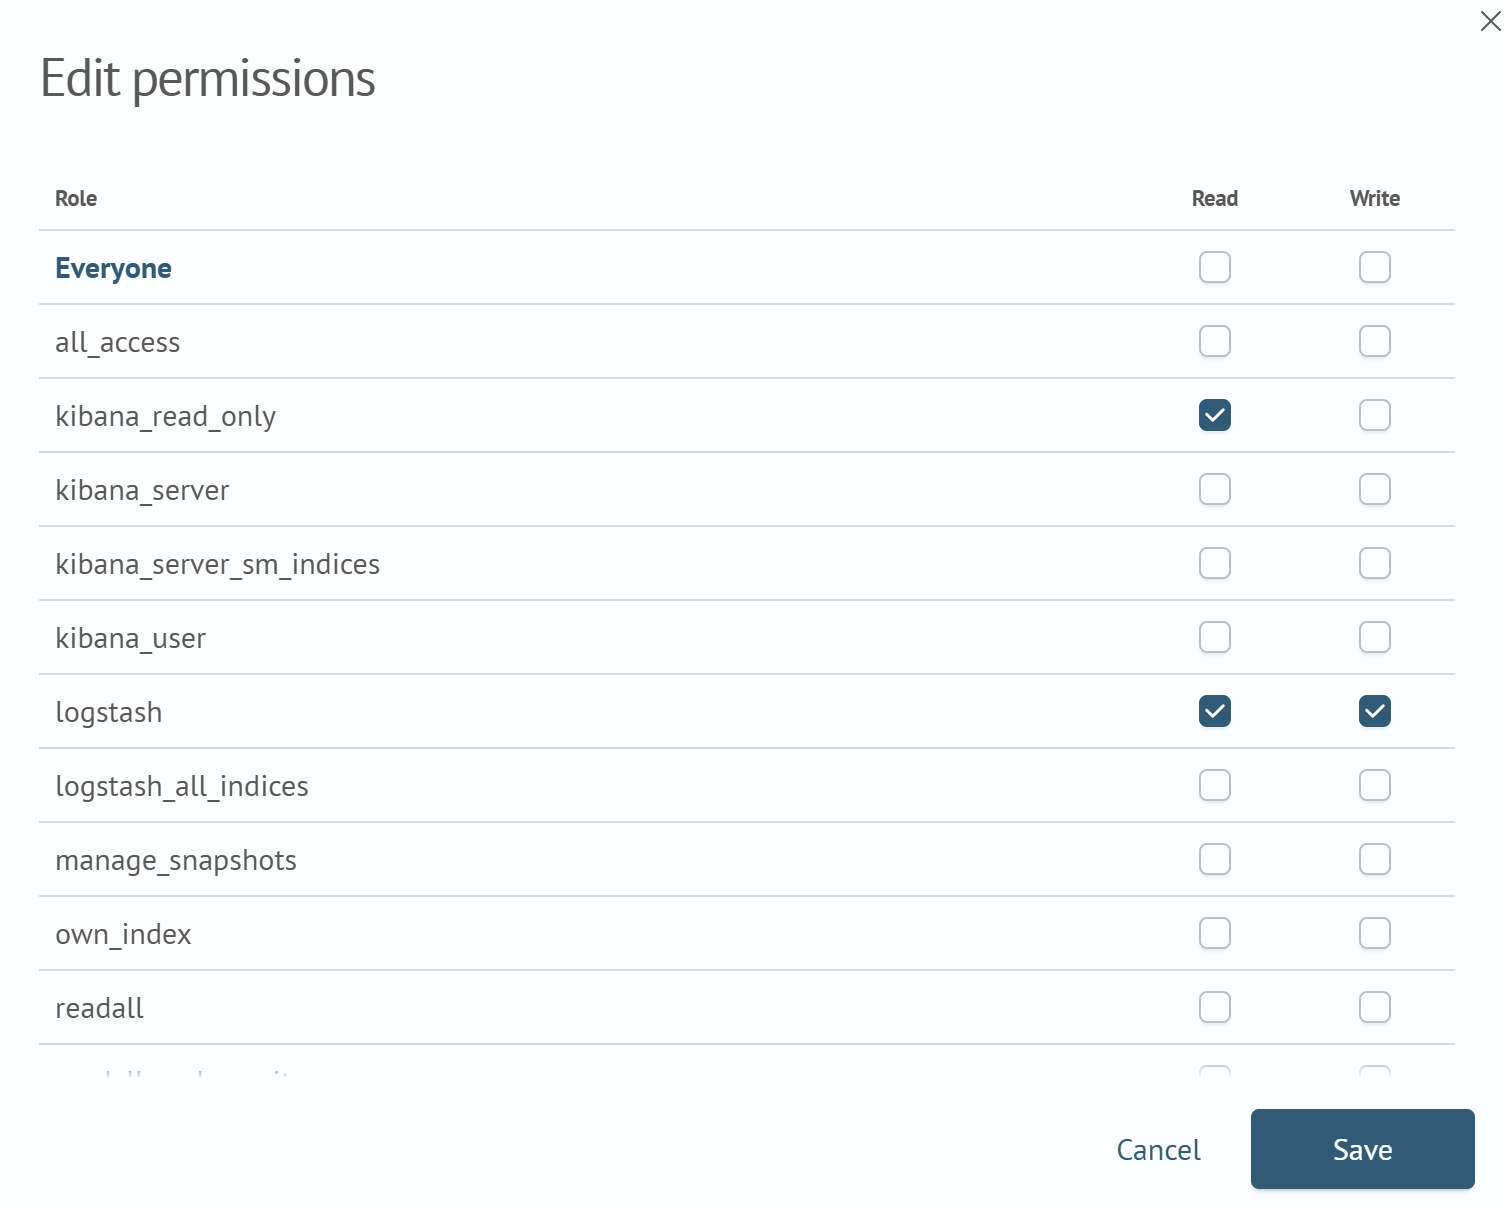
In the modal window, set the necessary permissions and save by clicking the Save button.
Assigning Tags
You can assign one or more tags to each task. Tags make it easy to find tasks in the table using the filter.
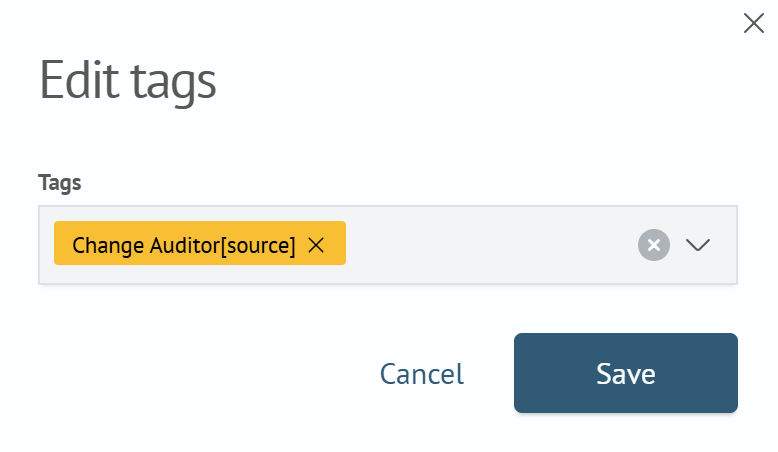
To set tags, expand the list of actions for the task by clicking the three-dot button on the right in the table. In the opened list, select Tags. Set the desired tags in the modal window and save by clicking the Save button.
Task tags are displayed in the table below their name and in the tag editing modal.
You can filter tasks using the Tags filter, located to the right of the search field. It's also convenient to filter tasks by a specific tag by clicking on the tag itself in any task. It will be added to the search field and filter the task list in the table.
Creating and Editing Tasks
To create a task, use the Create button on the top panel.
The task configuration interface contains two tabs: Main and Actions.
Settings on the "Main" Tab
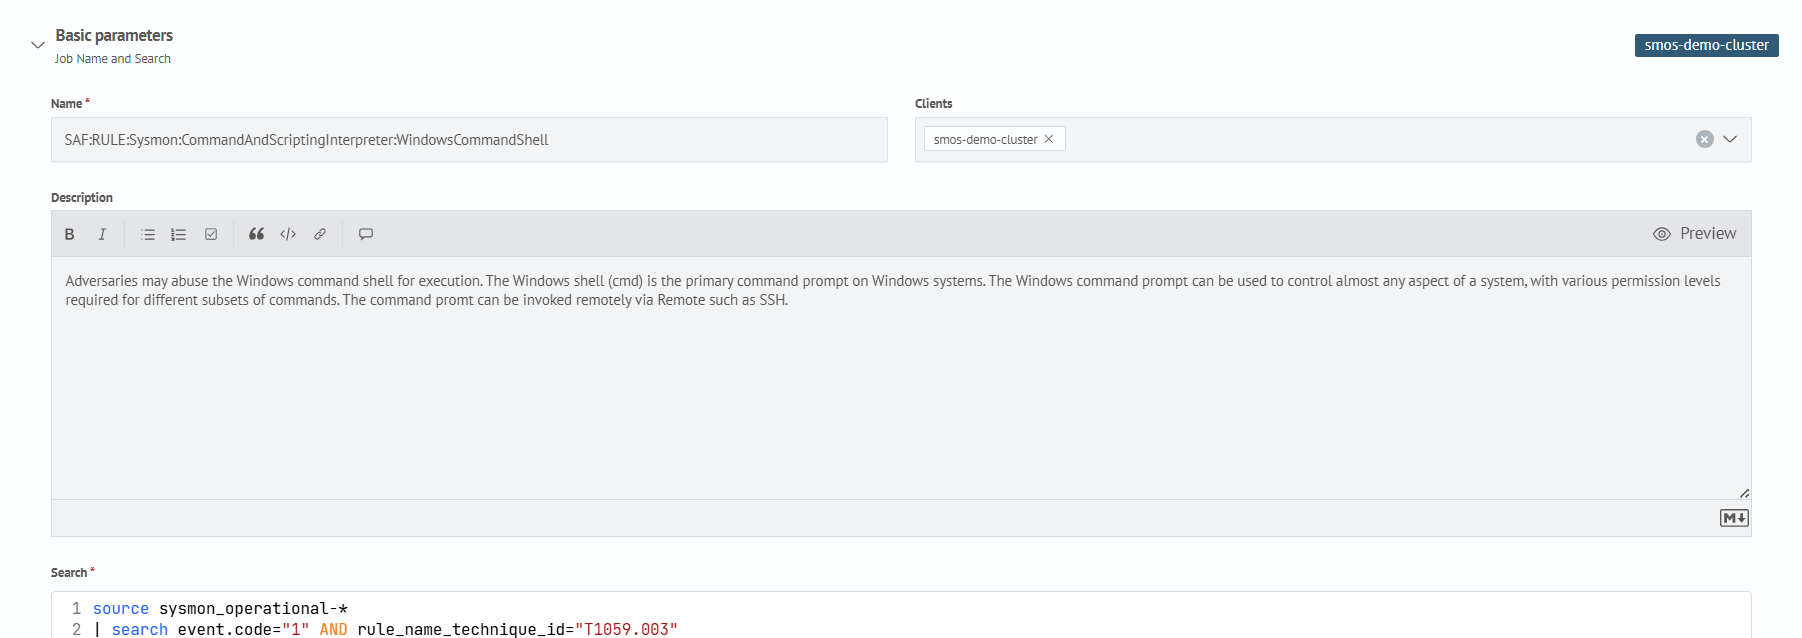
On the Main tab, in the Basic section, you can configure the general description and search query. The example below uses a search query to detect user account deletions.
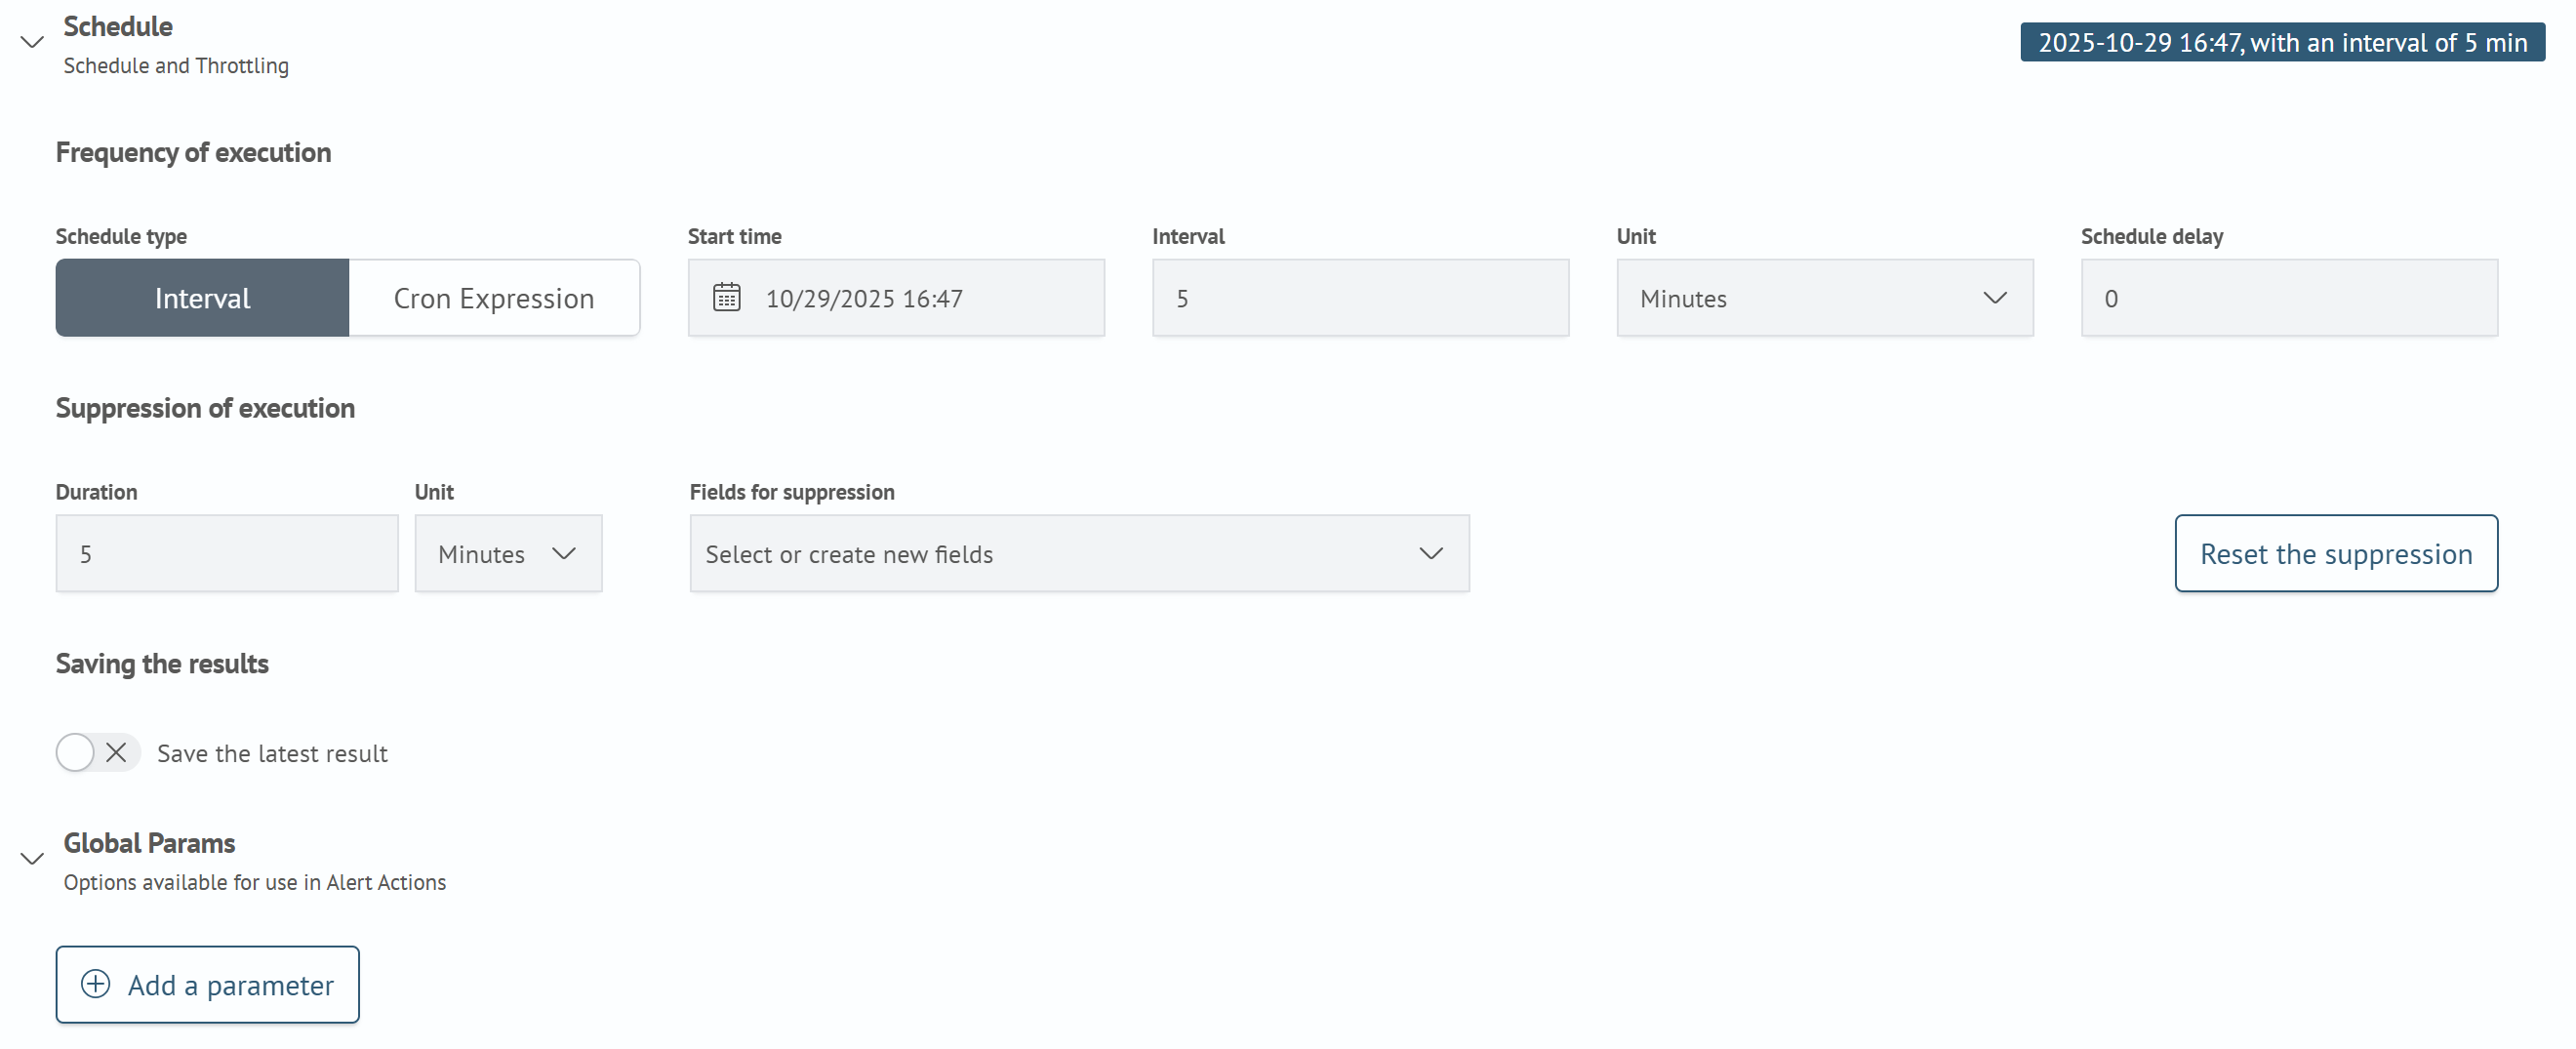
In the Schedule section, you can configure the frequency at which the search query will be executed and the parameters for suppressing duplicate events. Searching within a time interval equal to the search query execution interval allows you to consider the entire flow of events coming into the storage.
In situations where events are recurring, you can configure suppression by specifying fields for event comparison. When these fields match, duplicate events will be ignored for the specified time, allowing the active action to be triggered the desired number of times.
Clicking the Reset Suppression button clears information about recurring events, making them available for reuse in active actions.
The Save Results section allows saving the latest search results to disk. In this mode, the task runs in the background and overwrites the results on the hard drive with each execution. Search results can be retrieved using the loadjob command.
The Global Parameters section is intended for passing additional parameters and their substitution in active actions.
Settings on the "Actions" Tab
The Active Actions tab is for configuring the list of actions to be performed with the search query results.
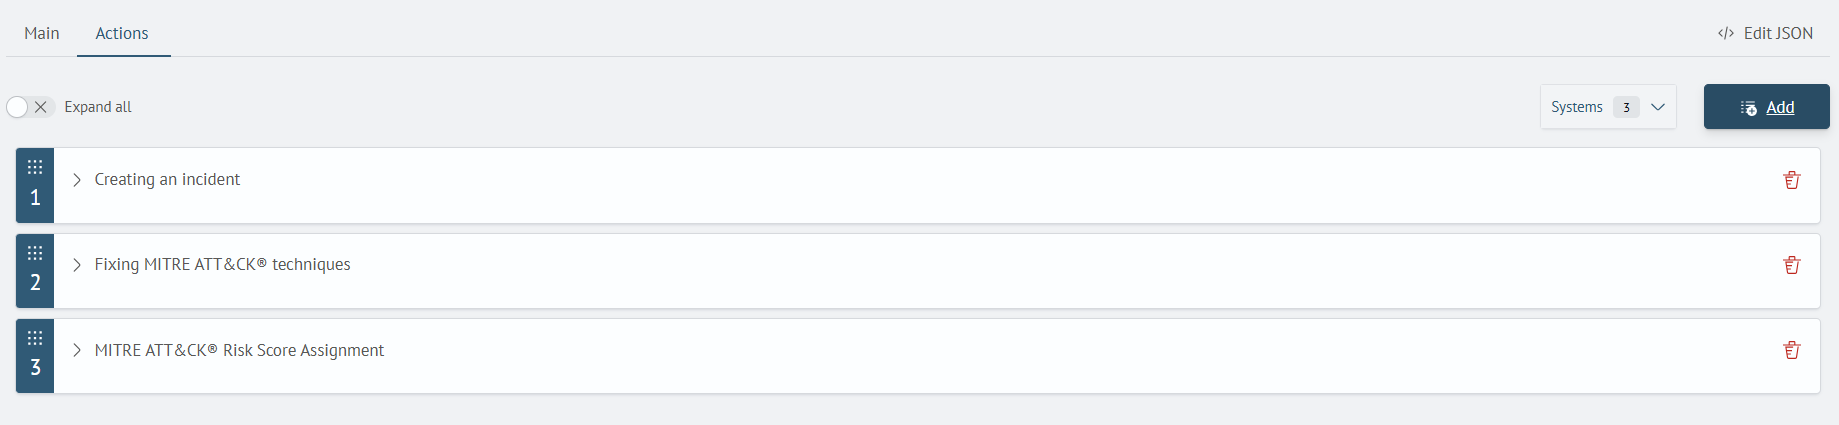
Active actions are performed only if search query results contain any events.
To add an active action, use the Add button and select the desired action.
After adding an active action, fill in the fields by expanding the block with the new action.
Note that field substitution from search query results can be used in action fields.
Let's add Incident Action - creating an incident in the Incident Manager.
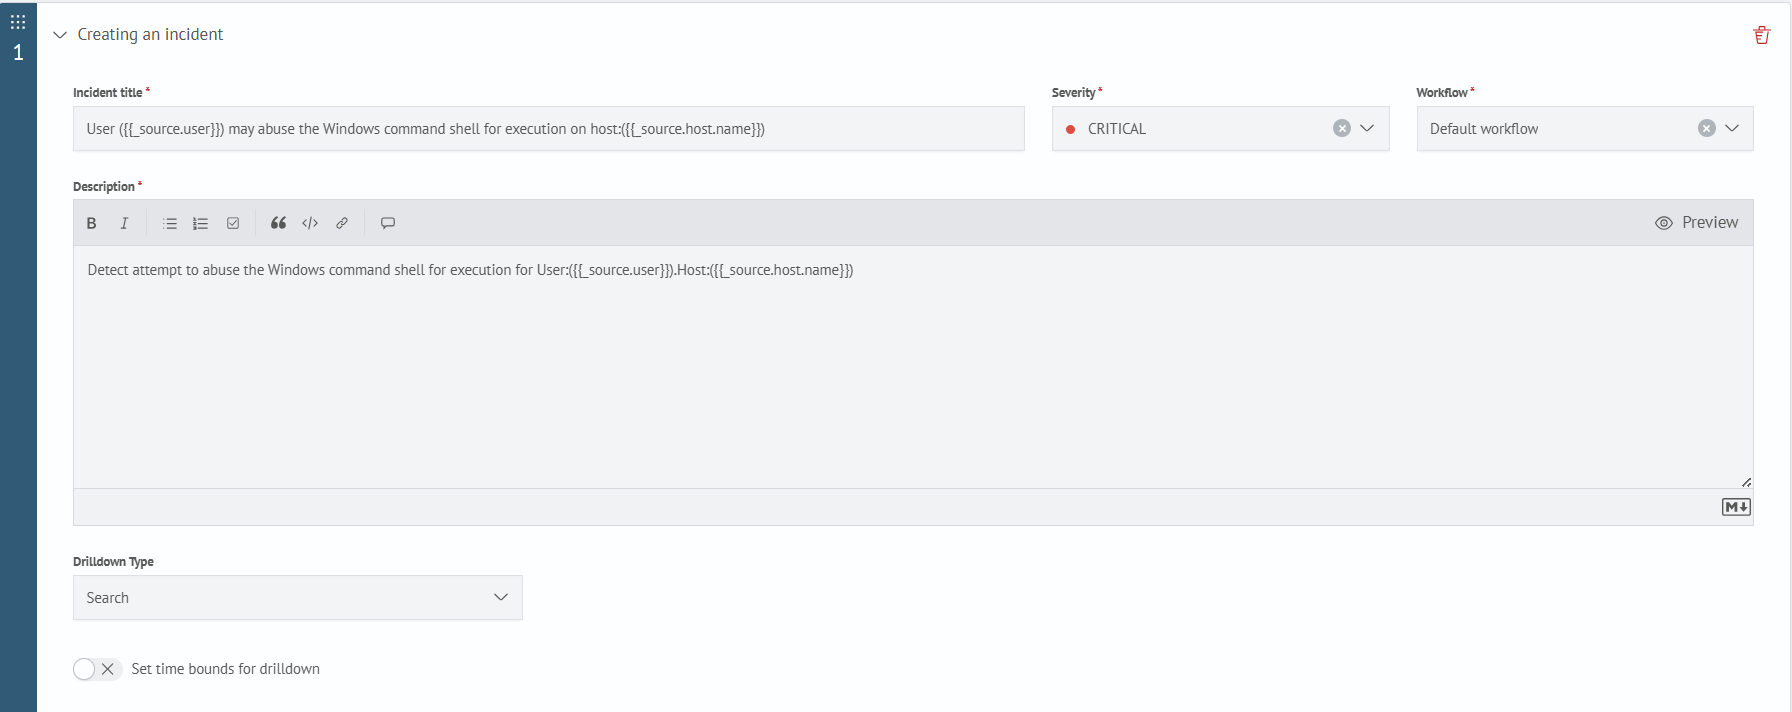
This action has its own set of fields, but field substitution from search query results is still available.
After performing the actions, there will be two items in the actions list. With multiple active actions, they are executed sequentially. The order can be adjusted by dragging the blocks.
After saving the task, it will start execution according to the specified schedule.
Scheduler Settings
In the example above, we used Email Action, which will send a notification email. To configure scheduler-related settings, including those related to email delivery, main to the Module Settings section in the Main Menu and select Scheduler Settings on the opened page.
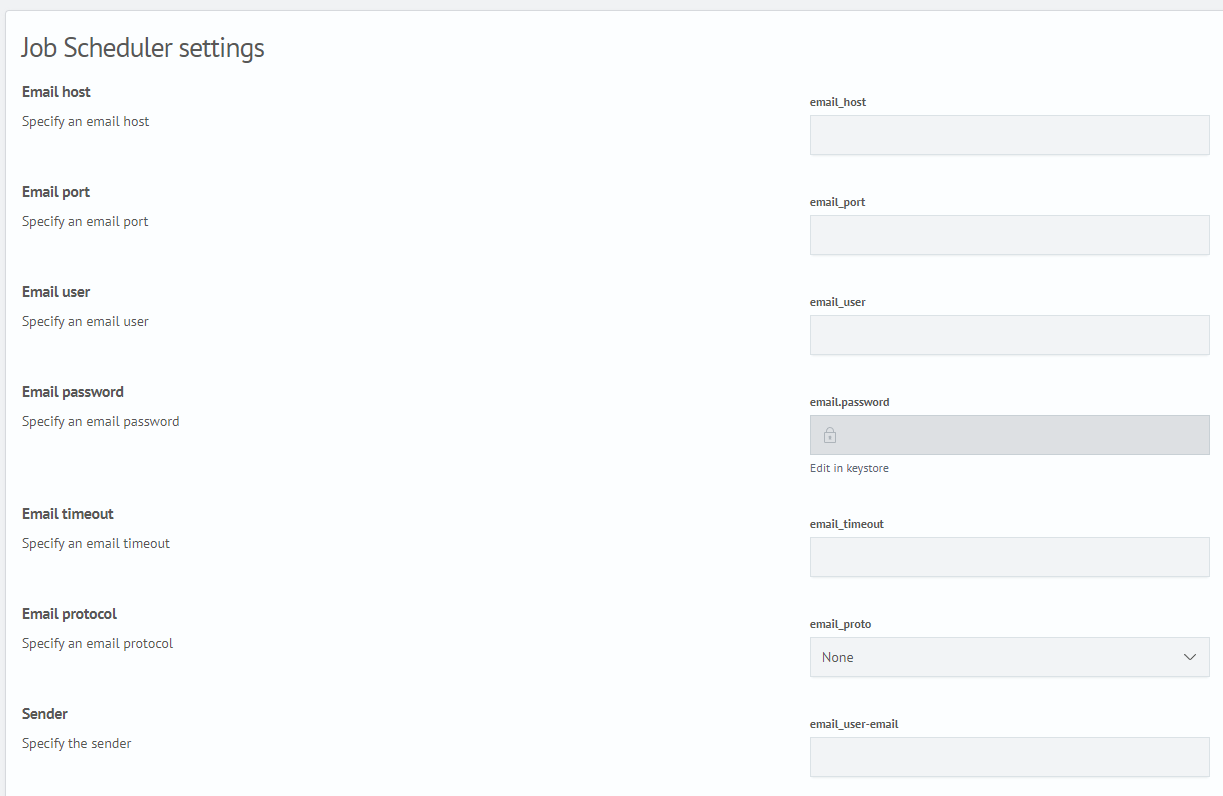
Here you can set the necessary settings for integration with your system. After entering the relevant parameters and saving the changes, the setup process can be considered complete.