Installing SA Master Node and SA Data Storage
Conventions:
SAF_INSTALLER- the directory where theSearch Anywhere Frameworkinstallation package is unpackedUSER- a system user with administrator rights, usuallyadmin
General
Unpack the installation package into a directory, for example, /app/distr and specify the unpacked directory as a variable:
tar xzf saf-installer-*.tar.gz -C /app/distr/
SAF_INSTALLER=/app/distr/saf_5.1/
A single installer is used to install SA Master Node and SA Data Storage. The installation script must be run as the root user, specifying the path to it:
${SAF_INSTALLER}/opensearch/install.sh
You can run the installation script as the opensearch user with limited privileges (in rootless mode). However, some commands must be executed before and after running the script by a user with elevated (root) privileges.
To launch the installation without elevated privileges, use the following command:
sudo -u opensearch ${SAF_INSTALLER}/opensearch/install.sh
A full update cannot be completed without root privileges. Some operations must be performed by a user with elevated rights.
The installer will display a list of required commands at the appropriate step.
If these commands are not executed before the update, data loss may occur.
Along with SA Master Node and SA Data Storage, SA Engine and its component SA Engine Remote Execution are installed.
SA Engine Remote Execution is used for remote execution of Python and other external scripts. In some cases, storage for intermediate data may be required, in which case the memcached package will need to be installed. For SA Master Node, SA Data Storage, and SA Engine Remote Execution, the owner opensearch and the group opensearch are used by default.
The $OS_HOME/uploads directory is used for uploading user files. This directory must be mounted as a shared network directory accessible from all SA Master Node and SA Data Storage nodes.
Read more.
When deploying a Search Anywhere Framework cluster, consider the number of SA Master Node nodes. It should be odd to avoid split-brain issues. SA Master Node and SA Data Storage are based on OpenSearch with the master role and OpenSearch with the data role, respectively.
The installer supports the following parameters:
-c, --config <path_to_config_file_yaml>- use a configuration file for installation-h, --help- display help
The installer supports the use of a configuration file; all parameters in the file correspond to the questions and parameters during manual installation.
Example configuration file ${SAF_INSTALLER}/opensearch/example_config_opensearch.yaml
OpenSearch:
  openSearchLocation:
    # Use already existing directories if found (if not will use default dirs)
    USE_PREVIOUS_OS_PATHS: y
    # User for install
    OS_USER: opensearch
    # Group for install
    OS_GROUP: opensearch
    # Home path to install directory
    OS_PATH_HOME: /app/opensearch
    # Directory OpenSearch configuration
    OS_PATH_CONFIG: /app/opensearch/config
    # Directory OpenSearch data storage
    OS_PATH_DATA: "/app/data/opensearch"
    # Directory OpenSearch logs storage
    OS_PATH_LOGS: /app/logs/opensearch
    # Path to license SAF file
    SA_LICENSE_PATH: /root/SAF-LICENSE.lic
    # Usage memcached
    SA_MEMCACHED_FLAG: n
  baseOpenSearchParameters:
    # Password for user 'admin'
    PASSWORD_FOR_ADMIN: $2y$12$OLRmqL1CBHJDZkG0R4wxC.Ifb9bcqDMsZWO9780bW3lKw9nn95GjO
    # Password of admin, use only with update script
    PASSWORD_FOR_ADMIN_UNSECURED: XXX
    # Username for update
    OS_USERNAME: selfmon
    # The usernames password for update
    OS_USERNAME_PASSWORD: XXX
    # Flag about password of user is hash
    IS_PASSWORD_HASH_FLAG: y
    # Name of the current node
    NODE_NAME: saf-node-00
    # OpenSearch roles of the current node
    NODE_ROLES_LIST: master, data, ingest
    # Routing mode for current node
    NODE_ROUTING_MODE: warm
    # Name cluster
    CLUSTER_NAME: saf-cluster
    # List of cluster OpenSearch nodes with master role
    DISCOVERY_SEED_HOSTS: 127.0.0.1
    # Calculate JVM Heap for OpenSearch instance
    CALCULATE_JVM_HEAP_SIZE: y
    # JVM Heap for OpenSearch instanse
    JVM_HEAP_SIZE: 4
    # Should disable allocation while installing
    DISABLE_ALLOCATION: false
  masterNodeParameters:
    # Is the cluster initialized
    CLUSTER_INIT_FLAG: n
    # Names of hosts with master role
    MASTER_NODE_LIST: saf-node-00
  openDistroSecurity:
    # Using existing certificates and keys
    USE_EXISTING_CERTS: n
    # Using existing CA certificate and private key to generate node certificate and private key
    EXISTING_CA_CERT: n
    # Path to existing CA certificate
    CA_CERT_PATH: autogenerated
    # Path to existing CA private key
    CA_KEY_PATH: autogenerated
    # Path to existing node certificate
    EXISTING_NODE_CERT: ./certs/node-cert.pem
    # Path to existing node private key
    EXISTING_NODE_PRKEY: ./certs/node-key.pem
    # Path to existing admin certificate
    EXISTING_ADMIN_CERT: ./certs/admin-cert.pem
    # Path to existing admin private key
    EXISTING_ADMIN_PRKEY: ./certs/admin-key.pem
    # CN for node certificate
    CERT_NODE_NAME: saf-node-00
    # Country code
    CERT_COUNTRY: AE
    # Region
    CERT_STATE: Dubai
    # City
    CERT_CITY: Dubai
    # Name organization
    CERT_ORG: SAF Test Org
    # Automatically get every available external IP for current node connection
    GET_EVERY_EXTERNAL_IP: y
    # IP for current node connection
    CERT_NODE_IP: 127.0.0.1
  installationProceed:
    # Kill processes of elasticsearch and opensearch if they started
    kill_current_instance: y
    # Clear existed folders
    clear_existed_folders: y
    # Making changes to the operating system
    continue_installation: y
    # Use username of OpenSearch for update
    use_os_username: n
    # Disable operations where root rights are required
    disable_root_operations: n
The configuration file has default settings for installing all Search Anywhere Framework components on a single node.
Initial Role Configuration
When creating a cluster with SSL/TLS, initializing the Security plugin in OpenSearch creates system indices. The first node in the cluster must have both master and data roles to ensure this initialization.
If initially it was planned to use only the data role without master, the following steps should be performed:
- Install the first cluster node with the
masteranddataroles - Install the next cluster node with the
masterordatarole - Use the
elasticsearch-node repurposeutility to change the roles of the first cluster node
You can read more about the elasticsearch-node repurpose utility in this article.
Role exclusion operations can be performed manually, as detailed in this article.
Setting up the Main Directories
The first step involves analyzing the system. If there is already an installed and running instance of OpenSearch or Elasticsearch, it may issue a warning:
================================================================================
SEARCH ANYWHERE FRAMEWORK INSTALL SCRIPT - OPENSEARCH
================================================================================

Current working directory: /app/distr/saf_5.1/opensearch

Current name of install's archive: opensearch-2.18.0-linux-x64.tar.gz

Current version OpenSearch: 2.18.0

================================================================================
-- STEP 1. INSTALLATION DIRECTORIES AND LICENSE

!!! You have running instance of OpenSearch. Installer support only one running instance per node.
Do you want to continue? [y/N]:
The script displays the detected installation archive and the version of OpenSearch to be installed. By default, the installation will be cancelled unless you enter y to continue. After confirmation, any running instances will be stopped.
If you are reinstalling the node, the installer will take the directory settings and license location from the current server.
In the first step, the main installation directories are set, the Search Anywhere Framework license is specified, and whether to use memcached is determined. We recommend storing all files related to Search Anywhere Framework in a single directory /app/; this will simplify further maintenance.
If you are performing a test installation and plan to install all Search Anywhere Framework components on one server, you must specify separate directories for each component.
The following set of parameters is requested in this step.
| Parameter | Description | Default Value |
|---|---|---|
home directory | Installation directory for OpenSearch | /app/opensearch |
conf directory | Directory for configuration files | /app/opensearch/config |
data directory | Directory for storing indexed data | /app/data/opensearch |
logs directory | Directory for storing logs | /app/logs/opensearch |
Search Anywhere Framework license path | Full path to the Search Anywhere Framework license file | |
Is memcached needed | If you plan to use memcached, select y to enable and configure it; memcached must be installed before this point |
-- STEP 1. INSTALLATION DIRECTORIES AND LICENSE

Opensearch home directory [/app/opensearch]:
Opensearch conf directory [/app/opensearch/config]:
Opensearch data directory [/app/data/opensearch]:
Opensearch logs directory [/app/logs/opensearch]:
Search Anywhere Framework license path [/app/distr/opensearch/saf.lic]:
Do you want to use memcached in your Search Anywhere Framework? [y/N]:

Final Opensearch home directory: /app/opensearch
Final Opensearch conf directory: /app/opensearch/config
Final Opensearch data directory: /app/data/opensearch
Final Opensearch logs directory: /app/logs/opensearch
Final Search Anywhere Framework license path: /app/distr/opensearch/saf.lic
Is memcached needed: n
Is this correct? [y/n]:
After entering the data, the script will ask for confirmation of the correctness of the input. Confirm by entering y and pressing Enter. The installer will analyze the existing directories, and if they are not empty, it will issue a warning again:
!!! You've chosen not empty directories. All files will be deleted.
Do you want to continue? [y/N]:
If you continue, all content in the specified directories will be deleted without the possibility of recovery!
To continue the installation, you need to enter y again and press Enter.
Rootless Installation
At this stage, you can disable the use of commands that require elevated root privileges by choosing the rootless installation mode.
-- STEP 2. DISABLE OPERATIONS WHERE ROOT RIGHTS ARE REQUIRED

Want to install SEARCH ANYWHERE FRAMEWORK without root privileges? [y/N]:
To continue installation in rootless mode, type y and press Enter.
If you prefer to proceed as the root user, type n or simply press Enter.
Linux username for SEARCH ANYWHERE FRAMEWORK [opensearch]:
Linux groupname for SEARCH ANYWHERE FRAMEWORK [opensearch]:

Final SEARCH ANYWHERE FRAMEWORK username: opensearch
Final SEARCH ANYWHERE FRAMEWORK groupname: opensearch
Is this correct? [Y/n]:
Next, specify the system (Linux) user and group under which the SA Data Storage or SA Master Node service will run.
By default, this is opensearch. Press Enter to accept the default values.
Afterward, confirm the entered user and group by pressing Enter.
If the rootless mode is selected, a message will appear with a list of preparatory commands that must be executed by a user with elevated privileges, such as root:
 ATTENTION!
Before installing SEARCH ANYWHERE FRAMEWORK, you must run the following commands as a user with root privileges.
Change user, group and directories as needed

/bin/dnf install zip unzip openssl curl
systemctl stop sme-re
systemctl stop opensearch
groupadd --system opensearch
useradd --system --no-create-home -g opensearch opensearch
mkdir -p /app/opensearch
mkdir -p /app/opensearch/config
mkdir -p /app/data/opensearch
mkdir -p /app/logs/opensearch
chown -R opensearch:opensearch /app/opensearch /app/opensearch/config /app/data/opensearch /app/logs/opensearch /app/distr/saf_5.1/opensearch

!!! Are you sure you have done everything from the list above? [y/N]:
If you have completed all the necessary steps, type y and press Enter to proceed.
If you still need to perform any actions or want to cancel the installation, simply press Enter.
The installer includes several validation checks. If any issues are detected, the script will automatically stop and display the following message:
You need to chown all directories, login as opensearch and run the script again.
Setting Cluster and Current Node Parameters
In this step, the basic parameters for OpenSearch are entered.
| Parameter | Description |
|---|---|
Node name | Name of the current OpenSearch node |
Node roles list | List of roles for the current OpenSearch node, listed comma-separated with a space. Note that the cluster must have the roles master and data (or master, data_content, and data_hot). That is, if the cluster consists of a single node, it must include these roles. |
Node routing mode | If you plan to use tiered data storage (hot-warm-cold), you can specify the required tier for this node here. |
Bind address— The IP address of the interface on whichOpenSearchwill accept incoming connections. By default, all available network interfaces (0.0.0.0) are listened to. It is possible to specify multiple IP addressesOpenSearch cluster name— The name of the clusterCluster discovery seed hosts— The IP addresses of nodes with themasterrole (if you plan to deploy a cluster of several nodes, this setting should be the same on all nodes and point to external IP addresses). You can specify multiple IP addresses in quotes, separated by commas. We recommend using an odd number of nodes with themasterrole, otherwise, voting problems may occur within the clusterJVM heap size— The amount of memory in GB allocated for the OpenSearch JVM. This parameter should not exceed half of the free RAM on the server. The parameter sets the-Xmsand-Xmxvalues for Java. It is not recommended to specify less than 4GB to maintain performance and speed. It is also not recommended to set it to more than 31GB. The script automatically calculates half of the available RAM and suggests it as the default value
-- STEP 3. BASE OPENSEARCH PARAMETERS

Node name [saf-node-00]:
Node roles list [master, data, ingest]: master, data
Node routing mode [warm]:
Bind address [0.0.0.0]:
Opensearch cluster name [saf-cluster]:
Cluster discovery seed hosts ["127.0.0.1", "[::1]"]:
It is recommended to set heap at least 4GB, but no more than 31GB and no more than 50% of the available RAM
JVM heap size in GB [4]: 3

Final node name: saf-node-00
Final node roles list: master, data
Final node routing mode: warm
Final bind address: [ "0.0.0.0" ]
Final Opensearch cluster name: saf-cluster
Final discovery seed hosts: [ "127.0.0.1" ]
Final JVM heap size in GB: 3
Is this correct? [y/n]:

Do you want to continue? [y/N]:
Cluster Initialization
This step sets the parameters for the initial initialization of the OpenSearch cluster.
Is cluster initialized— Whether the cluster is initialized (when deploying the first node, you must answer no (n) to perform initialization; when deploying all subsequent nodes, answeryor simply pressEnter)
-- STEP 4. MASTER NODE TUNING

Is cluster initialized [Y/n]: n

Is cluster initialized: n
Is this correct? [y/n]:
Setting the Password for the admin User
Next, you are prompted to enter a password for the admin user in OpenSearch. You can specify a password hash (at the end of this step, you will be asked if the entered sequence is a hash) or enter another sequence.
-- STEP 5. SET USER PASSWORD

Enter password for user "admin":
Enter password for user "admin" again:

Password for user 'admin': $2y$12$OLRmqL1CBHJDZkG0R4wxC.Ifb9bcqDMsZWO9780bW3lKw9nn95GjO

Is it password hash: y
Is this correct? [y/n]:
By default, if you don't enter anything, a hash corresponding to the default password will be set: P@ssWoRdElastic.
You can read about creating a password hash in this article.
Setting Certificate Parameters
When creating private keys, the RSA cryptographic algorithm with a length of 2048 bits is used, and the SHA256 algorithm is used to create a digital fingerprint. The self-signed CA certificate, according to our algorithm, is created for 3650 days, and the admin and current server certificates are created for 1095 days.
This step initializes the self-signed Certificate Authority (CA) certificate and creates the certificate for the current node. You can specify existing CA certificate and private key files.
Do you want to use existing CA certificate— Do you want to use existing certificate and key files? You can specify your own files or use the built-in algorithm. If you are using the built-in algorithm, answerno (n)only during the first installation. For subsequent nodes, you should use the files from the current configuration directory (by default:/app/opensearch/config/ca-cert.pemfor the certificate and/app/opensearch/config/ca-key.pemfor the private key)Do you want to use an existing CA certificate and private key to generate certificates and keys for this node?— If you chooseno, you will need to manually provide all the necessary certificates for the node to work. Otherwise, by choosingyes, the remaining certificates will be automatically generated based on the CA certificate and keyPath to CA certificate— Path to the root certificate (the certificate must be the same on all Search Anywhere Framework components)Path to CA key— Path to the private key (the key must be the same on all Search Anywhere Framework components)CN for node certificate— Common name for the current nodeCountry for node certificate— Country nameState for node certificate— State/region nameLocality for node certificate— City nameOrganization for node certificate— Organization nameExternal IP— The external IP address of the current node that will be used to interact with other components. It is calculated automatically and offered as an option
Below is an example with specifying existing CA private key and certificate:
-- STEP 5. OPENDISTRO SSL/TLS SETTINGS

Do you want to use your existing certificates and keys? [y/N]:
The selfsigned certificate will be created
CN for node certificate [saf-node-00]:
Country for node certificate [AE]:
State for node certificate [Dubai]:
Locality (city) for node certificate [Dubai]:
Organization for node certificate [SAF Test Org]:
External IP for alt_names extension [172.16.0.22]:
Final path to CA certificate: autogenerated
Final path to CA key: autogenerated
Final CN for node certificate: saf-node-00
Final country for node certificate: AE
Final state for node certificate: Dubai
Final locality (city) for node certificate: Dubai
Final organization for node certificate: SAF Test Org
External IP for alt_names extension: 172.16.0.22
Is this correct? [y/n]:
After entering the data, you need to confirm the correctness of the input.
Configuration Generation
No action is required from the administrator at this stage. This stage is conditionally divided into two points:
- Preparing temporary directories, performing checks, preparing templates
- Generating configuration files from the specified parameters
Certificate Creation
No action is required from the administrator at this stage. Private keys and certificates are created from the specified parameters.
Archive Extraction and Configuration File Modification
No action is required from the administrator at this stage. The archive containing OpenSearch is extracted, the configuration files extracted from the archive are modified, and preparatory processes are carried out before system changes.
All operations up to this point have been performed strictly within the installer directory and do not affect the operating system. You can view the set of files ready for installation in the staging directory.
For this, the administrator will be asked for permission to continue the installation:
!!! AT THIS POINT WE START TO MAKE CHANGES IN OPERATING SYSTEM !!!
Do you want to continue? [y/N]:
Confirm the changes to continue the installation by pressing y and then Enter.
Installation
No action is required from the administrator at this stage. Several actions take place here:
- Creating groups and users
- Creating directories
- Copying files and configurations
- Changing file and directory permissions
- Applying the SELinux security context
If the rootless installation mode was selected, some operations will not be executed.
Startup and Verification
No action is required from the administrator at this stage, and the following actions are performed:
- Starting the
opensearchandSA Engine Remote Executionservices - Checking the operability of the services
- Applying the security index
This step will be skipped if the rootless installation mode was selected.
Cluster Tuning
No action is required from the administrator at this stage, and cluster parameters are tuned.
This step will be skipped if the rootless installation mode was selected.
Completing the Installation
If the rootless installation mode was selected, the following message will be displayed:
 ATTENTION!
After installing SEARCH ANYWHERE FRAMEWORK, you must run the following commands as a user with root privileges.
Change user, group and directories as needed.

cp /app/distr/saf_5.1/opensearch/staging/config/opensearch/00-opensearch.conf /etc/sysctl.d/
cp /app/distr/saf_5.1/opensearch/staging/services/opensearch.service /etc/systemd/system/
cp /app/distr/saf_5.1/opensearch/staging/services/sme-re.service /etc/systemd/system/
chown root:root /etc/sysctl.d/00-opensearch.conf /etc/systemd/system/opensearch.service /etc/systemd/system/sme-re.service
sysctl -p /etc/sysctl.d/00-opensearch.conf
chcon -Rv -u system_u -r object_r -t bin_t /app/opensearch/bin
chcon -Rv -u system_u -r object_r -t bin_t /app/opensearch/jdk/bin
chcon -Rv -u system_u -r object_r -t var_run_t /app/opensearch/run
chown -R opensearch:opensearch /app/opensearch /app/opensearch/config /app/data/opensearch /app/logs/opensearch
systemctl daemon-reload
systemctl enable sme-re opensearch
systemctl start sme-re
systemctl start opensearch
systemctl status sme-re opensearch

Wait 60 seconds and run the following commands as a "opensearch" or user with root privileges:

JAVA_HOME=/app/opensearch/jdk/ /app/opensearch/plugins/opensearch-security/tools/securityadmin.sh -h localhost -cacert /app/opensearch/config/ca-cert.pem -cert /app/opensearch/config/admin-cert.pem -key /app/opensearch/config/admin-key.pem --accept-red-cluster --clustername saf-cluster --configdir /app/opensearch/config/opensearch-security/

curl -k -XPUT https://localhost:9200/_cluster/settings -H "Content-Type: application/json" -d '{ "persistent": { "search_backpressure.mode": "enforced", "shard_indexing_pressure": { "enforced": "true", "enabled": "true" }}}' --cacert /app/opensearch/config/ca-cert.pem --cert /app/opensearch/config/admin-cert.pem --key /app/opensearch/config/admin-key.pem
The listed commands must be executed by a user with elevated (root) privileges.
Cluster initialization and tuning commands must be run only on the first SA Data Storage node.
Upon completion of the installation, a firewall configuration message should appear, for example, for firewalld, as well as a successful installation message, as shown in the image below. Any other type of installation completion indicates an error, and additional corrective actions are required.
================================================================================
-- Additional firewall configuration example (if needed)
-- For RHEL/CentOS with firewalld example
    firewall-cmd --permanent --zone=public --add-port=9200/tcp
    firewall-cmd --permanent --zone=public --add-port=9300/tcp
    firewall-cmd --reload
-- For AstraLinux/Debian with ufw example
    ufw allow 9200/tcp
    ufw allow 9300/tcp
================================================================================

================================================================================
-- SEARCH ANYWHERE FRAMEWORK SUCCESSFULLY INSTALLED!
For further instructions, please refer to the documentation: https://docs.saf-systems.com
================================================================================
Upon successful completion of the installer, the node is deployed and ready for use. The opensearch and SA Engine Remote Execution services should be running on it.
The services will start automatically after the operating system reboots.
Note that you need to configure the firewall for the following ports:
9200/tcp– Port for accessing the OpenSearch REST API9300/tcp– Port for cluster node interaction
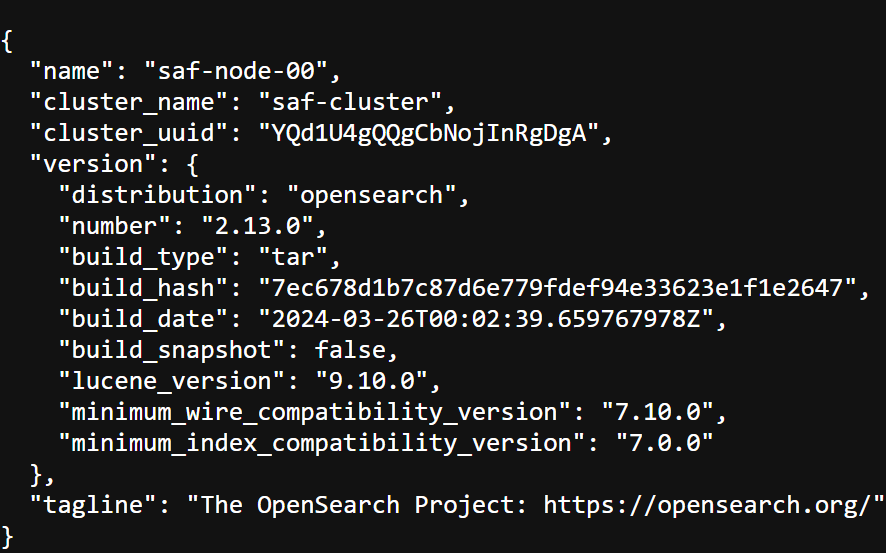
To check operability, open the https://<your-server-ip-address>:9200 page in your browser. Or you can make a request from the server console:
curl -k -u admin https://127.0.0.1:9200
Use the username admin and the password you entered during installation: