Configuring Additional Components
Firewall
All of our installers display a message with an example firewall configuration at the end. This example is not recommended for production environments, only for testing.
For a test environment, it's sufficient to allow access on the port from anywhere. For example, to allow access to OpenSearch-Dashboards, enter the following command as the root user:
firewall-cmd --add-port=5601/tcp
This rule will be active until the firewalld service or the OS is restarted. To make the rule permanent, modify the command:
firewall-cmd --permanent --zone=public --add-port=5601/tcp
firewall-cmd --reload
You can create a service in firewalld terminology, but in practice, it's not very convenient to use it for SAF.
For production environments, we recommend creating a separate zone in firewalld terminology and creating a rule within it to allow the necessary ports. The access filter to the zone can be a collection of IP addresses (ipset) or an interface if it is located entirely within a trusted zone.
If you use iptables instead of firewalld in your environment (assuming you have firewalld disabled), the following command will suffice for a test environment:
iptables -A INPUT -s 0.0.0.0/0 -p TCP --dport 5601 -j ACCEPT
This command will open port 5601/tcp for everyone, but the rule will be added to the end of the list. If a deny rule is used at the end, it's better to add the rule to the beginning (in the example, we add it instead of the first line):
iptables -I INPUT 1 -s 0.0.0.0/0 -p TCP --dport 5601 -j ACCEPT
Cluster Settings for Smart Monitor Single Instance
Single Instance refers to a cluster deployed on a single server that has been assigned at least the master and data roles. After installation, this cluster will have a yellow status. This occurs because replicas cannot be placed on the same node as primary shards. To change the cluster status to green, you need to set the number_of_replicas parameter to 0, thereby disabling replica creation both at the cluster configuration level and for individual indexes.
To check cluster settings, use the following command in the Developer Console (Main Menu - System Settings - Developer Console):
GET _cluster/settings?flat_settings&include_defaults
Example command output:

The following parameters should be set to 0:
cluster.default_number_of_replicas- sets the default number of replicas created for all new cluster indexesopendistro.index_state_management.history.number_of_replicas- previously used to configure ISM log replicas in Open Distro (now a deprecated parameter)plugins.index_state_management.history.number_of_replicas- sets the number of replicas for ISM log indexes in modern OpenSearch versions
Configure the cluster using this command:
PUT _cluster/settings
{
  "persistent": {
    "cluster.default_number_of_replicas": "0",
    "opendistro.index_state_management.history.number_of_replicas": "0",
    "plugins.index_state_management.history.number_of_replicas": "0"
  }
}
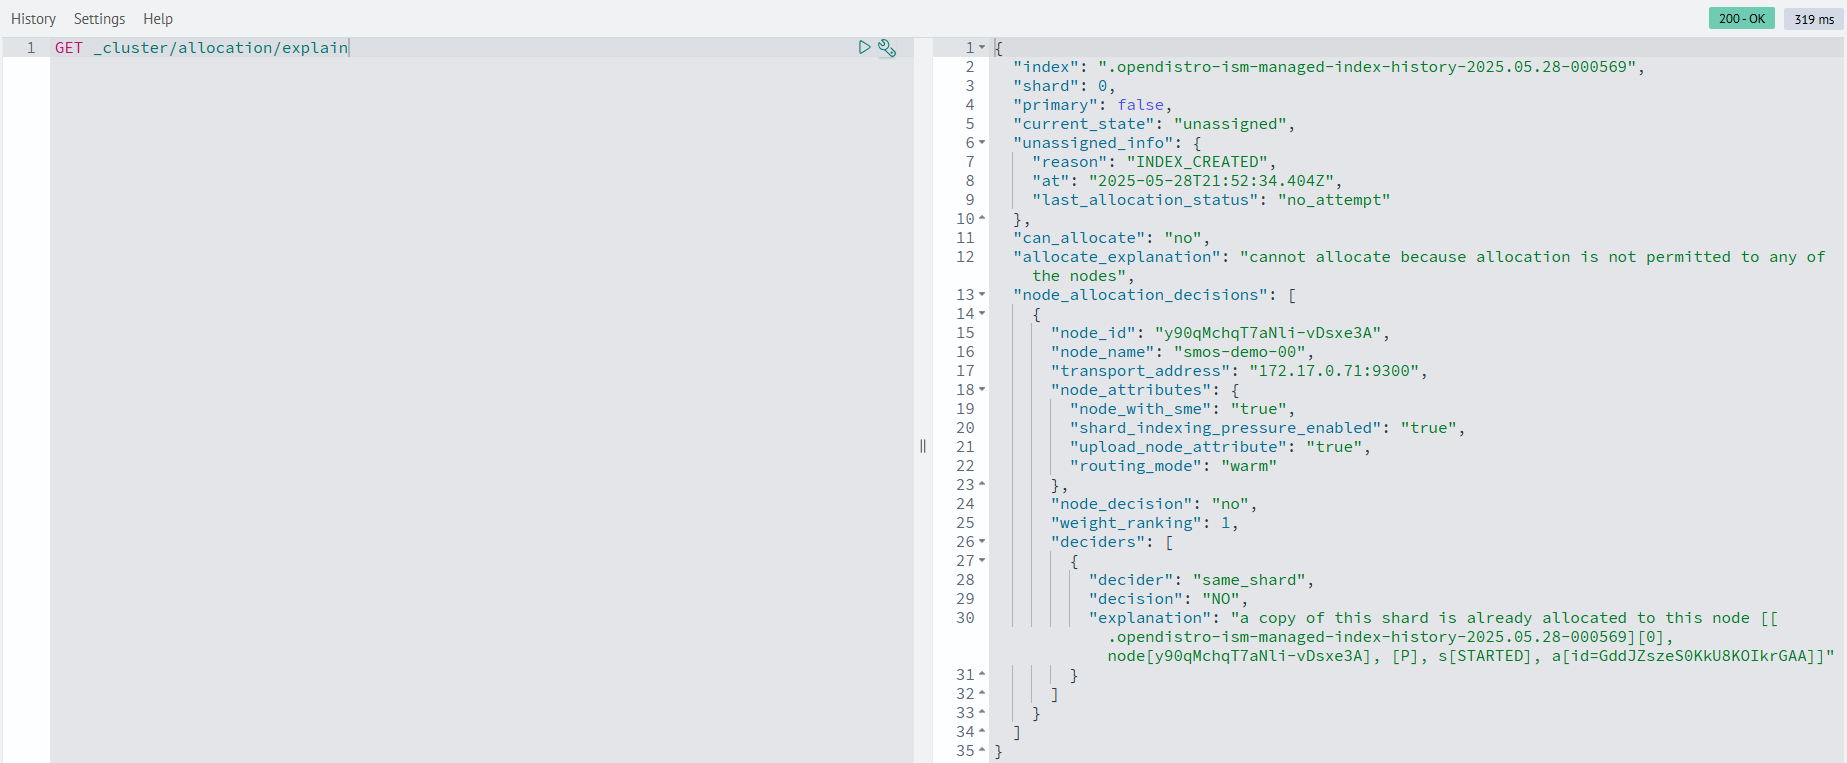
To identify indexes with incorrect replica configurations, execute this command in the Developer Console (Main Menu - System Settings - Developer Console):
GET _cluster/allocation/explain
Example command output:

View detailed index parameter information with this command in the Developer Console (Main Menu - System Settings - Developer Console):
GET <index>/_settings

For indexes with incorrect replica counts, set the number_of_replicas parameter to 0:
PUT <index>/_settings
{
  "settings": {
    "index": {
      "number_of_replicas": "0"
    }
  }
}