Filters
Overview
The dashboards created have filtering functionality that allows you to customize the display of data according to your specific needs. This means you can create complex and detailed views of data within a single dashboard.
Filters provide flexibility in information management. You can apply various criteria to select data, including date ranges, categories, keywords and more. This allows you to find the information you need quickly and efficiently without getting lost in large volumes of data.
In addition, filters can be customized to automatically update in real time. This means you will always see the most relevant and up-to-date information, without having to manually update the dashboard.
Creating Filters
In order to create a filter, go to the dashboard editing mode by clicking on the corresponding button in the upper right needle of the dashboard. Then you should press the Add input button in the upper left corner of the dashboard. Next, you select the type of filter from the dropdown menu:
To create a filter:
- Go to the dashboard editor
- Click the
Add Inputbutton - Select the filter type from the dropdown list
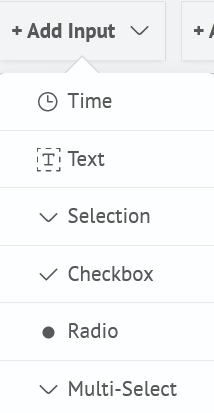
The following filter types are available in Search Anywhere Framework:
| Input | Description | Interface |
|---|---|---|
Time | filter for selecting the time interval | |
Text | filter for precise filtering, e.g. by IP address | |
Selection | single-select filter | |
Checkbox | multiple choice filter | |
Radio | single-select filter from a small set | |
Multi-Select | filter to select multiple values from a list |
After selecting the filter type, the created filter will be displayed above the visualization panels.

Filters can be edited by clicking on the pencil icon. Once clicked, the filter editing window will appear on the right.
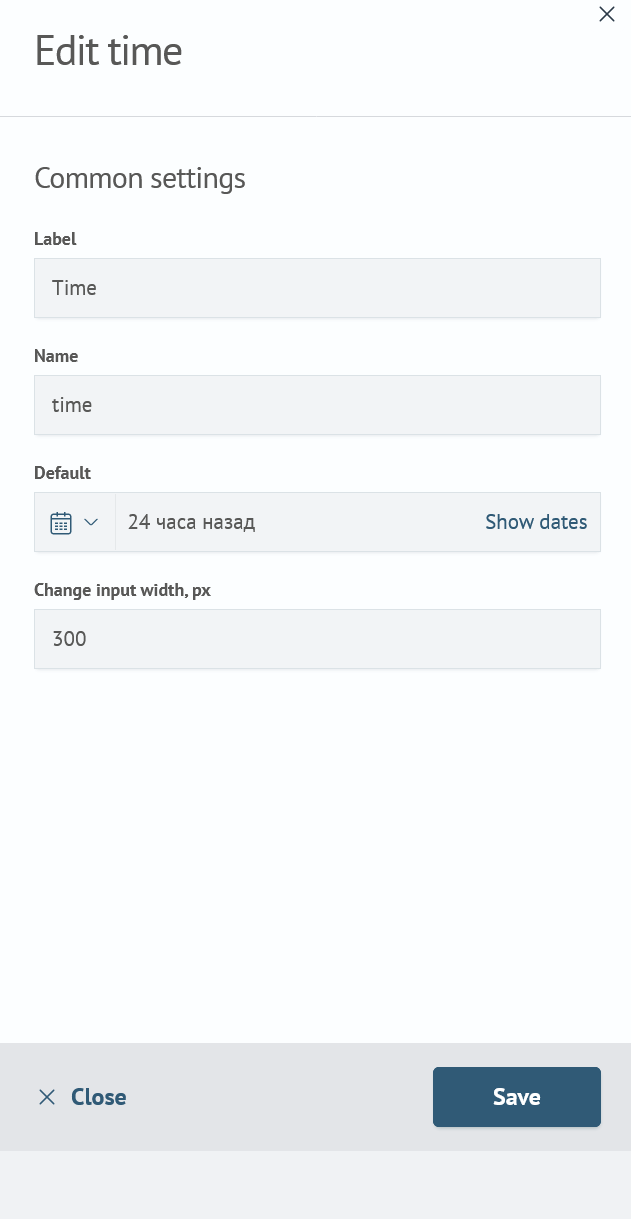
Depending on the filter, the window includes the following items:
Common settings- settings that specify the basic functionality of the filterStatic options- list of filtering options that are specified manuallyDynamic options- list of filtering options that are generated using SAFL query results.
Further description of filter settings uses a filter of Selection type.
Common settings
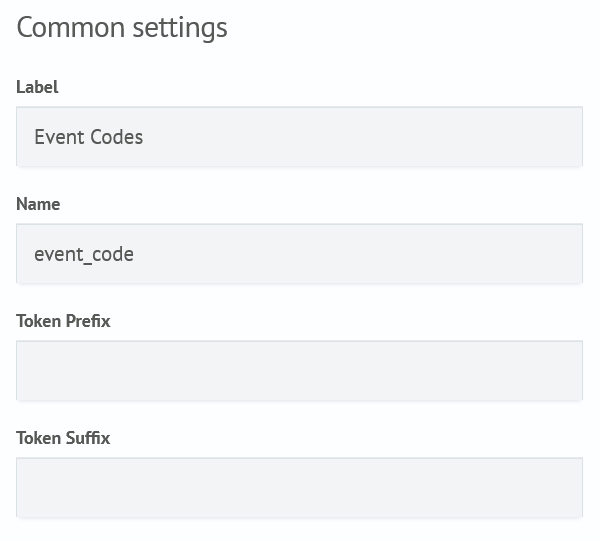
Common settings include the basic filter parameters:
Label- the displayed name of the component on the dashboardName- token name to be used in search queriesToken prefix- text before the token valueToken suffix- text after the token value
You can learn more about tokens in the Tokens section.
Static options
The static options block has the following fields:
Label- the displayed name in the listValue- the value to be substituted into the tokenDefault- the value that will be substituted into the token by default
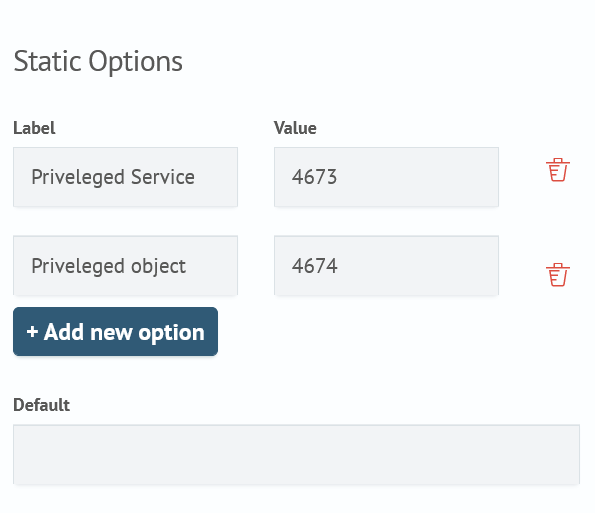
Now in the example above, the filter list will display the values that are specified in the static options.
Thus, when Priveleged Service is selected, 4673 will be substituted into the token, and when Priveleged Object is selected, 4674 will be substituted into the token.
Dynamic options
The dynamic options block allows you to compile a list of filter options from the results of a query in SAFL language. The block has the following appearance and fields:
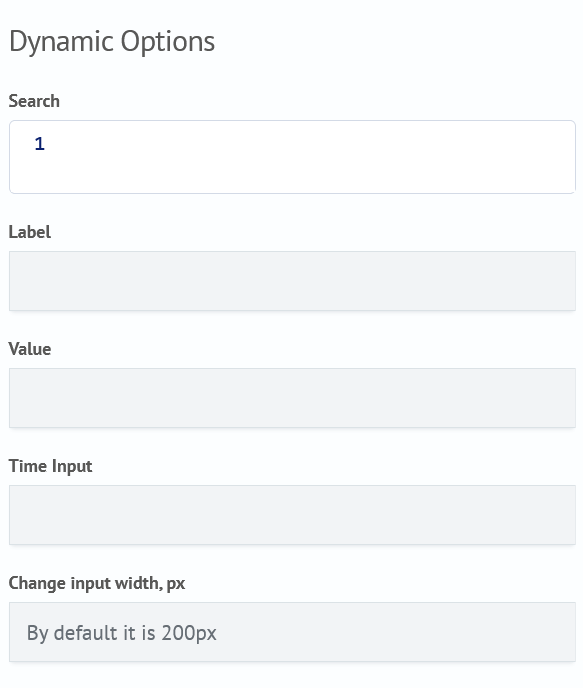
Search- query in SAFL language, the results of which will be used in the filterLabel- field from the query results that will be displayed in the drop-down listValue- filter value that will be substituted into the token when the option is selectedTime Input- mandatory parameter for specifying time limits for the query
For dynamic options to work in a filter of the Selection type, the Time temporary filter token is required. To do this, you need to create a temporary filter and specify the following settings for it, as an example:
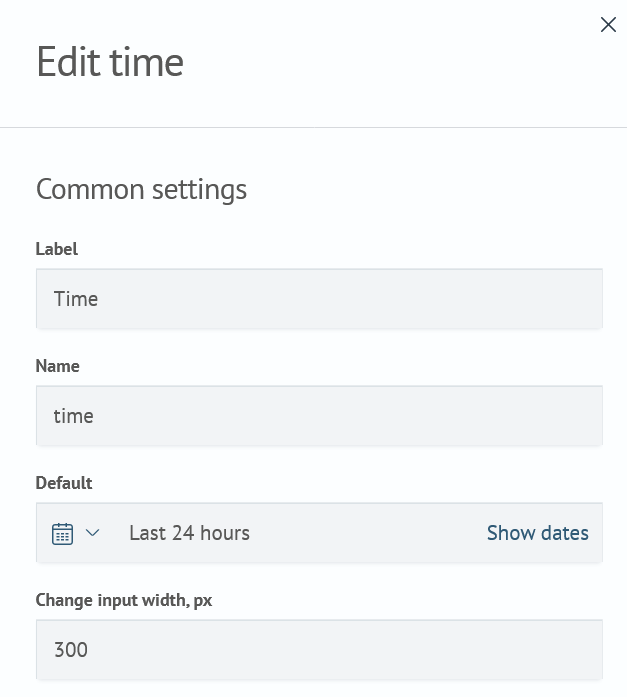
Here Name is the token to be used in the dynamic options settings.
Now we should return to the configuration of dynamic options.
For example, it is required to have a list of all values of the event.code field available in events in the filter options.
The following query will return a result consisting of two columns - the displayed name and the value:
source windows_events
| aggs latest(event.code) as event.code_latest by event.action

By specifying this query in the dynamic options, the time time filter token, and filling in the remaining fields as follows:
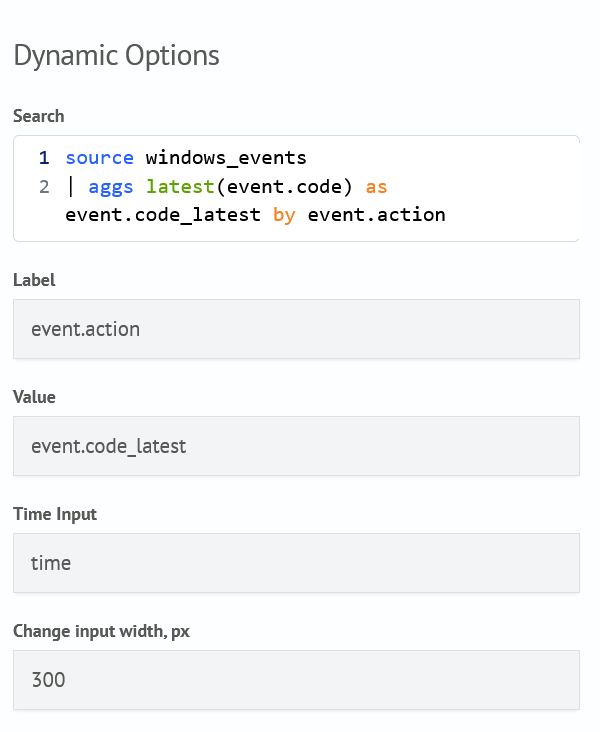
The filter options will take on the appearance:
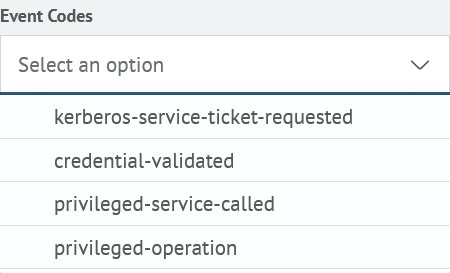
Now when you select a value from the list of fields to display, the corresponding value will be substituted into the token.
Tokens
Overview
Token is a variable whose value is substituted into a query or filter for more flexible customization of data filtering on the dashboard. Using tokens allows you to make data filtering on the dashboard more dynamic and user-friendly.
For example, a token with a value from the Selection filter selected by the user on the dashboard can be inserted into the query. This will automatically filter the data on the dashboard according to the specified value.
Creating a token
Tokens are created in the filter settings in the General settings section. The main fields for its customization are:
Name- unique name of the token by which it will be identified (mandatory parameter)Token prefix- value to be added before the token valueToken suffix- value to be added after the token value
To create a token:
- Go to the filter settings
- In the General Settings section, enter the desired
Namefor the token - (Optional) Specify
Token Prefixand/orToken Suffix - Click
Saveto apply the changes
Token Prefix and Suffix
Token Prefix and Token Suffix allow you to add text before and after the token value itself.
This is useful if the value needs to be wrapped in quotes or other characters that are necessary for the query to work correctly or are difficult to add when using dynamic/static options.
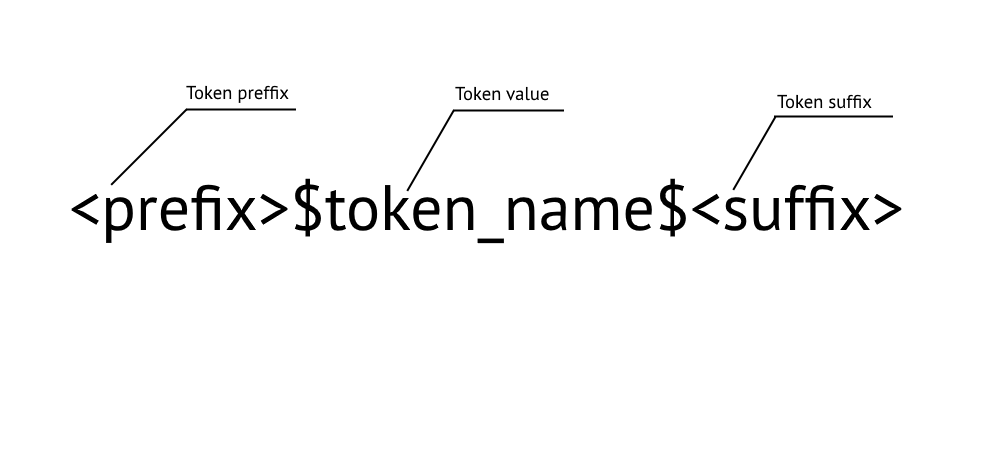
For example, if the token value should be wrapped in double quotes for use in an SAFL query, you can specify in the token settings:
Double quotes will now be automatically added to the token value around the value.
Use in search
Once a token is created, it can be used in queries for visualization panels on the dashboard:
To do this:
- Go to the dashboard editor
- Select the panel in whose query you want to use the token for filtering
- Go to the
Search Querycomponent
Search Anywhere Framework provides the following syntax $token_name$ for using the token in panel queries.
For example, in a query whose panel requires filtering by event code:
source windows_events
| search $event_code$