Create Panels
Add panels to dashboard
Adding panels using the visual editor
- To add a panel to the dashboard, go to the dashboard editing mode by pressing the
Editbutton on the dashboard page

- After entering the dashboard editing mode, you should press the
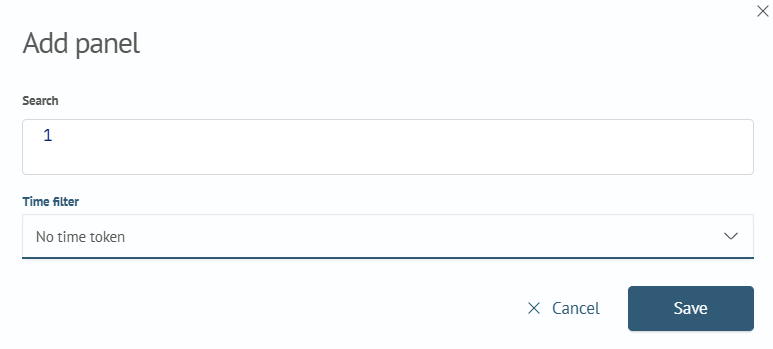
Add panelbutton and select the type of visualization to be used in the panel - Next, a pop-up window with panel settings appears
Search: the query to be used in the panelTime filter: time filter to be used in the query

- After clicking the
Savebutton, the panel will be added to the dashboard page
Adding panel using JSON editor
- To add a panel to the dashboard, go to the dashboard editing mode by pressing the
Editbutton on the dashboard page - After going to edit mode, you need to go to
JSONmode
The following JSON will appear in the source code editor:
{
    "label": "<Dashboard Title>,
    "inputs": [],
    "rows": [],
    "vars": []
}
- To add a panel to the dashboard it is necessary to add an object with the list of panels
panelsto therowslist. Then you need to add a visualization object to thepanelslist. For example:
 "rows": [
    {
      "panels": [
        {
          "inputs": [],
          "height": 150,
          "label": "",
          "type": "sm",
          "viz": {
            "options": {
              "general": {
                "fieldForTrend": "",
                "fieldForValue": "",
                "label": ""
              },
              "color": {
                "backgroundColor": false,
                "greenColor": "#65A637",
                "invertScale": true,
                "redColor": "#DC4E41",
                "redThreshold": 0,
                "yellowColor": "#F8BE34",
                "yellowThreshold": 0
              },
              "show": {
                "arrow": false,
                "label": false,
                "sparkline": false,
                "delimiters": true,
                "delimiter": ","
              },
              "sme": {
                "query": "source windows_events\r\n| aggs count by event.code"
              },
              "drilldown": {
                "drilldownText": "",
                "drilldownType": "search"
              },
              "timeToken": ""
            },
            "timeToken": "",
            "type": "single"
          },
          "subpanels": []
        }
      ]
    }
  ]
- After clicking the
Savebutton, the panel will be added to the dashboard page
Edit dashboard title
To edit the panel title you should follow the algorithm of actions:
-
Switching to the editing mode by the
Editbutton -
There are two options for changing the panel title:
- In the visual editor, clicking on the top of the panel will set the focus on the title text box, typing the text will add a new title
- In the JSON editor, the panel object to be modified has a new title entered in the
labelfield
-
Clicking the
Savebutton will save all the changes made
Edit panel
To edit the panel you should follow the algorithm of actions:
- Switching to the editing mode by the
Editbutton - Selecting the preferred method of editing in the upper part of the interface: visual editor or JSON
- Making changes to the panel using the selected method
- Editing using the visual editor is done by interacting with the interface elements
- Editing with JSON takes place in the dashboard source code editor
- Clicking the
Savebutton will save all the changes made
Deleting panel
To remove the panel, you need to follow the algorithm of actions:
- Switch to the editing mode by the
Editbutton - Selecting the preferred method of editing in the upper part of the interface: visual editor or JSON
- Delete panel
- To delete using the visual editor you should press the
Xicon in the upper right corner of the panel - To delete using JSON, you need to delete the selected panel in the
panelslist
- To delete using the visual editor you should press the
- Clicking the
Savebutton will save all the changes made