Role Model Settings
Getting Started with Roles
Navigate to Main Menu - Settings - Security - Rollup jobs, where all available roles will be displayed.
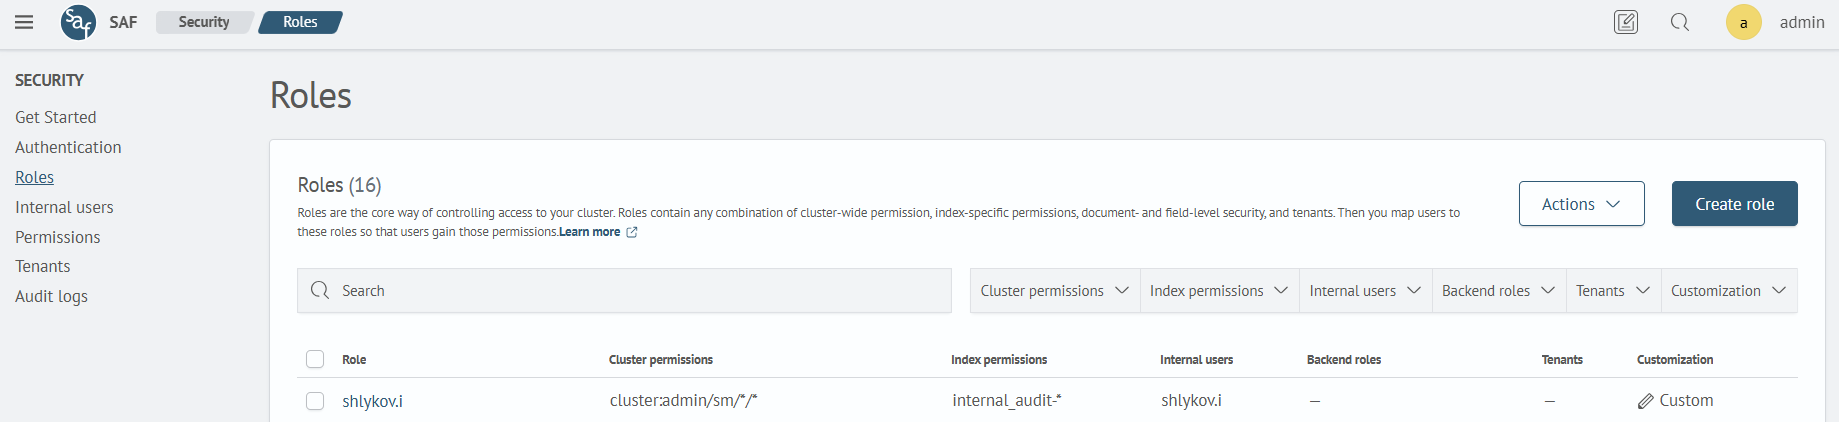
To start the process of creating a role for users, click Create Role or click on an existing role to edit it.
Creating a Role
On the creation page, specify the name of the role in the corresponding field and add permissions for the cluster, indices, and scope.
Name
Specify a name for the role that describes its actions. The role name cannot be changed after the role is created.
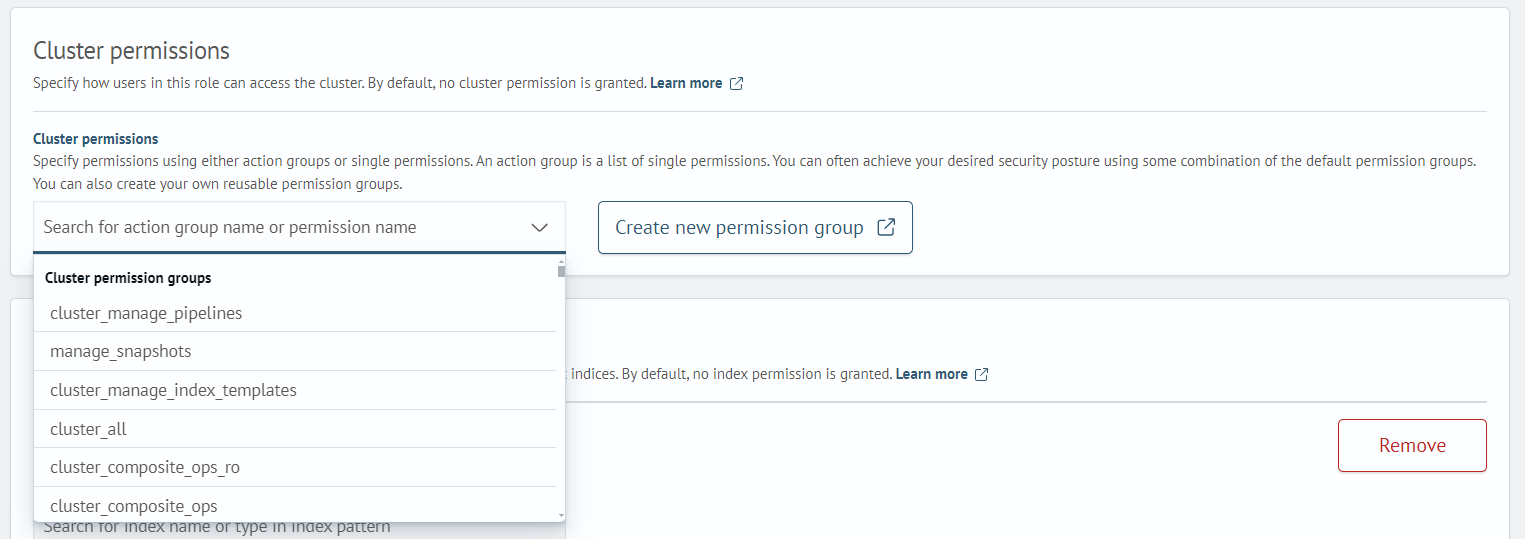
Cluster Permissions
Permissions for the cluster can be set as a group of actions or as individual permissions. Action groups are a list of individual permissions. You can achieve the desired level of security by using some combination of the default permission groups.
Select the required group/permission from the list or create your own permission group by clicking Create New Permission Group.
Index Permissions
Index permissions allow you to specify how users in this role can access specific indices. By default, no index permissions are granted.
When creating a new role, the index permissions already have a list of parameters for the first permission. You can add new permissions. To add a new permission, click Add another index permission.
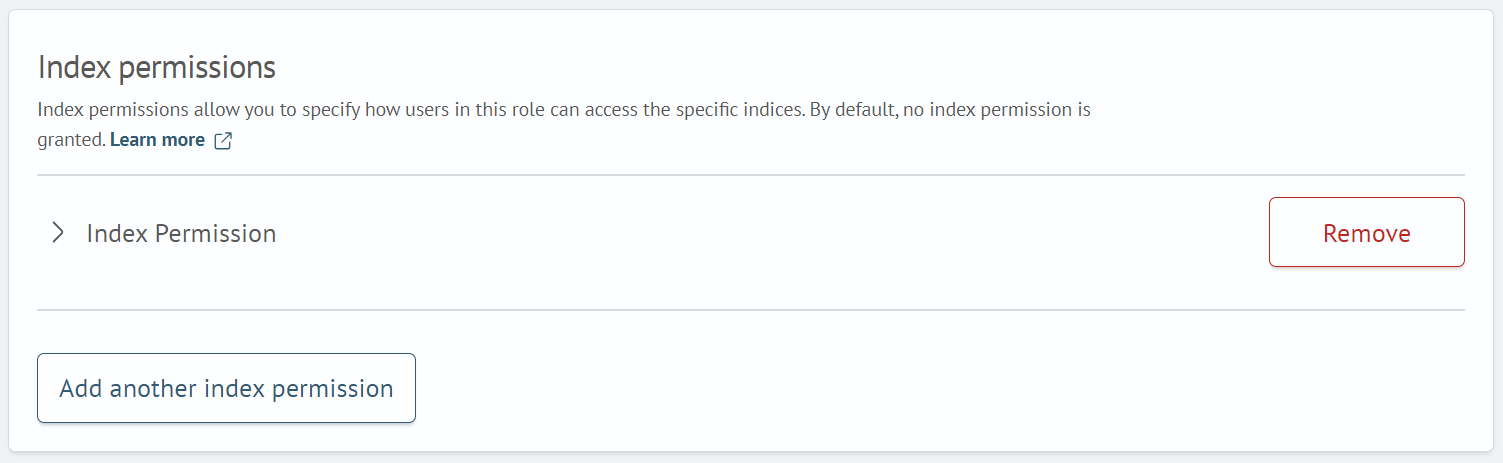
To enter data, you need to expand the Index Permission field group. After clicking, you will see the following fields to fill in:
-
Index — In this field, you must specify the name of the index or its pattern using wildcards (For example:
test_index_*will match all indices whose name starts withtest_index_) -
Index Permissions — Specifies the permission or group of permissions (see the Permissions section for more details)
-
Document Level Security (optional) — Allows you to restrict the role to a subset of documents For example, we have documents with a genre field, and we want to apply the role only to documents where the genre is
Comedy. Example:{
"bool": {
"must": {
"match": {
"genres": "Comedy"
}
}
}
} -
Field Level Security (optional) — Specify the document fields that the user will be able to see
-
Anonymization (optional) — Specify fields with sensitive data that need to be replaced with random values. This option hashes the field in search results
Editing a Role
To edit a role, click on the role name and on the opened page click the Edit Role button. The role editing page consists of two tabs: Permissions and Mapped Users:

On the Permissions tab, you can add permissions for the cluster, indices, and scope. Editing is done in the same way as creation. On the Mapped Users tab, you can add users to the edited role.
To assign a user, go to the Mapped Users tab and click Map user. On the opened page, specify users and backend roles by selecting them from the list or create a new one by clicking the corresponding button.
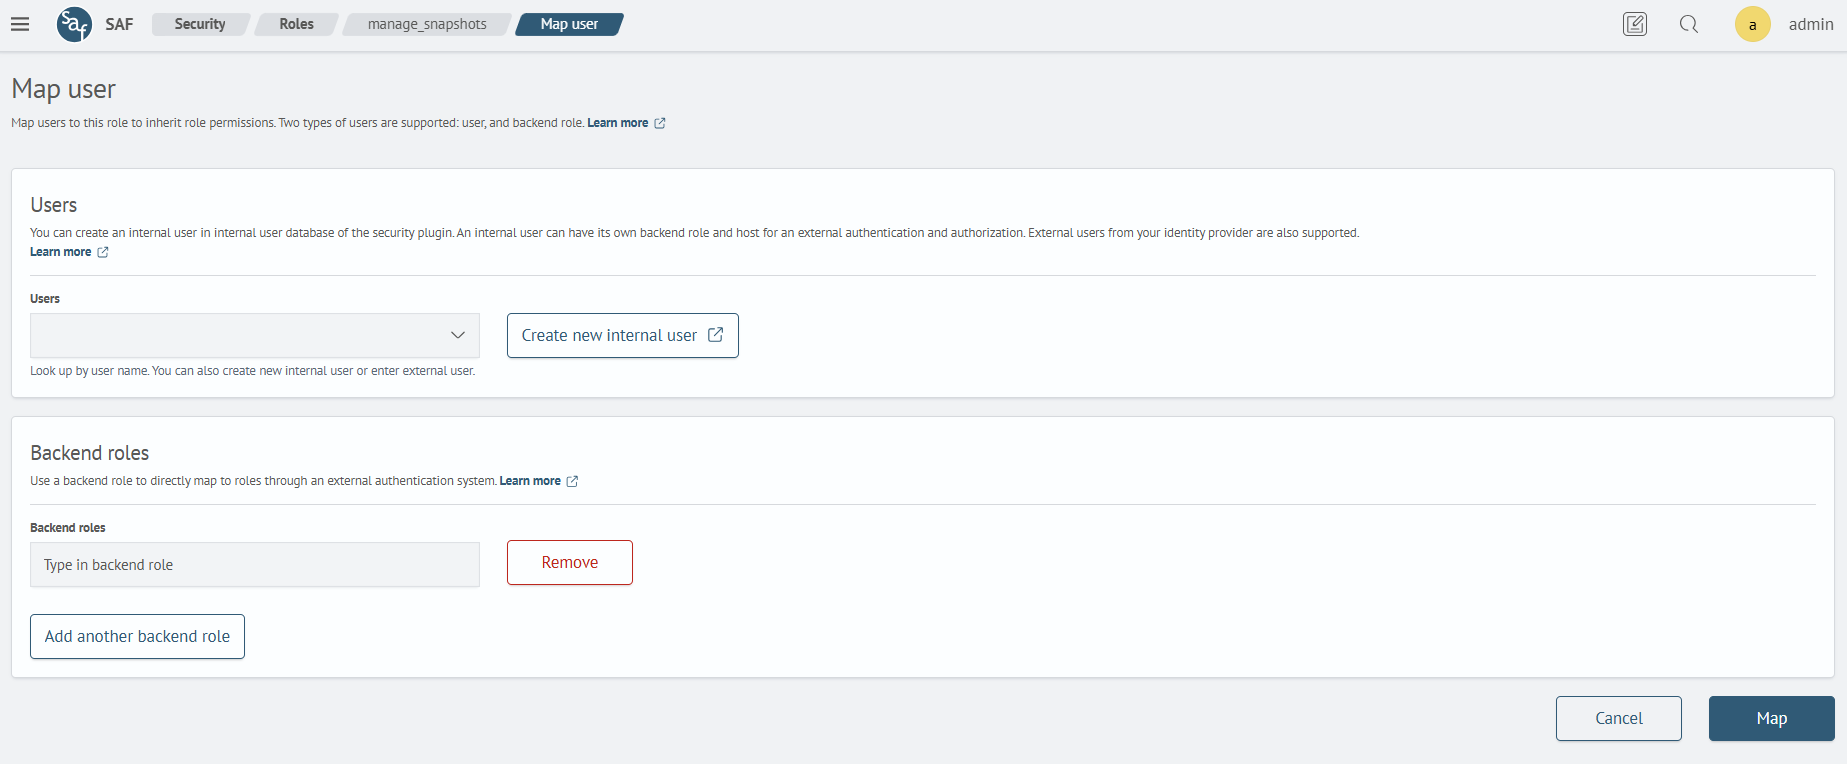
You can specify both an internal user and a user from Active Directory. After filling in the fields, click Map.