Asset Configuration Settings
All asset configurations created prior to version 5.0 will use the legacy calculation algorithm.
For more details on the update process, see Migrating Asset Configuration.
To ensure proper operation of the updated calculation algorithm, integration with Postgres must be configured. More information is available here.
List of Asset Configurations
The asset configuration page displays a table of existing asset configurations:
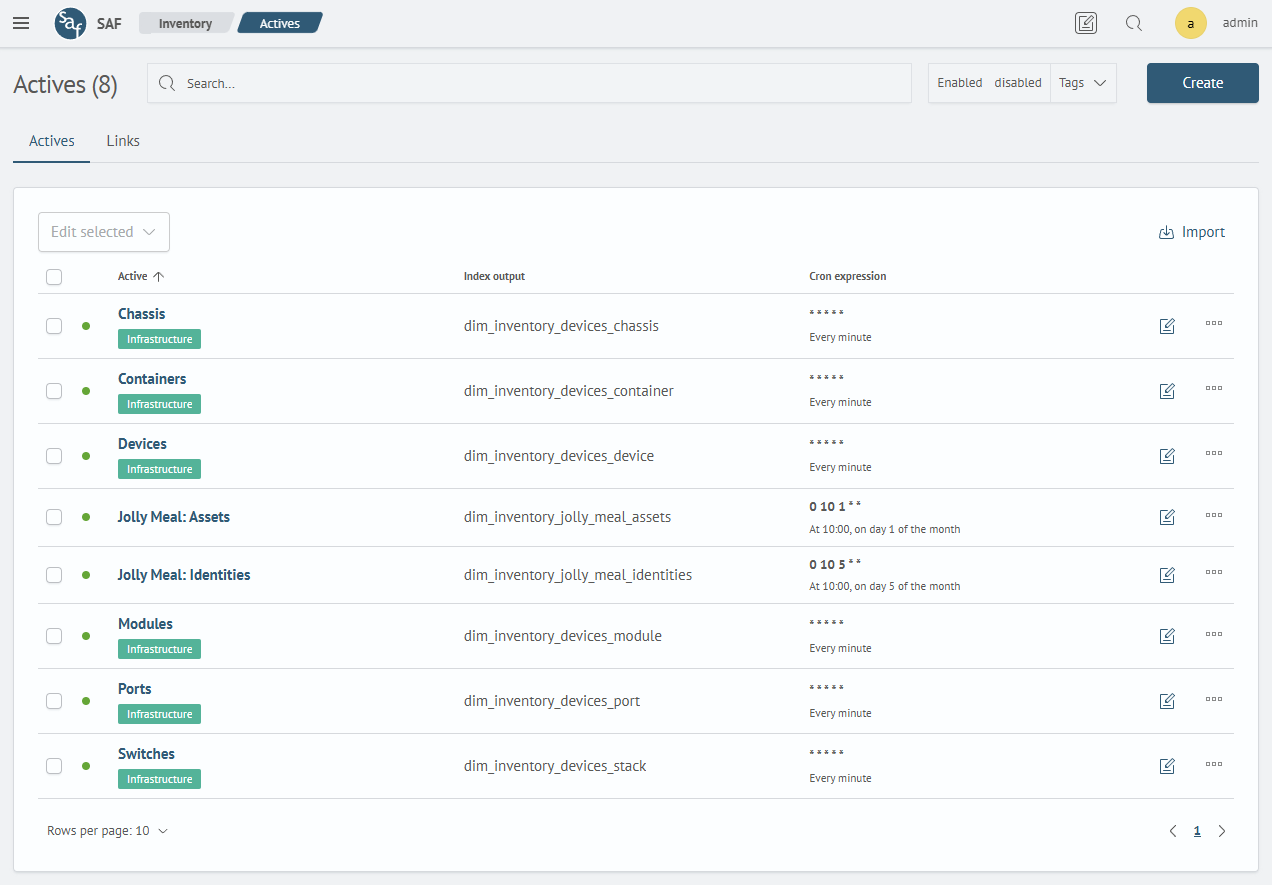
The table can be sorted by columns, filtered via the Search input field, or using filters like Enabled, Disabled, or Tags.
For each asset configuration, the Actions column provides the following options:
Tags– view the list of tagsPermissions– configure read/write permissions based on user rolesEnable/Disable– toggle background data collection by the calculation moduleExecution Statistics– navigate to the calculation module's execution statsDelete– remove the asset configuration
To edit a configuration, click the Edit button.
You can also import a new configuration or export an existing one using the Import and Export buttons at the top of the table.
Asset Configuration Relationships
To view all asset configuration relationships, go to the Links tab.
This page displays information about configured relationships between asset configurations:
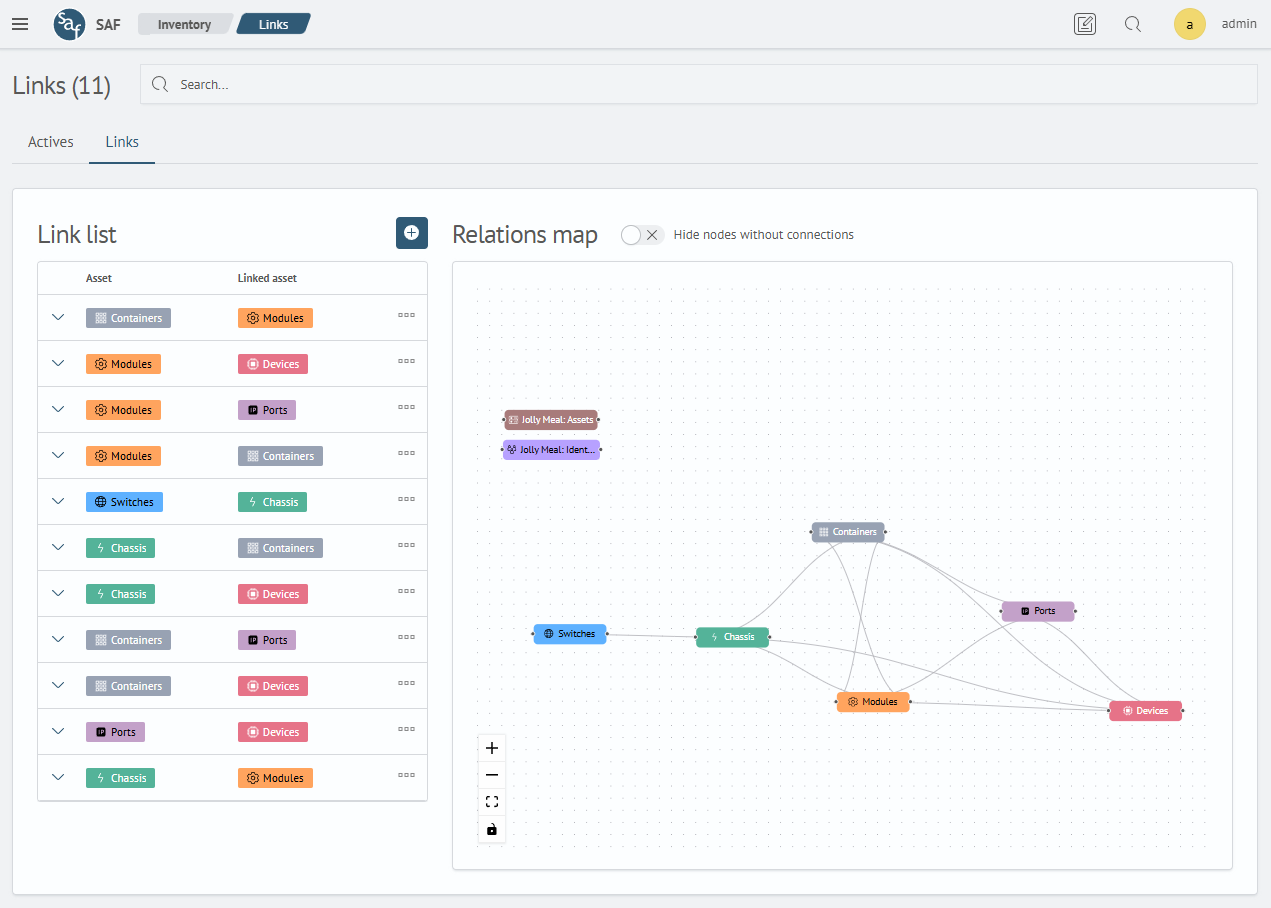
The page includes a Link list table and a Relations map visualization.
Only asset configurations using the updated calculation algorithm can be linked together!
Relations List
The relations list shows all existing links.
It can be filtered using the Search field.
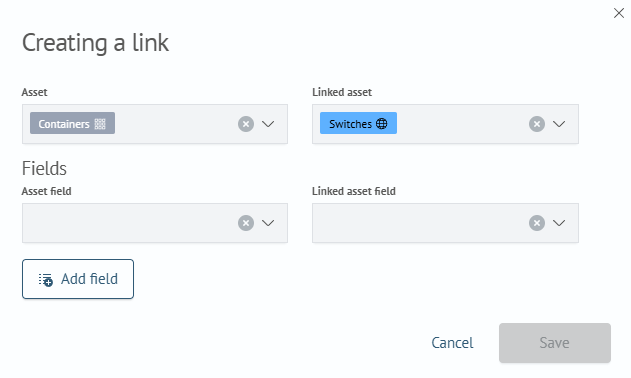
To create a new link, click Add Relation, then select the asset configurations to link and provide the field mapping details:

Each row in the Actions column includes:
Edit– modify the relation settingsDelete– remove the relation
Click the row expand icon to view relation field details:

Relations Map
The relations map visualizes asset configurations as nodes and their relationships as arrows.
To create a relation, drag a point from one side of a node to the opposite point on the target node (e.g., from the right point of one node to the left point of another).
This opens the relation creation window with the selected nodes prefilled:
By default, the location of nodes on the map has a random order, they can be moved along the link map at their discretion. In this case, a Save Location button will be available to apply the changes, or a Cancel button to return to its original appearance.
Use the Hide Nodes without Relations toggle to display only related configurations.
Clicking a node shows its asset configuration fields:

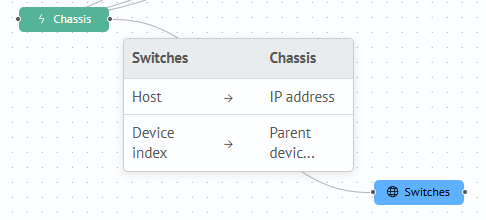
Hovering over a relation arrow reveals which fields are used in the relationship:
Configuration Settings Description
Configuration Management
To create your own configuration or edit an existing configuration, click Create or click Edit in the Actions section, and then you will see a configuration creation form (configuration editing is performed in the same way).
Fields in the General and Schedule sections are mandatory.
A configuration includes the following sections:
General Settings– general information about the assetFields– basic and additional fields used in the asset's structureSources– the list of sources that are used to create the asset base, and also includes the creation of a rule for matching source fields and basic/additional fieldsLinking– key fields used to link sourcesPrioritization– rules defining field extraction priority from sources
The fields from the General section and the Schedule from the General Settings are required.
By default, the updated calculation algorithm is used.
To select the old calculation algorithm, the Use a new algorithm switch is available. It must be disabled.
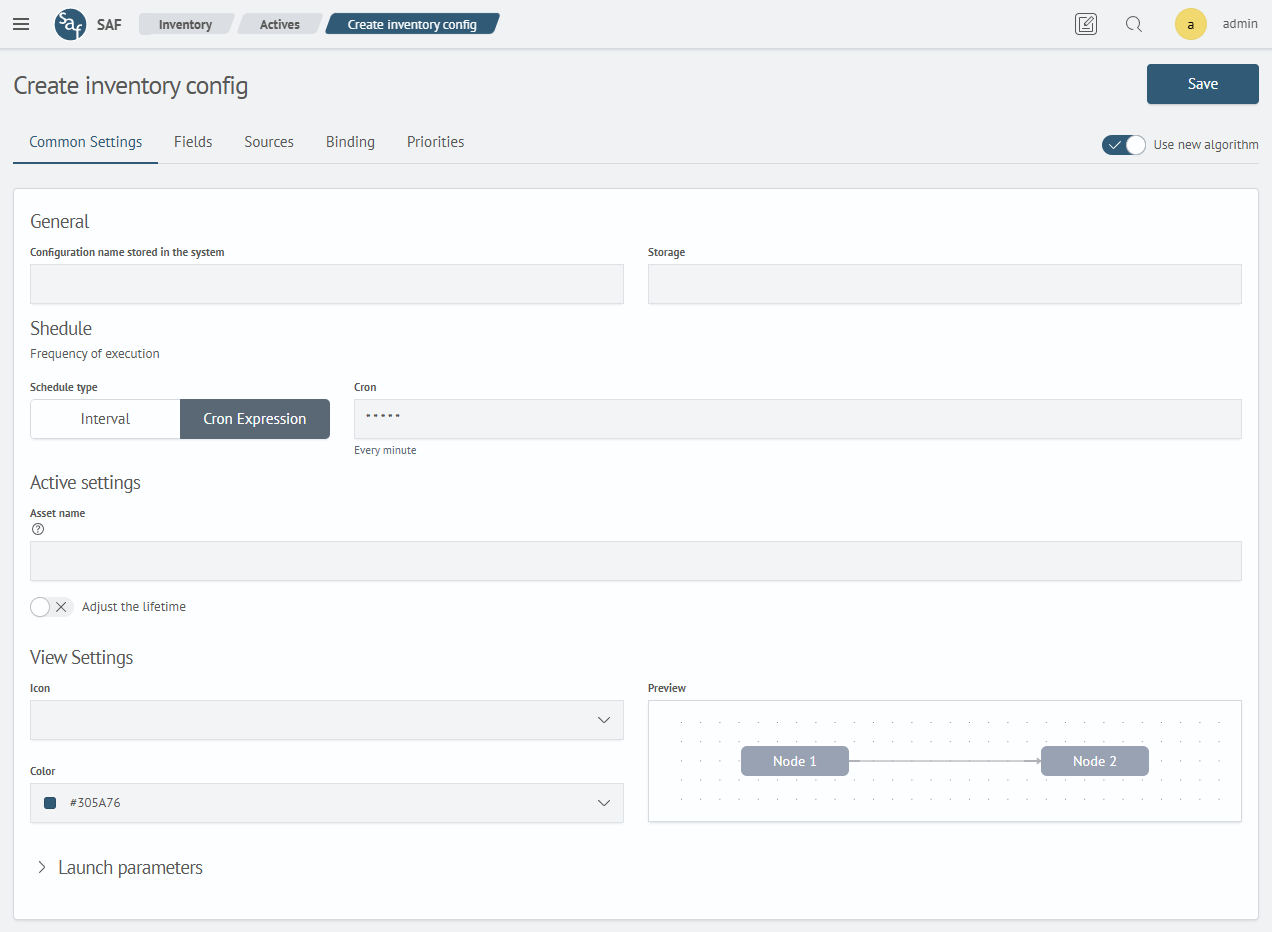
General Settings
This tab includes:
-
General– name of the configuration and storage name -
Schedule– interval or cron expression for running background collectionnoteSupported types:
IntervalorCron Expression -
Asset Settings– it contains the configuration of the asset name and the asset lifetime -
Display Settings– it contains settings for visualizing the asset configuration or the assets themselves in various parts of the interface (image and color) -
Execution Parameters– it contains the settings used when creating the asset base (batch changes, index usage, replication usage, etc.)
The Asset Name field supports tokens based on basic and additional fields, e.g., $hostname$ - $os$.
In the Asset Lifetime field, you can enter an integer from 1 indicating the unit of time (s - seconds, m - minutes, h - hours, d - days). The value cannot be composite. Examples: 20h, 2d, 30s.
Display Settings and Enable Data Replication to Index are only available for configurations using the updated algorithm.
Batch Changes, Use Index, Join with Empty, and Fast Search Only are only available with the legacy algorithm!
When the data replication option is enabled in the index, the asset database generated by the background task of the calculation module will be copied to the index in accordance with the structure of the old calculation algorithm.
If the index does not exist, it will be created automatically.
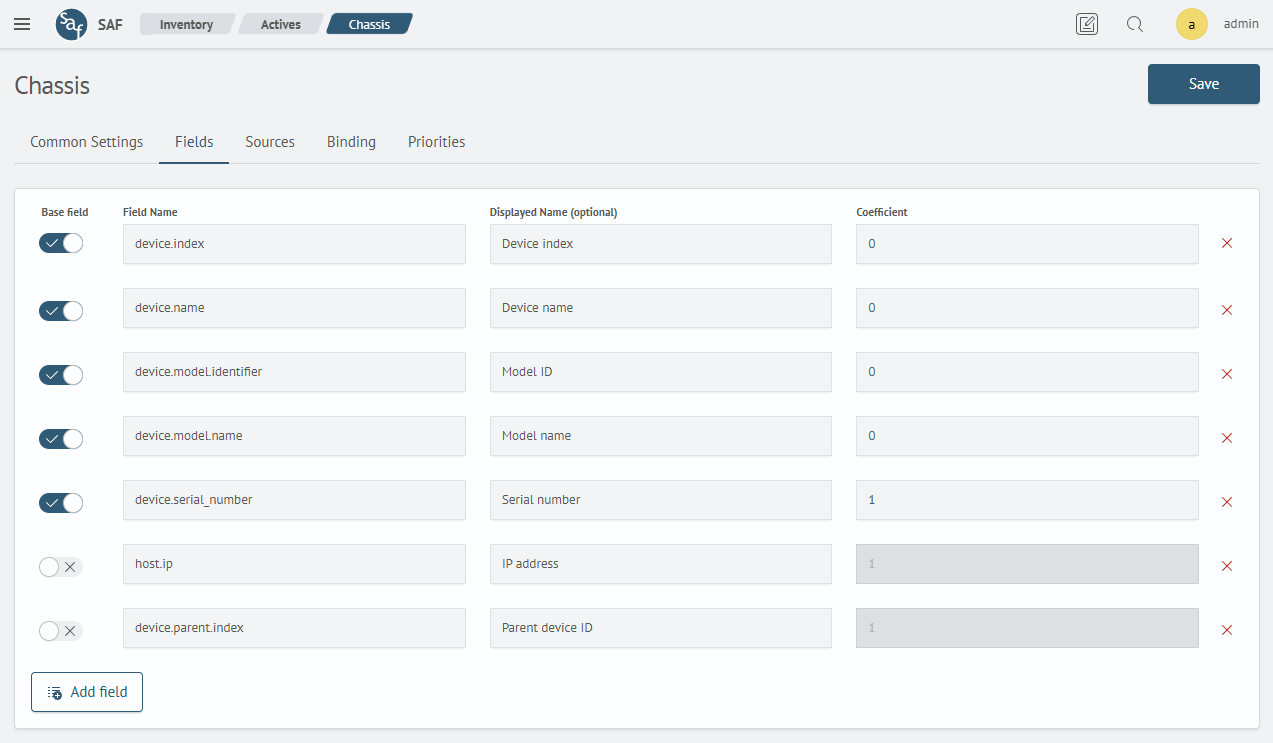
Fields
The Fields tab allows configuring asset fields with the following attributes:
-
Basic Field– defines if the field is basic or additional -
Field Name– technical name used in calculations (must be unique) -
Display Name (optional)- the field name displayed in the interfaces -
CoefficientnoteThe coefficient of the base field determines the degree of influence of the field on the similarity of two assets. It is used at the moment when an asset is received from source events and it is necessary to decide whether to create a new asset in the database or update an existing one. The decision is made by calculating the similarity coefficient of the two assets. Similarity is determined through the similarity coefficient k calculated using the formula k = c/(a+b-c), where:
- c - is the number of matching base fields for an existing and a new asset
- a - is the number of base fields of an existing asset
- b - is the number of base fields of the new asset Assets are considered similar if k >= 0.5 for b <= 5 or if k >= 0.554 for b > 5. The base field coefficient multiplies the presence of the field in the sums a, b and c. If the coefficient is 0, then the field is not counted in the sums. If the coefficient is 1, then the field is counted in the sums once. If the coefficient is specified n, then the field will be counted in the sums n times.
Use the Add Field button to add a new field.
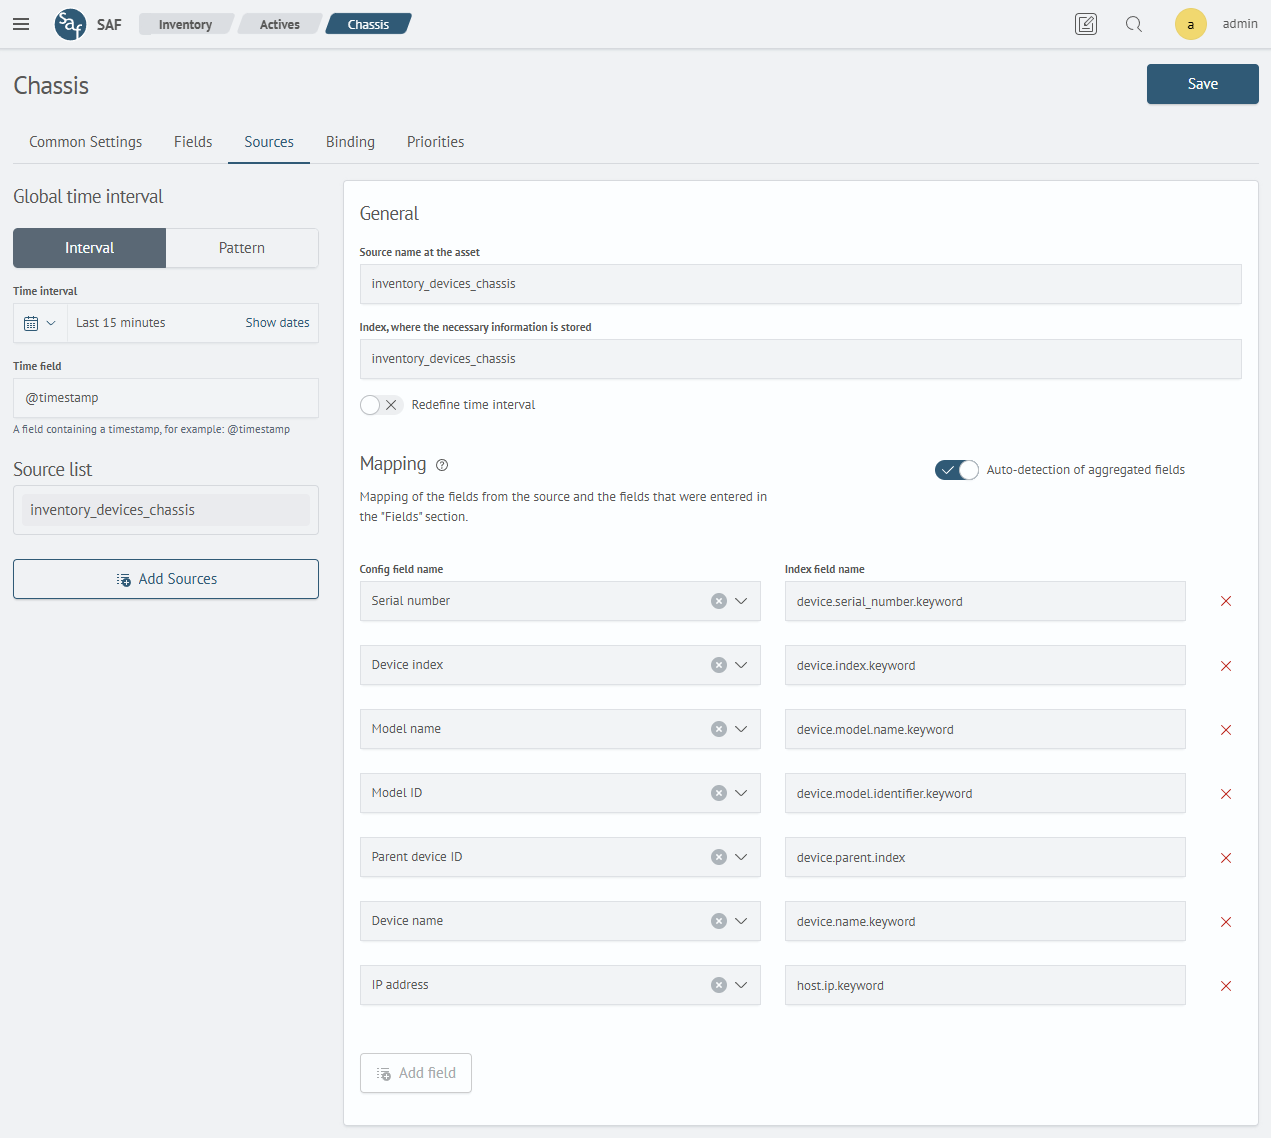
Sources
To add a source, click on the Add Source button, after which a submenu will appear, which must be opened to configure it.
Configuring the source consists of the following steps:
-
Source Name in Assets- name of the source -
Index– where is the necessary information storedNote!The number of configuration fields may exceed the limit of script fields for an index. If the number of script fields in the index is less than the number of configuration fields for the asset, it is necessary to increase the
max_script_fieldsparameter for the index.This can be done with the following command:
PUT <index>/_settings
{
  "index" : {
    "max_script_fields" : <value>
  }
} -
Time Interval– how long does information take to limit the sampling of data from the sourcenoteThe
Time Intervalfield specifies the value of the filter interval as anintervalorpatternin the@timestampfield (by default). You can set it globally for all sources or define it for each one separately.The interval value is indicated as a positive number of time units, such as 90d (90 days), 24h (24 hours), 15m (15 minutes). The following time units are supported:
m- minute,h- hour,d- day,w- week,M- month,y- year. For more information about time units, see the OpenSearch format documentation.If the time interval is specified in minutes, then the right border of the filter corresponds to the current moment (
now), otherwise the right border is equal to the beginning of the previous hour (now-1h/h). The left boundary is calculated as the difference between the right boundary and the time interval.All source documents with
@timestampgreater than or equal to the left border and less than or equal to the right border of the filter fall into the filter. -
Auto-detect Aggregated Fields– when enabled, aggregated type fields will be used (default: enabled) -
Field Mapping Rules– mapping, which is used to match fields from the source and fields that were specified in theBasic FieldsandAdditional Fieldsparameters
To complete the mapping, use the Add Field button.
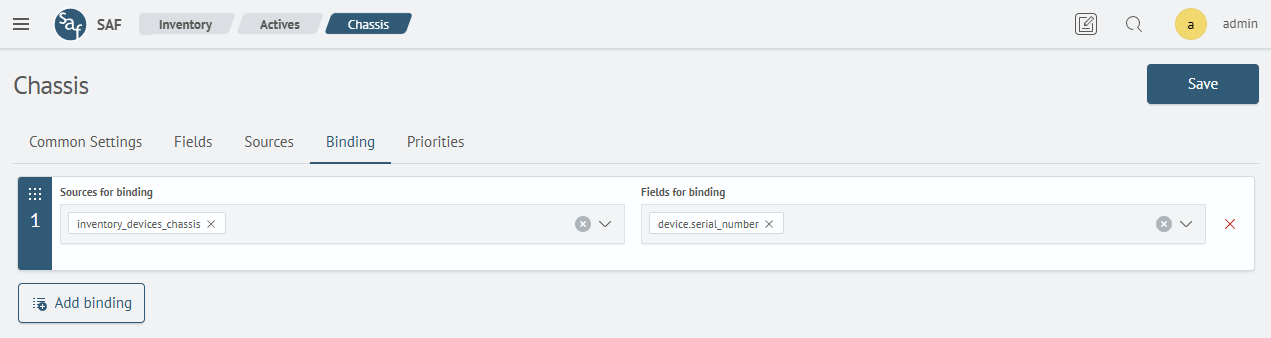
Linking
To fill in the information on the key fields, you need to click on the Add button, after which the settings line will appear.
Setting up a key field consists of the following steps:
-
Sources to Link– which sources should be linked are taken from theSourcestab -
Linking Fields– selecting the fields that were specified in theBasic FieldsandAdditional Fieldsparameters
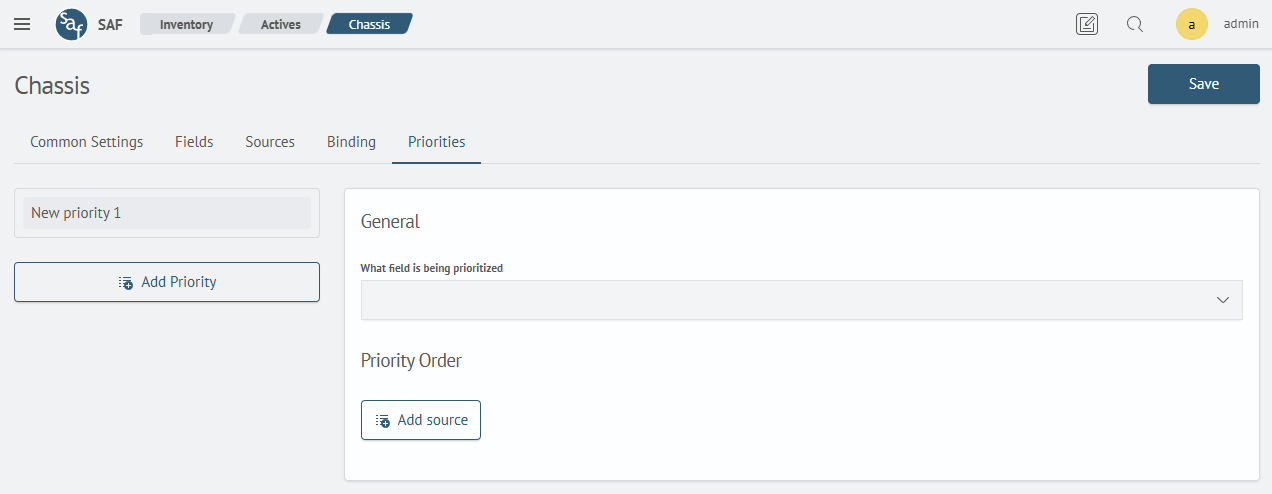
Prioritization
To fill in the prioritization information, click on the Add Priority button, after which a submenu will appear, which must be opened to configure it.
The priority setting consists of the following points:
-
Field– field to prioritize -
Extraction Order– define priority across sources
Use Add Source to define extraction order.
The priority level indicates the sequence number of the field extraction from the source. The first field value will be extracted from the source with the lowest priority level value. If the same priorities are set, the field in the asset will be represented as an array.
Configuration Setup Process
To access configuration list, select Actives in the Inventory menu:
To configure, click Create or Edit, opening the configuration form:
Complete the Common Settings tab, then define fields in the Fields tab:
In Sources, add and configure data sources:
In Binding, define field relationships:
Then configure Priorities:
Once all settings are complete, click Save. You’ll be redirected to the configuration list with a confirmation.
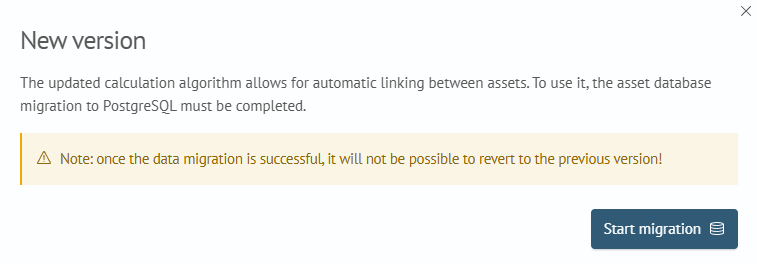
Asset Configuration Migration
This section applies only to configurations using the legacy algorithm.
Once migration is complete, reverting is not possible!
When opening a configuration with the legacy algorithm, you’ll see a banner for available migration:

To start the update process, click on the notification with the available update and click on the Start migration button:
Once started, the banner will indicate migration is in progress:

Migration occurs in the background (you may leave the page).
Assets are migrated in batches of 10,000 records.
Some configuration-related features may be unavailable during migration.
Progress updates are shown via the banner. You can cancel or view details:

Once complete, a success message will appear:
![]()
Click to view migration results:

To dismiss the success notification, click Close.
If an error occurs, you’ll see a corresponding alert:
![]()
To view the error information, you can click on the migration error notification. After studying the error, you can restart the migration by clicking on the Restart migration button:

If migration fails or is manually canceled, all transferred data will be deleted!